Welcome back to another exciting recipe drop that I know you are going to absolutely love! If you are someone who gets home after a long, tiring day and just wants to eat something good without spending hours in the kitchen, then you are in the right place today. This one is for all the busy moms, the working folks, the students, and honestly anyone who wants a real, tasty meal on the table fast. Today, I am walking you through some of the best quick dinner recipes you can pull off in just 20 minutes or less, and trust me, these are not boring meals at all.
These recipes are simple, they use ingredients you most likely already have at home, and they taste like you actually put in effort. Whether you are cooking for yourself, your partner, or the whole family, these ideas have got you covered. Get ready to fall in love with your kitchen all over again!
What Makes a Good 20-Minute Dinner?
Before we jump into the recipes, let us talk about what actually makes a dinner recipe work in 20 minutes. The secret is not magic, it is smart cooking. A good 20-minute dinner uses ingredients that cook fast, like thin cuts of meat, pasta, eggs, canned beans, or vegetables that do not need long cooking times. It also means you are not making five different dishes at the same time. Everything comes together in one pan or one pot, which also means less washing up at the end of the night.
Another thing that helps is keeping your pantry stocked with the basics. Things like olive oil, garlic, canned tomatoes, pasta, soy sauce, stock cubes, and spices are your best friends. Once you have those ready, making a fast dinner becomes so much easier. Now let us get into the good stuff.
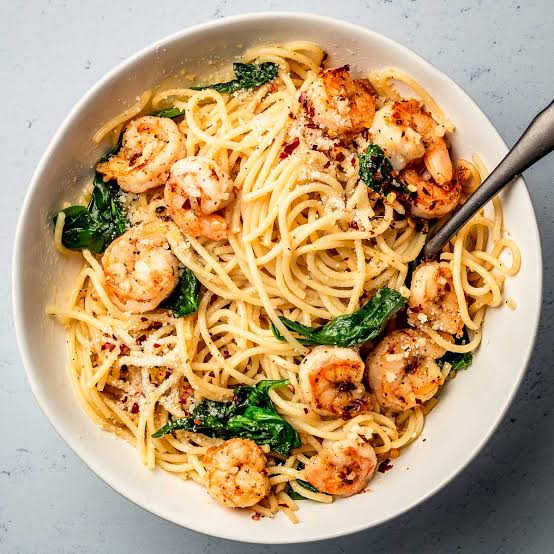
Garlic Butter Shrimp Pasta
This dish is honestly one of those meals that feels fancy but takes almost no time to make. The garlic butter sauce is rich, the shrimp cooks in minutes, and when it all comes together with pasta, it is the kind of dinner that makes people think you spent way more time than you did.
Ingredients
- 250g spaghetti or linguine
- 300g shrimp, peeled and deveined
- 4 cloves garlic, minced
- 3 tablespoons butter
- 2 tablespoons olive oil
- 1 teaspoon red pepper flakes
- Salt and black pepper to taste
- Juice of half a lemon
- Fresh parsley, chopped
- Parmesan cheese for serving
Cooking Method
Start by boiling your pasta in well-salted water according to the packet instructions. While the pasta is cooking, heat olive oil and butter in a large pan over medium-high heat. Add the garlic and stir it around for about 30 seconds until it becomes fragrant. Do not let it burn because burnt garlic will ruin the whole dish.
Add your shrimp into the pan and season with salt, black pepper, and red pepper flakes. Cook the shrimp for about 1 to 2 minutes on each side. You will know they are done when they turn pink and curl up slightly. Do not overcook them or they will become rubbery and tough.
Drain your pasta but save about half a cup of the pasta water before you pour it out. Add the drained pasta into the pan with the shrimp and toss everything together. If the sauce looks too thick or dry, pour in a little of that saved pasta water and it will loosen everything up perfectly. Squeeze in your lemon juice, throw in the parsley, and toss again.
Helpful Tips
Always use raw shrimp for this recipe, not pre-cooked ones. Pre-cooked shrimp will get tough and chewy very quickly in the hot pan. If your shrimp is frozen, just run it under cold water for a few minutes and it will thaw quickly. Salting your pasta water generously is also important because that is where a lot of the flavour comes from.
Storage Tips
Store any leftovers in an airtight container in the fridge for up to 2 days. When reheating, add a splash of water or butter to the pan so the pasta does not dry out.
Chicken Stir-Fry With Vegetables

This is a classic for a reason. Chicken stir-fry is fast, colourful, and packed with flavour. It is also incredibly flexible, meaning you can swap out the vegetables for whatever you have in the fridge and it will still come out amazing.
Ingredients
- 2 chicken breasts, sliced thin
- 1 red bell pepper, sliced
- 1 yellow bell pepper, sliced
- 1 cup broccoli florets
- 1 medium carrot, julienned
- 3 cloves garlic, minced
- 1 teaspoon fresh ginger, grated
- 3 tablespoons soy sauce
- 1 tablespoon oyster sauce
- 1 teaspoon sesame oil
- 1 tablespoon cornstarch
- 2 tablespoons vegetable oil
- Cooked rice for serving
Cooking Method
Slice the chicken thin, almost like strips. This is very important because thin pieces cook much faster than thick chunks. Toss the chicken in the cornstarch and a pinch of salt and set it aside for a moment.
Heat your vegetable oil in a wok or large pan over high heat. You want that pan really hot before anything goes in. Add the chicken and spread it out. Let it cook without touching it for about 1 minute, then stir and cook for another minute until it is golden and cooked through. Remove the chicken from the pan and set it aside.
In the same pan, add a tiny bit more oil if needed, then throw in your garlic and ginger. Stir quickly for about 20 seconds, then add all your vegetables. Keep everything moving in the pan. Stir-fry means exactly that, keep it moving! Cook the vegetables for about 3 to 4 minutes until they are just tender but still have a little crunch to them.
Add the chicken back in, pour over the soy sauce, oyster sauce, and sesame oil. Toss everything together until well coated and heated through. Serve immediately over steamed rice.
Helpful Tips
The key to a good stir-fry is high heat and speed. Everything needs to be prepped and ready before you start cooking because once the pan is hot, things move fast. Also, do not overcrowd the pan. If you put too much in at once, the ingredients will steam instead of fry and you will lose that lovely caramelised flavour.
Storage Tips
Keep leftovers in the fridge for up to 3 days in a sealed container. Reheat in a pan with a splash of soy sauce rather than the microwave to keep the texture nice.
Scrambled Egg Tacos
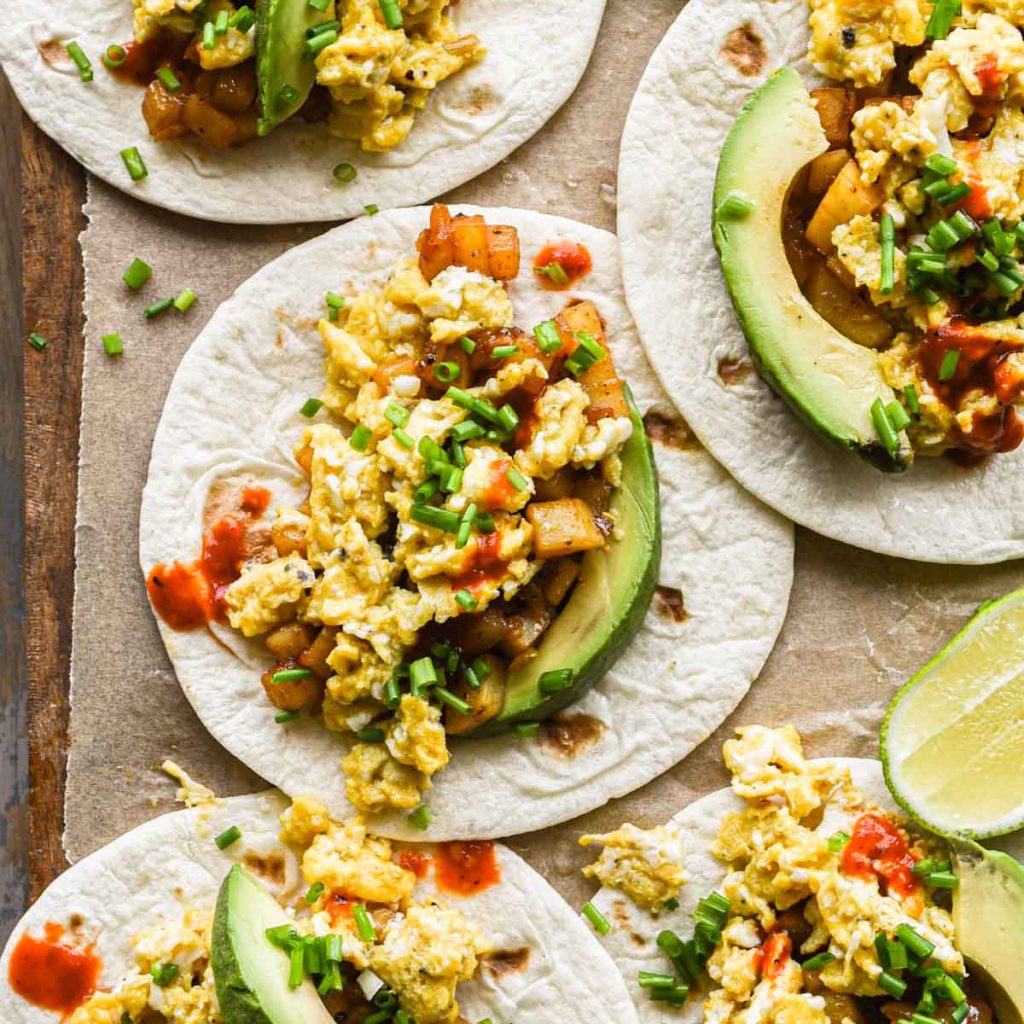
Do not underestimate the power of eggs for dinner. Scrambled egg tacos are one of the most satisfying and underrated quick dinners out there. They are creamy, filling, and when you load them up with the right toppings, they feel like a proper meal.
Ingredients
- 4 large eggs
- 2 tablespoons milk or cream
- Salt and pepper to taste
- 1 tablespoon butter
- 4 small flour or corn tortillas
- Half a cup shredded cheese
- 1 avocado, sliced
- Salsa or pico de gallo
- Sour cream
- Fresh coriander
Cooking Method
Crack your eggs into a bowl, add the milk, salt, and pepper, and whisk them until everything is nicely combined. Heat the butter in a non-stick pan over medium-low heat. Pour in the eggs. Here is the important part, do not rush them.
Use a spatula to gently push the eggs from the edges toward the centre. Keep doing this slowly. Remove the pan from the heat when the eggs look almost done but still a little glossy. They will continue cooking from the heat of the pan. This gives you soft, creamy scrambled eggs that are nothing like the dry rubbery ones you might have had before.
Warm your tortillas in a dry pan for about 30 seconds on each side or wrap them in a damp paper towel and microwave for 20 seconds. Load them up with the scrambled eggs, cheese, avocado slices, salsa, and a dollop of sour cream. Top with fresh coriander and serve right away.
Helpful Tips
Low and slow is the rule for scrambled eggs. High heat is the enemy here. If you rush eggs over high heat, they will become dry and rubbery. Also, take them off the heat just before they look fully done because they will finish cooking on their own.
Storage Tips
Scrambled eggs are best eaten fresh and are not great for storing because they get watery and rubbery when reheated. Make only what you will eat immediately.
One-Pan Tomato Basil Gnocchi
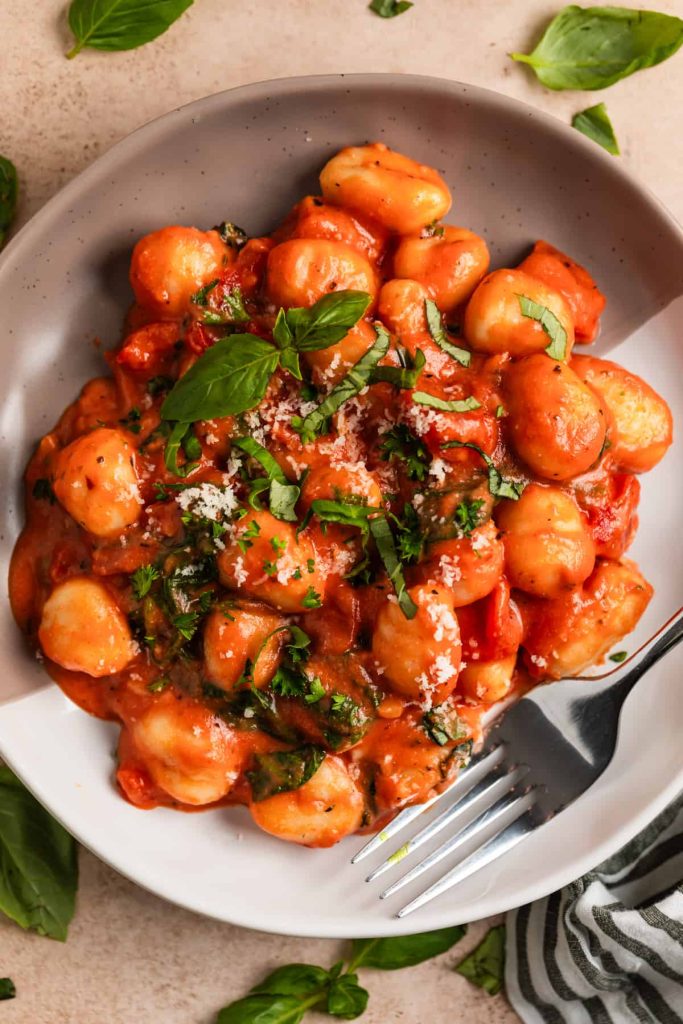
This is the kind of recipe that sounds impressive, tastes incredible, and takes almost no effort. Gnocchi is a soft potato pasta and it cooks in just a couple of minutes. Combined with a simple tomato and basil sauce, this dinner is pure comfort in a pan.
Ingredients
- 500g store-bought gnocchi
- 1 can crushed tomatoes (400g)
- 3 cloves garlic, minced
- 1 teaspoon dried oregano
- Half a teaspoon sugar
- Salt and pepper to taste
- 2 tablespoons olive oil
- A handful of fresh basil
- Half a cup heavy cream or coconut cream
- Parmesan to serve
Cooking Method
Heat olive oil in a large pan over medium heat. Add garlic and stir for about 30 seconds. Pour in the crushed tomatoes, oregano, sugar, salt, and pepper. Let this simmer for about 5 minutes, stirring occasionally.
Stir in the cream and let it bubble gently for another minute. Add the gnocchi straight into the sauce, do not boil it separately. Press them down into the sauce, cover the pan with a lid, and let them cook in the sauce for about 5 to 6 minutes. Stir halfway through. The gnocchi will absorb the flavours of the sauce while cooking, which makes them taste absolutely wonderful.
Once the gnocchi is soft and cooked through, tear in the fresh basil and give everything a final stir. Serve in bowls with parmesan grated on top.
Helpful Tips
Using store-bought gnocchi saves you so much time. You do not need to make it from scratch for this recipe. Also, if the sauce feels too thick, add a splash of water or vegetable stock to loosen it up. The pinch of sugar is important because it balances the acidity of the canned tomatoes.
Storage Tips
This stores well in the fridge for up to 3 days. When reheating, add a little water or cream and warm it gently on the stove.
Black Bean Quesadillas

Quesadillas are one of the most underrated dinner options ever. They are crispy on the outside, gooey on the inside, and you can fill them with almost anything. This black bean version is hearty, flavourful, and completely filling without needing any meat.
Ingredients
- 4 large flour tortillas
- 1 can black beans, drained and rinsed
- 1 cup shredded Mexican cheese blend or cheddar
- Half a cup corn kernels (fresh, frozen, or canned)
- Half a teaspoon cumin
- Half a teaspoon smoked paprika
- Salt to taste
- 1 tablespoon olive oil
- Sour cream and salsa for dipping
Cooking Method
Mix the black beans, corn, cumin, smoked paprika, and a pinch of salt in a bowl. Lay one tortilla flat and sprinkle a good amount of cheese on one half of it. Spoon some of the bean mixture on top of the cheese, then fold the tortilla over to close it.
Heat a little olive oil in a flat pan over medium heat. Place the quesadilla in the pan and press it down gently with a spatula. Cook for about 2 to 3 minutes until the bottom is golden and crispy, then carefully flip it and cook the other side for another 2 minutes.
Remove from the pan and let it sit for a minute before cutting into wedges. This helps the cheese set slightly so it does not all slide out. Serve with sour cream and salsa on the side.
Helpful Tips
Do not overfill your quesadilla or it will be hard to flip and everything will spill out. A modest amount of filling and plenty of cheese is the winning formula. If you want to add more protein, throw in some leftover rotisserie chicken or diced peppers.
Storage Tips
Quesadillas are best eaten fresh but can be stored in the fridge for a day. Reheat in a dry pan rather than a microwave to bring back the crispiness.
Soy Glazed Salmon With Rice

Salmon is one of the fastest proteins you can cook. It is done in about 10 minutes and when you give it a simple soy glaze, it goes from plain fish to something that feels restaurant-worthy. Serve it over fluffy white rice and you have a balanced, satisfying dinner.
Ingredients
- 2 salmon fillets
- 3 tablespoons soy sauce
- 1 tablespoon honey
- 1 teaspoon garlic powder
- 1 teaspoon sesame oil
- 1 tablespoon vegetable oil
- Sesame seeds and spring onions for garnish
- Cooked white or brown rice for serving
Cooking Method
Mix together the soy sauce, honey, garlic powder, and sesame oil in a small bowl. This is your glaze. Pat the salmon fillets dry with a paper towel. Drying the fish is important because moisture stops it from getting that nice golden crust.
Heat vegetable oil in a pan over medium-high heat. Place the salmon skin-side down and let it cook without moving it for about 4 minutes. You will see the flesh cooking up the sides of the fillet. Flip it carefully and cook the other side for about 2 to 3 minutes.
Pour the glaze over the salmon in the pan. It will sizzle and bubble. Spoon the glaze over the fish as it caramelises. After about 1 to 2 minutes, the glaze will thicken and coat the salmon beautifully. Remove from heat.
Serve the salmon over rice and spoon any remaining glaze from the pan over the top. Scatter sesame seeds and sliced spring onions over everything.
Helpful Tips
Do not move the salmon around when it is first in the pan. Let it sit and develop a crust before you flip it. If it sticks, it is not ready to flip yet. It will naturally release when it is ready. Also, thinner fillets will cook faster, so keep an eye on them.
Storage Tips
Cooked salmon keeps in the fridge for up to 2 days. Store it separately from the rice in a covered container. Reheat gently in a pan with a tiny bit of butter.
Spinach And Egg Fried Rice
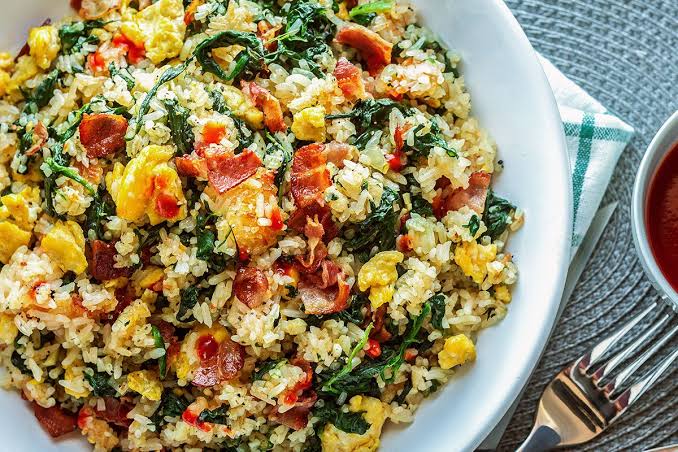
Fried rice is one of the greatest inventions for using up leftover rice and turning it into something delicious. This version with spinach and egg is simple, nourishing, and comes together in under 15 minutes.
Ingredients
- 2 cups cooked rice, preferably cold leftover rice
- 3 eggs, beaten
- 2 cups fresh spinach
- 3 cloves garlic, minced
- 3 tablespoons soy sauce
- 1 tablespoon sesame oil
- 2 tablespoons vegetable oil
- Salt and pepper to taste
- Spring onions for garnish
Cooking Method
Heat vegetable oil in a wok or large pan over high heat. Add the garlic and stir for about 20 seconds. Push the garlic to the side and pour in the beaten eggs. Scramble them quickly and break them into small pieces as they cook.
Add the cold rice and break up any clumps with your spatula. Toss everything together and let the rice sit in the pan for about a minute without touching it. This gives it a chance to fry and get slightly crispy at the bottom.
Stir in the soy sauce and sesame oil. Add the fresh spinach and toss everything together. The spinach will wilt down in about 1 minute from the heat of the rice and pan. Taste and adjust salt and pepper. Serve in bowls topped with spring onions.
Helpful Tips
Cold leftover rice is absolutely key to a good fried rice. Freshly cooked warm rice has too much moisture and will turn mushy in the pan. If you only have fresh rice, spread it on a tray and let it cool in the fridge for at least 30 minutes before using it.
Storage Tips
Fried rice keeps well in the fridge for up to 3 days in a covered container. Reheat in a hot pan with a splash of soy sauce.
Creamy Avocado Pasta
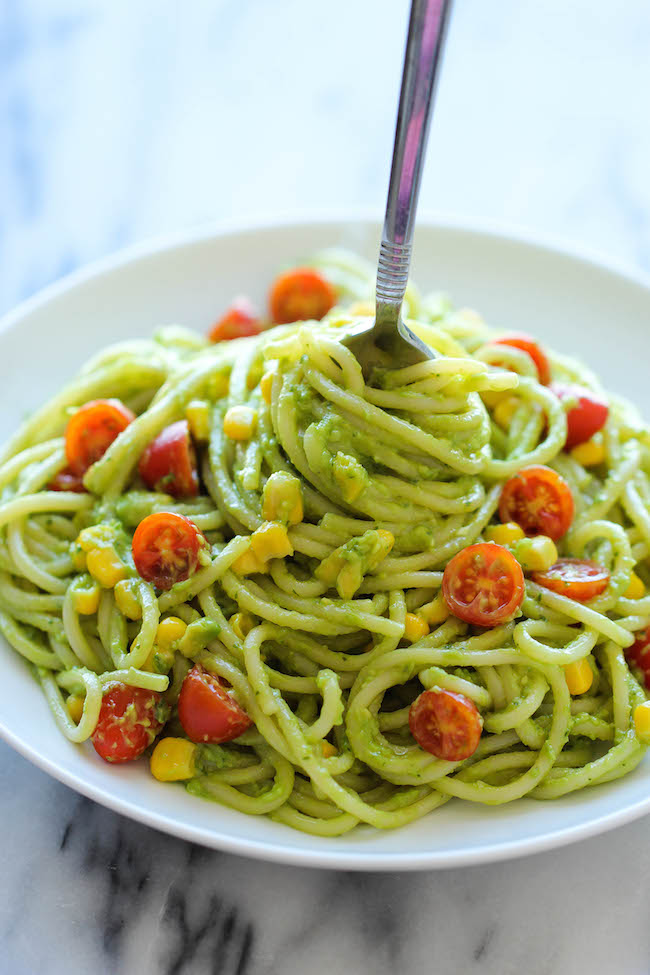
This pasta requires zero cooking for the sauce, which makes it one of the most effortless dinners you will ever make. The avocado blends into a smooth, creamy sauce that coats the pasta beautifully, and the whole thing comes together while the pasta is still boiling.
Ingredients
- 300g spaghetti or pasta of your choice
- 2 ripe avocados
- 2 cloves garlic
- Juice of 1 lemon
- 3 tablespoons olive oil
- Salt and pepper to taste
- A handful of fresh basil
- Cherry tomatoes, halved, for serving
- Parmesan for serving
Cooking Method
Cook your pasta according to packet instructions in well-salted boiling water. While the pasta cooks, scoop out the avocado flesh into a blender or food processor. Add the garlic, lemon juice, olive oil, basil, salt, and pepper. Blend until completely smooth.
Before draining the pasta, save about half a cup of the pasta water. Drain the pasta and immediately toss it with the avocado sauce. Add pasta water little by little to loosen the sauce to a consistency you like. It should be creamy and smooth, coating every strand of pasta.
Top with cherry tomatoes and parmesan and serve immediately.
Helpful Tips
Avocado sauce will start to turn brown after a while because of oxidation. The lemon juice slows this down but it is best to eat this pasta right away after making it. Make the sauce fresh every time and do not try to make it in advance.
Storage Tips
This is one recipe that does not store well. Eat it fresh. The avocado sauce will discolour and taste off the next day.
Tips To Make Any 20-Minute Dinner Even Better
There are a few general cooking habits that will make every recipe on this list work out even better for you. First, always read the recipe through completely before you start cooking. It takes two minutes but saves you from scrambling or missing a step midway through.
Second, prep all your ingredients before turning on any heat. Chop everything, measure everything out, and have it all ready. In cooking, this is called mise en place, which just means everything in its place. When you are cooking fast, you do not have time to stop and chop halfway through.
Third, season as you go. Add a little salt at each stage of cooking rather than dumping it all in at the end. Food tastes much more balanced and flavourful when seasoning builds throughout the cooking process.
Fourth, invest in a good sharp knife. More than any fancy equipment, a sharp knife makes all the difference in how quickly and easily you can prep ingredients.
Fifth, keep your pantry stocked with basics. Canned beans, pasta, rice, soy sauce, olive oil, canned tomatoes, garlic, and dried spices are the building blocks of almost every quick dinner on this list.
Frequently Asked Questions
Can I meal prep these 20-minute recipes in advance?
Yes, most of these recipes can be partially prepped ahead of time. You can cook your rice, chop your vegetables, and marinate your proteins in advance. Store each component separately in the fridge and then combine and cook quickly on the night you need dinner. The avocado pasta and scrambled egg tacos are the exceptions and are best made completely fresh.
What is the best protein for a 20-minute dinner?
Shrimp, thin sliced chicken breast, eggs, canned beans, and fish fillets like salmon are the fastest proteins to cook. They all go from raw to ready in under 10 minutes, which makes them perfect for quick dinners. Thick cuts of meat like whole chicken thighs or beef steaks need more time and are better suited for longer cooking methods.
How do I keep a 20-minute dinner healthy?
Focus on including a protein, a vegetable, and a carbohydrate in each meal. Many of the recipes on this list already do that naturally. You can also swap white rice for brown rice or cauliflower rice, use whole wheat pasta, and add extra vegetables wherever possible. The soy glazed salmon with rice and the chicken stir-fry are especially well-balanced options.
What if I do not have all the exact ingredients listed?
These recipes are very flexible. You can almost always swap one vegetable for another, use a different pasta shape, or replace chicken with shrimp or tofu. The most important thing is to keep the base flavours of the sauce or seasoning intact. If a recipe calls for soy sauce and you do not have it, a little Worcestershire sauce with a splash of water can work in a pinch.
How do I stop quick dinners from feeling boring and repetitive?
The key is to vary your sauces, spices, and proteins. Even rice and vegetables will taste completely different depending on whether you season them with soy and sesame, garlic butter, or tomato and herbs. Keep a few different spice blends and sauces in your kitchen and you can turn simple ingredients into completely different meals every time.
Conclusion
Quick dinners do not have to be sad or boring at all. As you can see from everything we just went through together, 20 minutes is actually plenty of time to make something that is flavourful, filling, and worth sitting down to enjoy. From the garlic butter shrimp pasta to the soy glazed salmon and the creamy avocado pasta, every one of these recipes proves that good food does not always require hours of effort.
The most important thing to take away from all of this is to keep your kitchen stocked with smart basics, prep your ingredients before you start cooking, and do not be afraid to make swaps and adjustments based on what you have available. Cooking is supposed to be enjoyable and these quick recipes are designed to make your evenings easier, not harder.
Try one recipe this week, then another next week, and before you know it, you will have a whole collection of go-to dinners that you can make on autopilot even after the busiest days. Share these recipes with a friend who always says they do not have time to cook because now they have absolutely no excuses!