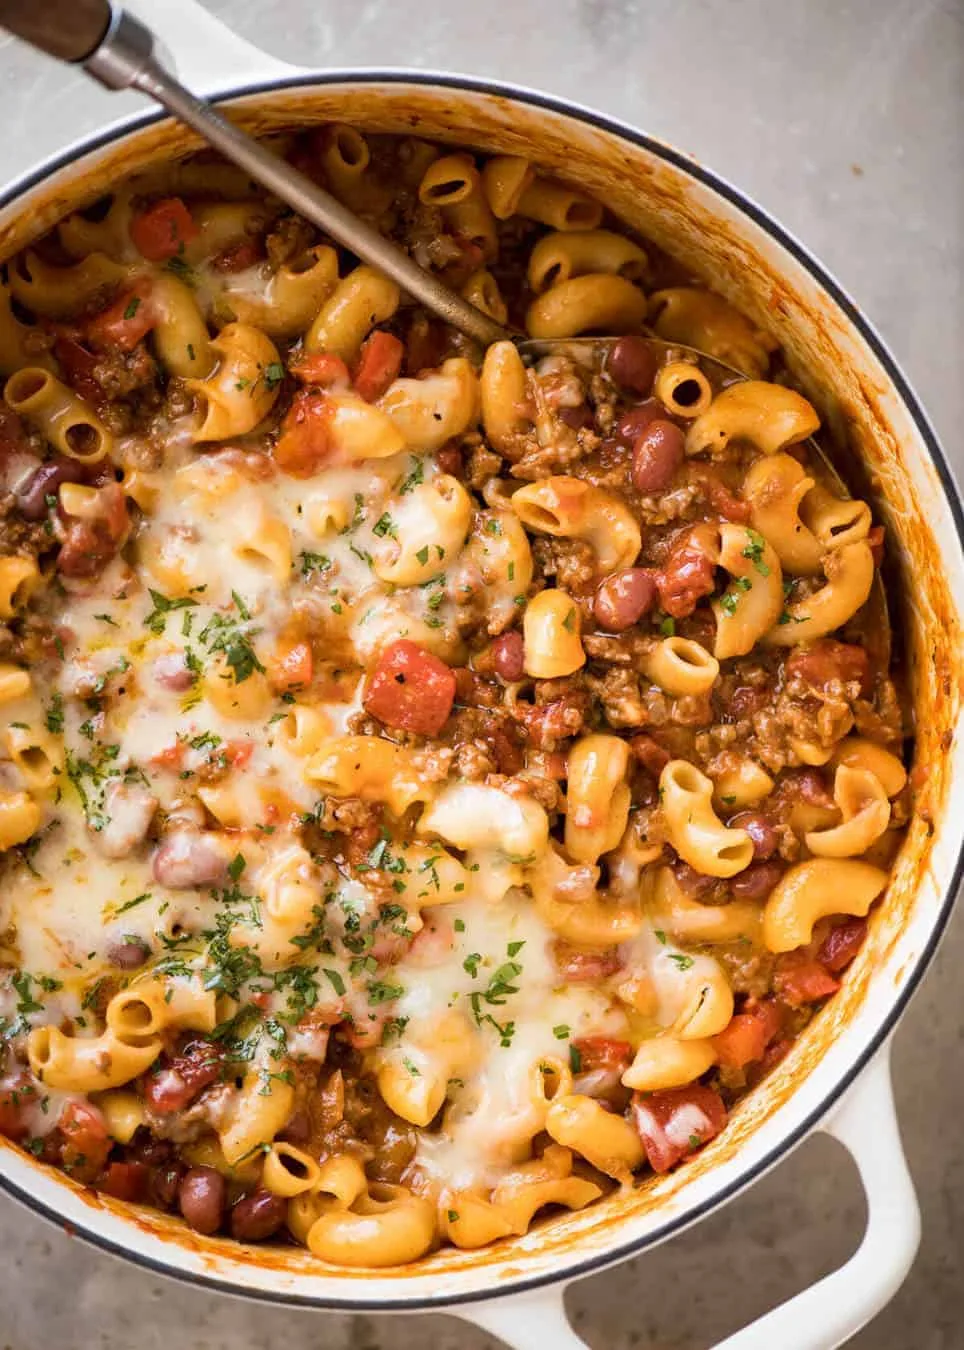
Hello beautiful, welcome to kiekie’s place! Oh my goodness, today I am bringing you one of the most satisfying, most comforting, most deeply delicious one-pot dinners that has ever graced this blog and I genuinely cannot wait for you to try it. This is the kind of recipe that takes two of the greatest comfort foods ever created — chili and mac and cheese — and combines them into one absolutely spectacular, ridiculously easy, one-pot dinner that is going to make everyone at your table incredibly happy.
Chili Mac and Cheese. Say those words out loud and tell me your mouth does not immediately start watering. We are talking about seasoned ground beef cooked with bold chili spices, kidney beans, tomatoes, and garlic, all brought together with pasta that cooks directly in the pot and absorbs every single drop of that incredible chili flavour, then finished with a generous amount of melted, creamy cheese that pulls into the most gorgeous, indulgent, stringy, golden topping imaginable. It is hearty, it is bold, it is deeply satisfying, and it is made entirely in one pot in about 35 minutes.
This is weeknight dinner at its absolute finest. It is the kind of meal that feeds a crowd without draining your budget, that kids and adults love equally, that gets better and better with every spoonful, and that leaves you wondering why you ever ordered takeout when this exists. Whether you are feeding a hungry family, cooking for a group of friends, or meal prepping for the week ahead, this recipe is going to become one of your absolute most-made dishes. Let us get into every single detail.
What Is Chili Mac and Cheese?
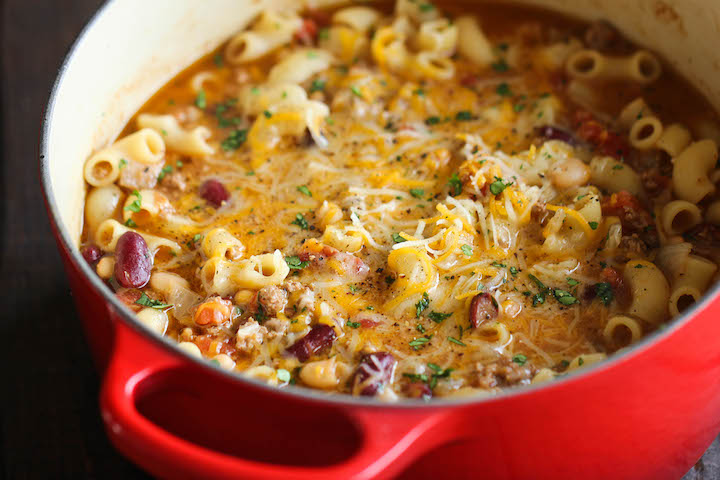
Chili mac and cheese — often called chili mac — is an American comfort food dish that combines the bold, spiced, meaty character of classic chili with the creamy, cheesy indulgence of macaroni and cheese. It is a dish that exists in the wonderful culinary space where two beloved comfort foods meet and discover that together they are even better than they are separately.
The concept is brilliantly simple. You make a bold, well-seasoned chili base with ground beef, beans, tomatoes, and spices, then cook pasta directly in that chili base so the pasta absorbs all the flavour as it cooks. Then you finish the whole thing with cheese — lots and lots of cheese — that melts into the chili pasta and creates a sauce that is simultaneously spiced and creamy, hearty and indulgent, bold and comforting.
The one-pot method is what makes this recipe so brilliant for weeknight cooking. Everything happens in a single pot, which means the flavours from every component of the dish get to mingle and build on each other from the very beginning. The ground beef flavours the base. The spices infuse the broth. The pasta absorbs the broth and all its flavour. The cheese melts into everything. By the time you serve it, every component has contributed to something that is greater than any of them could be alone.
Choosing the Right Cheese
The cheese is one of the most important components of this dish and choosing the right combination makes a very significant difference to the final result.
Sharp cheddar is the backbone of the cheese sauce in this recipe. Its bold, slightly tangy, deeply savoury flavour cuts through the richness of the chili and provides the primary cheese flavour in every bite. Always buy a block of sharp or extra sharp cheddar and grate it yourself — pre-shredded cheddar contains anti-caking agents that prevent it from melting as smoothly and can make the sauce grainy rather than silky.
Monterey Jack is a wonderful addition that melts very smoothly and adds a mild, creamy, slightly buttery quality that softens the sharpness of the cheddar and makes the sauce more silky and flowing. It is the cheese that makes everything come together in that beautiful, coating, indulgent way.
Cream cheese added in a small amount at the end is a secret weapon that many people do not know about. A couple of tablespoons of cream cheese stirred into the finished dish adds an extraordinary creaminess and a slightly tangy richness that makes the cheese sauce incredibly smooth and stable — it prevents the sauce from breaking or becoming grainy and keeps it beautifully coating the pasta.
Smoked gouda is a wonderful optional addition that adds a deeply smoky, complex flavour that pairs beautifully with the chili spices and elevates the whole dish.
Ingredients You Will Need
For the chili base:
- 500 grams of ground beef (80/20 for the best flavour)
- 1 large onion (finely diced)
- 1 large red bell pepper (finely diced)
- 4 cloves of garlic (minced)
- 1 can of kidney beans (400 grams, drained and rinsed)
- 1 can of black beans (400 grams, drained and rinsed)
- 1 can of diced tomatoes (400 grams)
- 2 tablespoons of tomato paste
- 1 tablespoon of Worcestershire sauce
- 1 tablespoon of olive oil
For the chili spice blend:
- 2 teaspoons of chili powder
- 1 and a half teaspoons of cumin
- 1 teaspoon of smoked paprika
- 1 teaspoon of garlic powder
- 1 teaspoon of onion powder
- Half a teaspoon of dried oregano
- Half a teaspoon of black pepper
- Quarter of a teaspoon of cayenne pepper (adjust to your heat preference)
- Salt to taste
For cooking the pasta:
- 300 grams of elbow macaroni or small shell pasta (uncooked)
- 3 cups of beef broth or chicken broth (low sodium)
- Half a cup of water (for adjusting consistency if needed)
For the cheese sauce:
- 2 cups of freshly grated sharp cheddar cheese
- 1 cup of freshly grated Monterey Jack cheese
- 2 tablespoons of cream cheese
- Half a cup of heavy cream or whole milk
- Half a teaspoon of mustard powder (optional but adds wonderful depth to cheese sauces)
For garnish and serving:
- Extra shredded cheddar for the top
- Sour cream
- Sliced spring onions or green onions
- Fresh cilantro
- Sliced jalapeños (fresh or pickled)
- Crushed tortilla chips for crunch
- Hot sauce on the side
- Lime wedges
Step-by-Step Cooking Method

Step 1 — Make the Chili Spice Blend
Before anything goes on the stove, mix all the chili spice blend ingredients together in a small bowl — chili powder, cumin, smoked paprika, garlic powder, onion powder, dried oregano, black pepper, cayenne, and salt. Set this pre-mixed blend aside next to the stove. Having the spice blend ready before you start cooking means you can add it quickly at the right moment without scrambling to measure individual spices while the food is cooking and the heat is on.
Step 2 — Brown the Ground Beef
Place your largest, deepest pot — a Dutch oven or a large, heavy-bottomed saucepan with a tight-fitting lid works best — over medium-high heat. You do not need to add oil yet because the ground beef will render its own fat as it cooks.
Add the ground beef to the dry, hot pot. Break it apart with a wooden spoon or a spatula and spread it into a relatively even layer. Let it cook without stirring for about 2 to 3 minutes so it can develop a proper golden-brown crust on the bottom. Once the bottom is browned, start breaking it into smaller crumbles and continue cooking until no pink remains throughout. This should take about 6 to 8 minutes total.
The browning of the ground beef is one of the most important flavour-building steps in this recipe. Well-browned beef with those deeply caramelised, golden-brown pieces adds a richness and depth of flavour to the chili base that grey, barely-cooked beef simply cannot provide. Take the time to get a proper brown on the beef.
Once fully browned, season the beef with a pinch of salt and pepper. If there is an excessive amount of fat rendered in the pot, drain off most of it, leaving about 1 tablespoon behind. That tablespoon of rendered beef fat is flavourful and you want it in the pot to cook the vegetables.
Step 3 — Cook the Aromatics
Add the diced onion and diced red bell pepper to the pot with the browned beef. Stir everything together and cook over medium heat for about 5 to 6 minutes, stirring occasionally, until the vegetables have softened and the onion is translucent. The vegetables will absorb the flavour of the browned beef drippings in the pot and become wonderfully savoury themselves.
Add the minced garlic and stir it in immediately. Cook for about 1 minute, stirring constantly, until the garlic is fragrant. Garlic burns very easily in a hot pot with fat so keep it moving and do not walk away.
Add the tomato paste and stir it through the beef and vegetables. Let the tomato paste cook for 1 to 2 minutes, pressing it against the hot bottom of the pot so it caramelises slightly. You will see it darken from a bright red to a deeper, slightly bricked colour. This caramelisation removes the raw, slightly sharp taste from the tomato paste and develops a much deeper, richer flavour.
Step 4 — Add the Spices
Add the entire pre-mixed chili spice blend to the pot. Stir it through the beef and vegetable mixture immediately and thoroughly. Let the spices cook in the fat and beef drippings for about 1 minute, stirring constantly. This is the blooming step — cooking the dried spices in the fat activates their flavour compounds and releases their full aromatic potential into the dish. Your kitchen should smell absolutely incredible at this point.
Step 5 — Build the Chili Base
Add the drained and rinsed kidney beans and black beans to the pot. Add the diced tomatoes with all their juices. Add the Worcestershire sauce. Stir everything together very thoroughly, making sure to scrape up any caramelised bits from the bottom of the pot — these bits are pure concentrated flavour and you want them dissolved into the sauce.
Pour in the beef broth and stir well. Bring everything to a boil over high heat. Let it boil for 2 minutes, then taste the chili base. It should be bold, spiced, slightly smoky, and deeply flavourful. This is the liquid that your pasta is going to cook in and absorb, so it needs to taste properly seasoned and bold. Adjust the salt, the cayenne, or any other spice if needed.
Step 6 — Cook the Pasta Directly in the Chili
Add the dry, uncooked elbow macaroni directly into the boiling chili base. Stir immediately to make sure the pasta is submerged in the liquid and not clumped together. Reduce the heat to medium so the liquid maintains a steady, active simmer rather than a vigorous rolling boil.
Cook the pasta in the chili, stirring every 1 to 2 minutes, for about 10 to 12 minutes. Stirring frequently is important — pasta cooked in a thicker liquid like this chili base is more prone to sticking to the bottom of the pot than pasta cooked in a large pot of plain water. Stay close, stir regularly, and keep an eye on both the pasta texture and the liquid level.
As the pasta cooks, it will absorb the chili broth and the whole mixture will become thicker and more concentrated. The starch released by the pasta as it cooks also helps thicken the chili base into a saucy, coating consistency. Check the pasta regularly — you want it al dente, cooked through with just a very slight firmness remaining in the very centre. If the liquid is absorbing too quickly before the pasta is cooked, add a splash of water or extra broth. If the pasta is cooked but there is still too much liquid, raise the heat slightly and let it reduce for a minute or two while stirring.
Step 7 — Add the Cream and Cheese
Once the pasta is perfectly cooked and the chili has reduced to a thick, saucy consistency that coats the pasta beautifully, reduce the heat to the lowest possible setting. This low heat is important for the cheese addition — cheese added over high heat will become grainy and oily rather than smooth and creamy.
Pour in the heavy cream or whole milk and stir it through. Let it warm for about 1 minute. Add the cream cheese in small pieces and stir until it melts completely into the mixture. The cream cheese adds an extraordinary silkiness and stability to the cheese sauce.
Add the grated cheddar cheese in three additions — add a third, stir until melted, add another third, stir until melted, add the final third, stir until completely melted and incorporated. Adding the cheese in stages and stirring between additions ensures it melts smoothly and evenly without clumping. Add the grated Monterey Jack cheese in the same way — in a couple of additions, stirring between each one until completely melted.
Add the mustard powder if using and stir through. The mustard powder adds a subtle depth and slightly tangy sharpness that makes cheese sauces taste more complex and balanced without tasting of mustard.
Stir the whole pot thoroughly so the cheese sauce is evenly distributed through the chili pasta. The finished dish should look thick, creamy, deeply sauced, and absolutely irresistible. Taste one final time and adjust the seasoning — add more salt, more cayenne, or a few dashes of hot sauce if it needs more punch.
Step 8 — Serve With All the Toppings
Serve the chili mac and cheese immediately in deep bowls while it is hot and the cheese is at its most melted and gorgeous. Load the toppings generously because they are not optional extras — they are essential components that complete the dish.
Add a generous dollop of sour cream to each bowl. Scatter sliced spring onions and fresh cilantro over the top. Add sliced jalapeños for heat. Crush a small handful of tortilla chips over each bowl for an incredible crunchy contrast to the creamy, saucy chili mac. Drizzle hot sauce over the top if desired. Squeeze a wedge of lime over everything — the acidity of the lime brightens all the bold flavours beautifully.
Put all the toppings on the table so everyone can customise their own bowl to their preference.
Helpful Cooking Tips for the Best Results
Grate your own cheese from a block. This is one of the most important tips in this entire recipe. Pre-shredded cheese from a bag contains cellulose or other anti-caking agents that prevent the cheese from melting smoothly. When added to a hot sauce these agents can cause the cheese to seize, clump, or become grainy rather than melting into the silky, smooth sauce you want. Always buy blocks of cheddar and Monterey Jack and grate them yourself right before adding them to the pot.
Add the cheese over low heat and in stages. Cheese proteins can break and become grainy and oily if they are exposed to high heat or added all at once to a very hot liquid. Always reduce the heat to the lowest setting before adding cheese and add it in three or four additions, stirring and allowing each addition to fully melt before adding the next.
The cream cheese is the secret weapon. Do not skip the cream cheese. It adds a smoothness, creaminess, and stability to the cheese sauce that makes it coat the pasta beautifully and stay silky rather than separating or becoming grainy as it sits. Two tablespoons is all you need and the difference is very noticeable.
Season the chili base boldly. Remember that the pasta is going to absorb a lot of the chili broth and will dilute the flavours slightly. The chili base needs to taste bolder and more intensely seasoned before the pasta goes in than you want the final dish to taste. If the base tastes perfectly seasoned, the finished dish will taste under-seasoned. If the base tastes bold and assertive, the finished dish will be perfectly balanced.
Stir frequently while the pasta cooks. Pasta cooking in a thicker liquid rather than a large pot of plain water is much more prone to sticking to the bottom of the pot and to clumping together. Stir every 1 to 2 minutes throughout the pasta cooking process to prevent sticking and ensure even cooking.
Do not overcook the pasta. The pasta will continue to absorb liquid and soften slightly even after you remove the pot from the heat. Pull it off heat when the pasta is just al dente — slightly firmer than you ultimately want it to be. By the time you add the cheese and serve it, the pasta will have reached the perfect texture.
Use a wide, deep pot. A wide pot gives the pasta and chili more surface area to cook in and prevents the mixture from being too deep and cooking unevenly. A Dutch oven or a large, wide, deep saucepan of at least 5 litres capacity is ideal for this recipe.
Brown the beef properly. I said it in the method and I am saying it again because it matters so much. Properly browned, golden-brown beef with caramelised surfaces adds an incredible depth of flavour to the chili base that barely-cooked grey beef simply cannot provide. Give the beef time to properly brown and resist stirring it too frequently in the first few minutes of cooking.
Common Mistakes to Avoid
Adding the cheese when the heat is too high. High heat is the enemy of a smooth cheese sauce. Cheese proteins break down and separate when exposed to excessive heat, resulting in a greasy, grainy sauce rather than a smooth, creamy one. Always reduce to the lowest heat before adding cheese and add it slowly in stages.
Using pre-shredded cheese. I mentioned this in the tips but it bears repeating as a mistake to avoid. The anti-caking agents in pre-shredded cheese make a very noticeable difference to the texture of the finished cheese sauce. Always grate from a block.
Not stirring the pasta while it cooks. Pasta cooked in a thick chili base will stick to the bottom of the pot and to itself if you do not stir it regularly. Set a timer and stir every 1 to 2 minutes throughout the cooking time.
Making the chili base too thin. A chili base that is too thin before the pasta goes in will result in a finished dish that is watery rather than thick and saucy. Let the chili base reduce properly before adding the pasta and use the amount of broth specified in the recipe without adding extra liquid unless the pasta genuinely needs it.
Under-seasoning. Chili mac and cheese should be bold, well-seasoned, and deeply flavourful. Under-seasoning produces something that is flat and disappointing regardless of how correctly the technique is followed. Taste at every stage and season with confidence.
Skipping the toppings. The toppings transform a good bowl of chili mac into a genuinely extraordinary one. The cool sour cream against the hot chili, the crunch of tortilla chips against the creamy pasta, the fresh cilantro and spring onions bringing brightness, the lime bringing acidity — each topping adds something essential. Do not skip them.
What to Serve With Chili Mac and Cheese

Cornbread is the most natural and most beloved accompaniment for any chili-based dish and chili mac is no exception. The slightly sweet, crumbly, golden cornbread is wonderful alongside this bold, spiced dish.
A simple green salad with a light lime vinaigrette provides a fresh, clean contrast to the rich, hearty chili mac and makes the meal feel more balanced.
Garlic bread alongside chili mac is a wonderfully indulgent combination — the buttery, garlicky bread is perfect for scooping up the saucy chili mac from the bowl.
Coleslaw — particularly a tangy, vinegar-based coleslaw — provides a cool, crunchy contrast that cuts through the richness of the chili mac beautifully.
Tortilla chips and salsa on the side add a fun, casual element that pairs very naturally with the Tex-Mex-inspired flavours of the dish.
Steamed broccoli or roasted vegetables add nutrition and freshness to balance the richness of the main dish.
How to Store Leftovers
In the fridge: Allow the chili mac to cool completely before transferring to an airtight container. Store in the refrigerator for up to 4 days. The pasta will absorb more of the sauce as it sits and the dish will become thicker overnight. To reheat, place in a pot over medium-low heat and add a generous splash of broth, water, or milk. Stir gently as it heats — the added liquid will loosen everything and bring the creamy, saucy consistency back to life. You can also reheat in the microwave covered with a damp paper towel in 1-minute intervals, stirring between each and adding a splash of liquid.
In the freezer: Chili mac freezes well for up to 2 months, though the pasta texture changes slightly after freezing — it can become softer after thawing. Cool completely, portion into freezer-safe containers, and freeze. Thaw overnight in the fridge before reheating gently with added liquid. For the best freezer results, slightly undercook the pasta when making the original batch — leave it a little firmer than you ultimately want it since it will soften more during freezing and reheating.
Meal prep tip: This recipe makes a generous amount and reheats beautifully, making it perfect for batch cooking at the beginning of the week. The flavours actually deepen overnight and the chili mac tastes even better on day two.
Variations You Can Try
Make it spicier: Double the cayenne, add a tablespoon of chipotle in adobo sauce to the chili base, use pepper jack cheese instead of Monterey Jack, and serve with sliced habanero or extra jalapeños. This is for genuine heat lovers only and is absolutely incredible.
Make it with turkey: Replace the ground beef with ground turkey for a lighter, leaner version. Ground turkey has a milder flavour than beef so be generous with the seasoning to ensure the chili is as bold and satisfying as the original.
Vegetarian version: Leave out the ground beef entirely and replace it with a can of pinto beans and a cup of finely diced mushrooms that you cook down until golden before adding the other ingredients. Use vegetable broth instead of beef broth. The bold chili spice blend and the cheese make this vegetarian version deeply satisfying and flavourful.
Add vegetables: Stir in a cup of frozen corn kernels when you add the beans — the corn adds sweetness and texture. Diced zucchini cooked down with the onion and pepper adds bulk and nutrition. Baby spinach stirred in at the very end adds colour and nutrition that wilts invisibly into the dish.
Baked chili mac: After finishing the stovetop recipe, transfer the chili mac to a large baking dish. Top with extra shredded cheese and crushed tortilla chips. Bake at 200 degrees Celsius for 15 to 20 minutes until the top is golden, bubbly, and slightly crispy. This baked version is an absolute showstopper.
White chili mac: Use white beans instead of kidney and black beans, replace the ground beef with shredded chicken or ground turkey, use a combination of green chilies, cumin, and chicken broth instead of the tomato-based chili spices, and finish with Monterey Jack and cream cheese. This lighter, creamier version is a wonderful variation.
Frequently Asked Questions
Can I use a different pasta shape instead of elbow macaroni?
Yes, several pasta shapes work beautifully in this recipe. Small shell pasta is excellent because the shells cup and hold the chili sauce inside them. Ditalini — very small tube-shaped pasta — is a classic in chili-style dishes and works wonderfully. Rotini or fusilli are good options because the spirals grip the sauce well. Penne is another option but may need slightly more cooking time. Avoid very large pasta shapes that take too long to cook through in the chili base. The key is using a small to medium pasta shape that cooks in approximately the same time as elbow macaroni — 10 to 12 minutes.
My cheese sauce became grainy and oily. What went wrong?
Grainy, broken cheese sauce is almost always caused by one of two things — adding cheese over heat that is too high, or adding cheese too quickly without enough stirring between additions. Cheese proteins break and separate when they are exposed to high heat, and the fat separates from the proteins resulting in an oily, grainy sauce. The fix going forward is to always reduce the heat to the absolute lowest setting before adding any cheese, and to add it in small additions stirring fully between each one. The cream cheese in this recipe also helps prevent breaking — make sure you include it. If your sauce does break, add a splash of milk and stir vigorously over very low heat — this can sometimes bring a broken sauce back together.
Can I make this recipe in a slow cooker?
You can make the chili base in a slow cooker but the pasta and cheese steps are best done on the stovetop. Make the chili base — browning the beef and cooking the aromatics on the stovetop first for the best flavour — then transfer everything to the slow cooker and cook on LOW for 4 to 6 hours or HIGH for 2 to 3 hours. In the last 30 minutes of slow cooking, cook the pasta separately on the stovetop, drain it, and stir it into the slow cooker along with the cream and cheese, following the same steps as the original recipe. This method works very well for making the chili base ahead.
How do I make this dish less rich and heavy if I want a lighter version?
There are several easy adjustments to make a lighter version. Replace the heavy cream with whole milk or evaporated milk — both give a creamy result with less fat. Reduce the amount of cheese slightly and use reduced-fat versions if available, though keep in mind that reduced-fat cheese does not melt as smoothly. Use 90 percent lean ground beef or ground turkey to reduce the fat from the meat. Use vegetable broth instead of beef broth. Add extra beans and reduce the amount of meat. These adjustments give you a lighter dish that still has excellent flavour.
Can I make this recipe gluten-free?
Yes, with two simple substitutions. Replace the regular elbow macaroni with your favourite gluten-free pasta — rice-based or corn-based gluten-free pastas work particularly well. Gluten-free pasta can absorb liquid at a slightly different rate than regular pasta, so check for doneness a few minutes earlier than the time suggested in the recipe. Make sure the Worcestershire sauce you use is gluten-free — most brands are but it is worth checking the label. Everything else in the recipe is naturally gluten-free.
Final Thoughts
One Pot Chili Mac and Cheese is one of the most perfectly conceived comfort food recipes that exists. It takes the bold, deeply spiced, hearty satisfaction of a proper chili and combines it with the creamy, indulgent, impossibly satisfying character of a great mac and cheese, and the result is something that is better than either dish could ever be on its own. It is warm and bold and creamy and spiced and cheesy all at the same time, in every single spoonful, and it is made in one pot in about 35 minutes from start to finish.
What makes this recipe so genuinely excellent is the attention to the details that make the biggest difference. Properly browning the beef for real depth of flavour. Blooming the spices in the fat for full aromatic impact. Building a bold, well-seasoned chili base that gives the pasta something extraordinary to absorb as it cooks. Grating your own cheese and adding it slowly over low heat for a perfectly smooth, silky sauce. And loading the finished bowls with toppings that add the final layers of texture, temperature contrast, and flavour that turn a great bowl into an unforgettable one.
This is the recipe you make when you want everyone at the table to be genuinely delighted. It is the recipe you make when you need to feed a crowd without breaking the bank. It is the recipe you make when you want maximum flavour and maximum comfort with minimum effort and minimum cleanup. Make it this week, customise it to your taste, load it with your favourite toppings, and enjoy every single rich, bold, creamy, deeply satisfying spoonful. Happy cooking!