Hello sweetheart, you are highly welcome to kiekie’s place! Oh, I just love this time of year and today’s post is all about celebrating it in the most delicious way possible. Spring is here and that means one thing in the kitchen — fresh, vibrant, colourful food that feels as alive and energetic as the season itself. The markets are filling up with beautiful new produce, the days are getting longer and warmer, and there is something in the air that just makes you want to cook something fresh and exciting for dinner.
Today I am sharing 10 easy spring dinner recipes that are going to make your evenings in the kitchen an absolute joy. These are not complicated restaurant-style dishes that require hours of work and a list of hard-to-find ingredients. These are real, honest, delicious dinners that come together relatively quickly, use fresh seasonal ingredients that are at their very best right now, and deliver the kind of satisfaction that makes everyone at the table genuinely happy.
Whether you are cooking for yourself after a long day, feeding a hungry family on a weeknight, or putting together a lovely dinner for friends on a warm spring evening, this list has something perfect for every occasion. Each recipe comes with a full ingredient list, clear step-by-step cooking method, helpful tips, and everything you need to make it successfully at home. Let us get into these beautiful spring dinners.
What Makes Spring Cooking So Special?
Spring cooking has a character all of its own and it is worth understanding what makes it so unique before we dive into the recipes.
Spring is the season of renewal in the kitchen. After the heavy, hearty dishes of winter — the stews, the braises, the thick soups — spring invites you to lighten things up. Spring produce is tender, delicate, and vibrant. Asparagus appears in bundles at the market. Fresh peas come out of their pods sweet and bright. Baby spinach and arugula are at their most tender. Radishes are crisp and peppery. Spring onions are mild and fresh. Artichokes are at their peak. Herbs like mint, dill, chives, and tarragon are growing lush and fragrant.
Spring dinners tend to be a beautiful middle ground — lighter than winter food but more substantial and warming than summer food. They celebrate fresh vegetables and herbs while still providing the comfort and satisfaction of a proper home-cooked dinner. And the best spring recipes do not fight against the season — they work with it, letting those fresh, vibrant ingredients speak for themselves.
With all of that in mind, here are 10 easy spring dinner recipes that perfectly capture the spirit of this wonderful season.
Lemon Herb Roasted Chicken Thighs With Asparagus
Sources: Cafe Delites
What Is It?
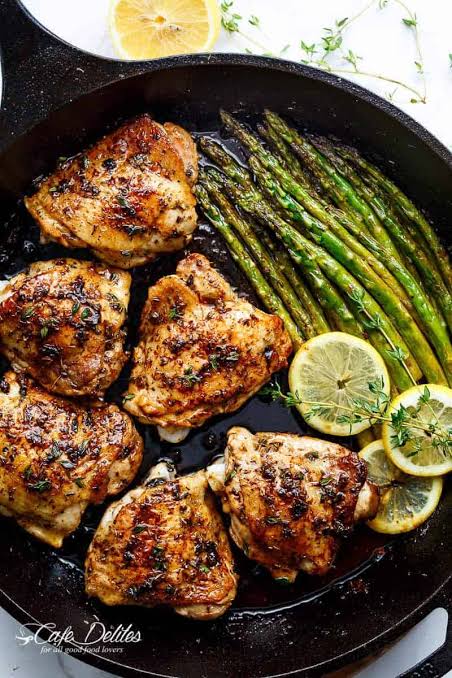
This is a one-pan spring dinner that is as easy as it gets but delivers results that are absolutely spectacular. Bone-in, skin-on chicken thighs are marinated in a bright, fragrant mixture of lemon, garlic, and fresh herbs, then roasted in the oven alongside tender asparagus spears until the chicken skin is golden and crispy, the meat is juicy and falling-off-the-bone tender, and the asparagus is perfectly roasted with slightly caramelised tips. The whole thing comes together in one pan, which means minimal washing up and maximum flavour. Asparagus is one of the most iconic spring vegetables and pairing it with lemon herb chicken creates a dinner that tastes exactly like spring feels.
Ingredients
For the chicken:
- 6 bone-in, skin-on chicken thighs
- 4 tablespoons of olive oil
- Juice and zest of 2 large lemons
- 5 cloves of garlic (minced)
- 2 tablespoons of fresh thyme leaves (or 1 teaspoon dried)
- 2 tablespoons of fresh rosemary (finely chopped, or 1 teaspoon dried)
- 1 tablespoon of fresh oregano (or half a teaspoon dried)
- 1 teaspoon of smoked paprika
- Salt and black pepper to taste
For the asparagus:
- 500 grams of fresh asparagus (woody ends snapped off)
- 2 tablespoons of olive oil
- Salt and black pepper to taste
- A squeeze of fresh lemon juice
For serving:
- Extra lemon wedges
- Fresh thyme or parsley for garnish
- Flaky sea salt for finishing
Cooking Method
Start by making the marinade. In a large bowl combine the olive oil, lemon juice, lemon zest, minced garlic, fresh thyme, fresh rosemary, fresh oregano, smoked paprika, salt, and black pepper. Mix well. Add the chicken thighs and coat them thoroughly on all sides. If you have time, cover and marinate in the fridge for at least 1 hour, or overnight for the most flavourful result. If you are short on time, even 20 minutes at room temperature will make a difference.
Preheat your oven to 220 degrees Celsius. Line a large baking sheet or roasting pan with parchment paper.
Place the marinated chicken thighs skin-side up on the prepared pan, spacing them well apart. Roast for 25 minutes. During this time the skin will start to turn golden and render its fat.
While the chicken roasts, toss the asparagus with olive oil, salt, and pepper in a bowl. After 25 minutes, remove the pan from the oven and arrange the asparagus spears around the chicken thighs. Return to the oven and roast for another 15 to 18 minutes until the chicken skin is deeply golden and crispy, the chicken is cooked through with an internal temperature of 74 degrees Celsius, and the asparagus is tender with slightly caramelised tips.
Squeeze a little extra lemon juice over the asparagus, scatter with fresh herbs, and finish with a pinch of flaky sea salt. Serve immediately from the pan.
Helpful Tips
Always roast chicken thighs skin-side up and never cover them — the uncovered skin is what allows moisture to evaporate and the skin to crisp up beautifully. Adding the asparagus halfway through the cooking time prevents it from becoming overcooked and mushy while giving it enough time to roast and develop flavour. Thick asparagus spears can go in at the same time as the chicken — thin, delicate spears should go in only for the last 10 minutes.
Spring Pea and Mint Risotto
What Is It?
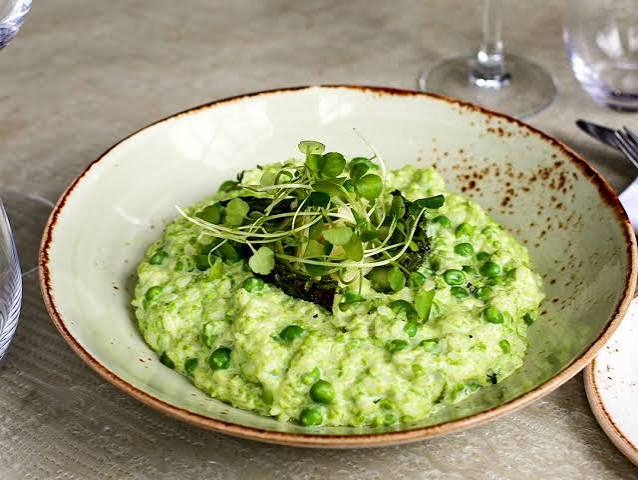
This risotto is pure spring on a plate. It is creamy, vibrant, and beautifully green — made with fresh or frozen peas, bright fresh mint, lemon zest, and good Parmesan cheese. Risotto has a reputation for being fussy and difficult but it is honestly much more forgiving than people think, and the reward for the 25 minutes of gentle stirring is a dish that is velvety, deeply satisfying, and absolutely beautiful. The combination of sweet peas and fresh mint is a classic spring pairing that works in the most magical way, and the lemon zest added at the end lifts everything and makes the flavours sing.
Ingredients
- 300 grams of arborio or carnaroli rice
- 2 cups of fresh or frozen peas (divided — half blended into a puree, half left whole)
- A large handful of fresh mint leaves (divided — some blended with the peas, some for garnish)
- 1 litre of warm vegetable or chicken broth
- 1 medium onion (very finely diced)
- 3 cloves of garlic (minced)
- Half a cup of dry white wine
- 3 tablespoons of butter (divided)
- 1 tablespoon of olive oil
- Half a cup of freshly grated Parmesan cheese (plus extra for serving)
- Zest of 1 lemon
- Salt and white pepper to taste
- Fresh pea shoots or extra mint for garnish (optional)
Cooking Method
Start by making the pea puree. Blanch half the peas in boiling water for 2 minutes, drain, and place in a blender with a handful of fresh mint leaves and a splash of water or broth. Blend until completely smooth. Set aside — this puree is what gives the risotto its beautiful vibrant green colour.
Keep your broth warm in a separate saucepan over low heat throughout the risotto cooking process. Adding cold broth to risotto slows the cooking and affects the texture — always use warm broth.
Heat 2 tablespoons of butter and the olive oil together in a large, wide, heavy-bottomed pan over medium heat. Add the finely diced onion and cook gently for about 6 to 8 minutes until completely soft and translucent but not browned. Add the garlic and cook for 1 more minute.
Add the arborio rice and stir it around in the butter and oil for about 2 minutes until the grains look slightly translucent at the edges. This toasting step helps the rice absorb liquid more evenly and adds a subtle nuttiness. Pour in the white wine and stir continuously until it has been completely absorbed.
Now begin adding the warm broth, one ladleful at a time. Add a ladle of broth, stir continuously until it is mostly absorbed, then add the next ladle. Keep the heat at medium — a gentle, steady simmer rather than a vigorous boil. Continue this process, adding one ladleful at a time and stirring, for about 18 to 20 minutes. The rice is done when it is tender but still has a very slight bite at the centre — not chalky but not mushy.
In the last 3 minutes of cooking, add the remaining whole peas and stir them through. Once the risotto is cooked, remove from the heat. Stir in the pea and mint puree, the remaining tablespoon of cold butter, the grated Parmesan, and the lemon zest. The cold butter and Parmesan stirred in at the end is what gives risotto its characteristic creamy, velvety consistency. Season with salt and white pepper. The risotto should flow and spread slowly when spooned onto a plate — not be stiff or thick like a solid mass.
Serve immediately in warmed bowls topped with extra Parmesan, fresh mint leaves, and pea shoots if you have them.
Helpful Tips
Never walk away from risotto once you have started adding the broth — it needs regular stirring and attention throughout. The cold butter stirred in at the very end is called mantecatura in Italian and it is the step that makes risotto genuinely creamy and glossy rather than just starchy. Serve risotto immediately — it continues to absorb liquid and thicken as it sits. If it thickens too much before serving, stir in a splash of warm broth to loosen it.
Spring Vegetable Frittata
What Is It?
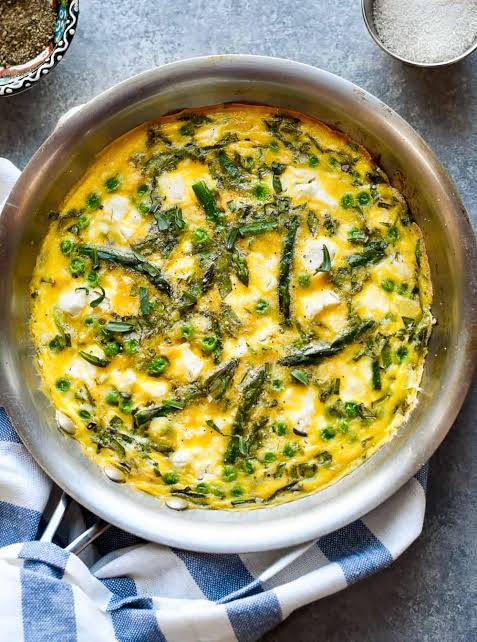
A frittata is an Italian baked egg dish — think of it as an open-faced omelette that is started on the stovetop and finished in the oven. It is one of the most versatile, most satisfying, and most effortless spring dinners you can make because it is endlessly adaptable to whatever vegetables you have on hand, comes together in about 25 minutes, and works equally well for dinner, brunch, or lunch. This spring version is loaded with asparagus, fresh peas, baby spinach, spring onions, and creamy goat cheese, making it vibrant, flavourful, and deeply satisfying.
Ingredients
- 8 large eggs
- Quarter of a cup of heavy cream or whole milk
- Half a cup of freshly grated Parmesan cheese
- 100 grams of goat cheese (crumbled)
- 1 bunch of asparagus (about 200 grams, woody ends removed and cut into 3 centimetre pieces)
- 1 cup of fresh or frozen peas
- 2 large handfuls of baby spinach
- 4 spring onions (thinly sliced)
- 3 cloves of garlic (minced)
- 2 tablespoons of olive oil or butter
- 1 tablespoon of fresh dill or fresh chives (chopped)
- 1 tablespoon of fresh mint (chopped)
- Salt and black pepper to taste
- Extra fresh herbs for garnish
Cooking Method
Preheat your oven to 190 degrees Celsius.
In a large bowl, whisk together the eggs, cream or milk, grated Parmesan, fresh dill or chives, fresh mint, salt, and black pepper until well combined and slightly frothy. Set aside.
Heat the olive oil or butter in a large oven-safe skillet — ideally a 25 to 28 centimetre pan — over medium heat. Add the spring onions and asparagus pieces and cook for about 3 to 4 minutes, stirring, until the asparagus is just starting to become tender. Add the garlic and cook for 1 minute. Add the peas and baby spinach and stir until the spinach wilts down — about 1 to 2 minutes. Season the vegetables with a little salt and pepper and spread them out in an even layer across the pan.
Pour the egg mixture evenly over the vegetables in the pan. Let it cook on the stovetop over medium heat without stirring for about 2 to 3 minutes until the edges start to set and pull away slightly from the sides of the pan. The centre will still be very wobbly and liquid at this point — that is exactly where you want it before it goes into the oven.
Crumble the goat cheese evenly over the top of the frittata. Transfer the pan to the preheated oven and bake for 12 to 15 minutes until the frittata is just set in the centre — it should have a slight wobble when you gently shake the pan but should not be liquid. The top should be lightly golden.
Remove from the oven and let it cool in the pan for 5 minutes before slicing. Garnish with extra fresh herbs and serve warm or at room temperature.
Helpful Tips
An oven-safe skillet is essential for this recipe — if your pan does not have an oven-safe handle, wrap the handle tightly in several layers of aluminium foil as a temporary solution. Do not overcook the frittata — slightly underdone in the centre is better than overcooked, as the residual heat will continue cooking it for a few minutes after you remove it from the oven. A frittata is one of the best meal prep options because it keeps in the fridge for up to 4 days and can be eaten cold, at room temperature, or gently warmed.
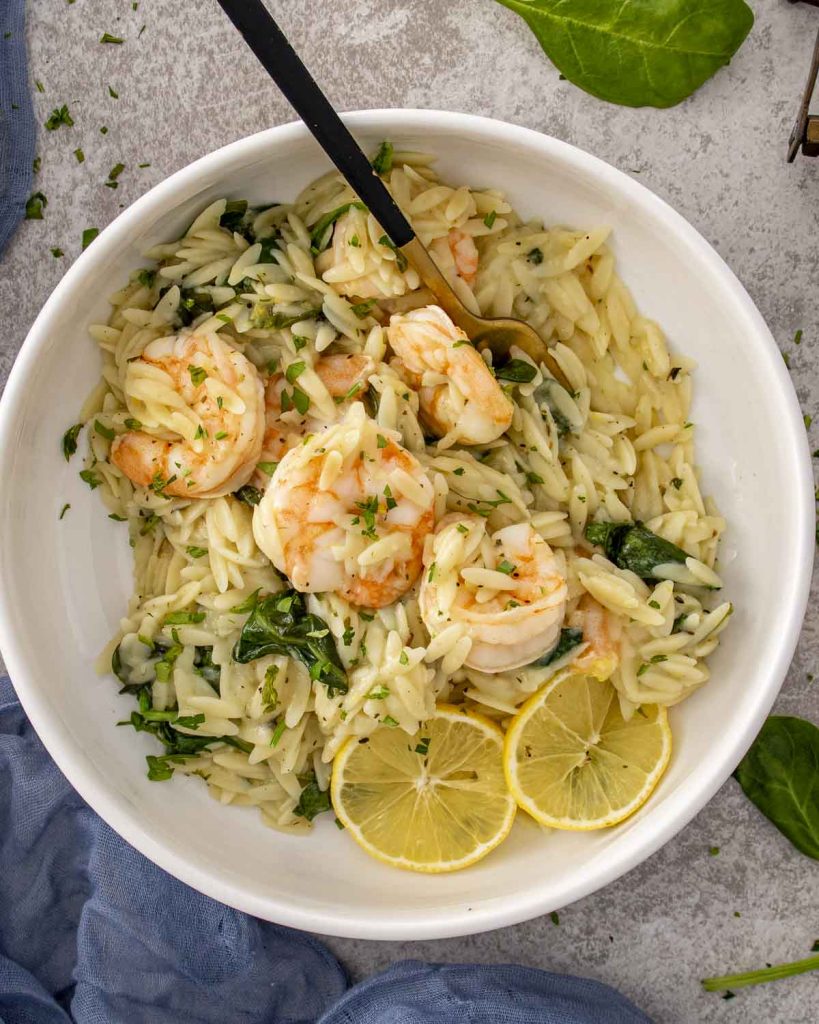
Garlic Butter Shrimp With Spring Pea Orzo
What Is It?
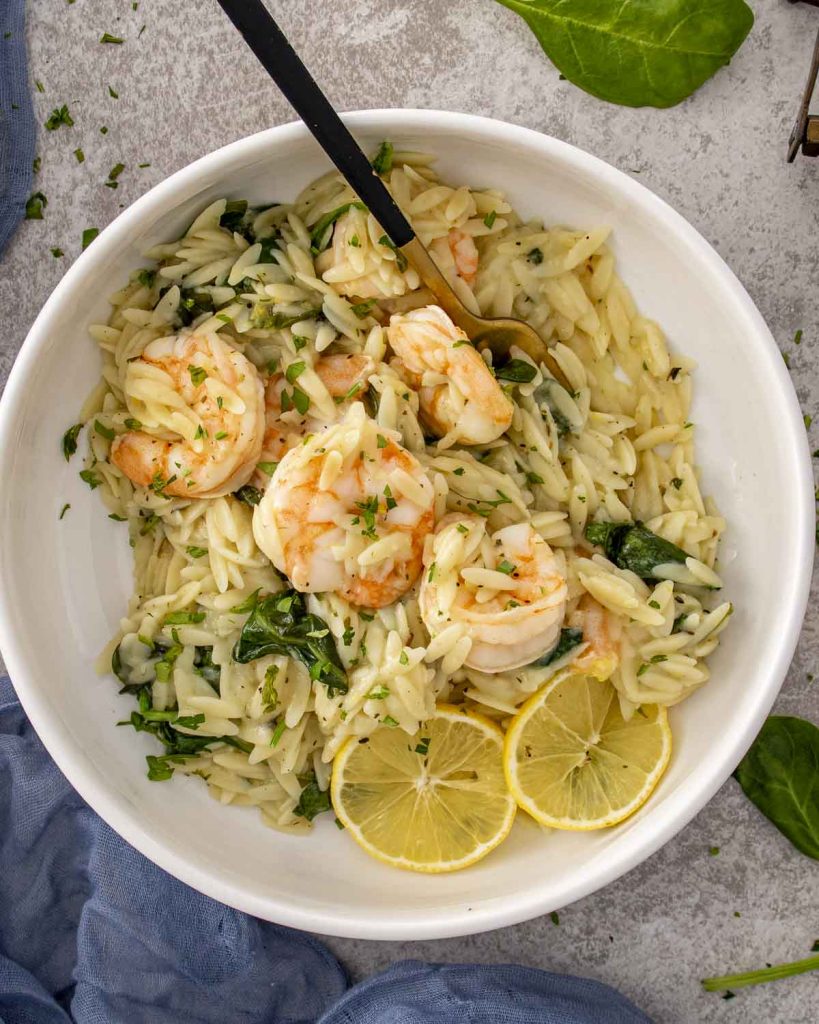
This is a dinner that looks and tastes incredibly impressive but is actually one of the simplest things on this entire list. Juicy, garlicky butter shrimp served over a creamy, lemony orzo cooked with fresh spring peas and finished with Parmesan and fresh herbs. The orzo cooks quickly and absorbs the flavour of the broth it is cooked in, the peas add sweetness and colour, and the garlic butter shrimp on top brings richness, protein, and a flavour that makes this dish feel very special. This entire dinner comes together in about 25 to 30 minutes and uses just one pot for the orzo and one pan for the shrimp.
Ingredients
For the spring pea orzo:
- 300 grams of orzo pasta
- 1 and a half cups of fresh or frozen peas
- 1 medium shallot or small onion (finely diced)
- 3 cloves of garlic (minced)
- 3 cups of vegetable or chicken broth
- Half a cup of heavy cream
- Half a cup of freshly grated Parmesan cheese
- Zest of 1 lemon
- 2 tablespoons of butter
- 1 tablespoon of olive oil
- Salt and black pepper to taste
- Fresh mint or fresh chives (chopped, for stirring through)
For the garlic butter shrimp:
- 500 grams of large shrimp (peeled and deveined)
- 4 tablespoons of butter
- 4 cloves of garlic (minced)
- Juice of half a lemon
- Half a teaspoon of red pepper flakes
- Salt and black pepper to taste
- Fresh parsley (chopped, for garnish)
Cooking Method
Make the orzo first. Heat the butter and olive oil in a medium pot over medium heat. Add the shallot and cook for 3 minutes until soft. Add the garlic and cook for 1 minute. Add the dry orzo and stir it around for 1 to 2 minutes to toast slightly. Pour in the broth and bring to a gentle boil. Reduce to a simmer and cook, stirring every couple of minutes, for about 8 to 10 minutes until the orzo is almost cooked and most of the broth has been absorbed. Add the peas in the last 2 minutes of cooking. Stir in the cream, Parmesan, and lemon zest. Season with salt and pepper. Stir through the fresh mint or chives. Keep warm over the lowest heat while you cook the shrimp.
Pat the shrimp completely dry. Season with salt and pepper. Heat a large pan over medium-high heat and add 2 tablespoons of the butter. Once the butter is hot and foaming, add the shrimp in a single layer. Cook for 1 minute on the first side without moving them, then flip and cook for 30 seconds to 1 minute on the second side until pink and just cooked through. Remove the shrimp to a plate.
Reduce the heat to medium-low and add the remaining 2 tablespoons of butter to the same pan. Add the minced garlic and red pepper flakes and cook for 30 seconds, stirring constantly. Add the lemon juice and stir to combine. Pour this garlic butter sauce over the shrimp and toss to coat.
Spoon the creamy pea orzo into bowls and arrange the garlic butter shrimp on top. Drizzle any remaining garlic butter sauce over the top and garnish generously with fresh parsley.
Helpful Tips
The shrimp cook incredibly fast — do not walk away from them. Overcooking shrimp makes them tough and rubbery and it only takes an extra 30 seconds to ruin them. Cook them just until they turn pink and curl into a loose C shape, then remove from heat immediately. The orzo will continue to thicken as it sits — if it has thickened too much before you are ready to serve, stir in a splash of warm broth to loosen it back to a creamy consistency.
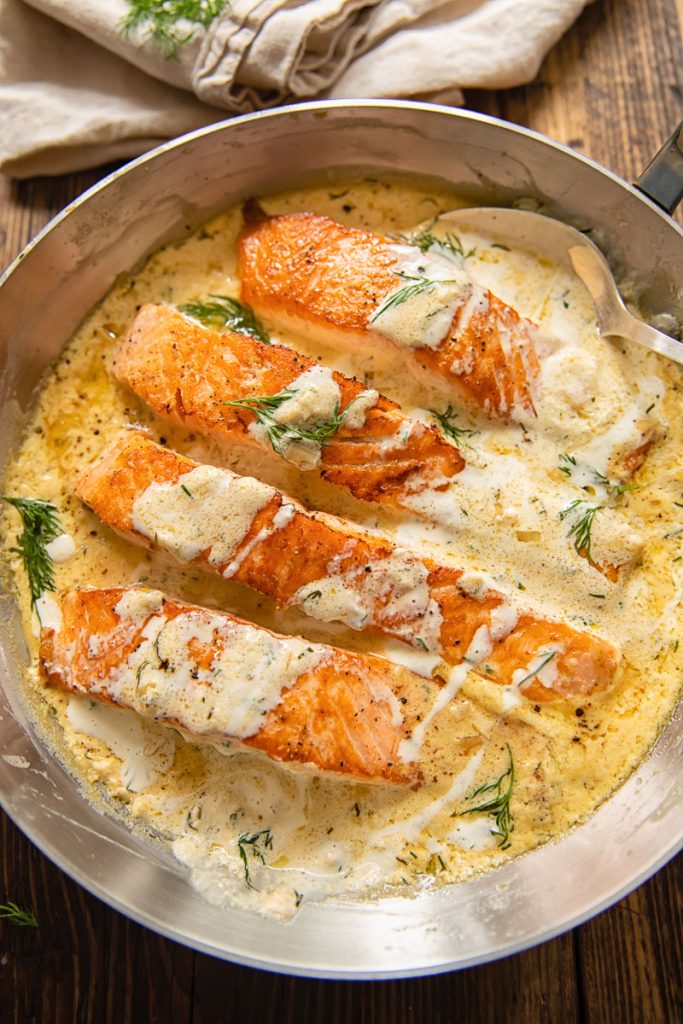
One Pan Spring Salmon With Lemon Dill Sauce
What Is It?
Salmon is a wonderful spring dinner protein — it is quick to cook, incredibly nutritious, beautifully flavoured, and works so naturally with the bright, fresh flavours of the season. In this recipe, salmon fillets are pan-seared until perfectly golden on the outside and silky inside, then served with a simple but absolutely incredible lemon dill sauce made from Greek yoghurt, fresh dill, lemon juice, and garlic. Served alongside roasted spring vegetables or a simple salad, this is an elegant, nutritious, and deeply satisfying dinner that comes together in about 20 minutes.
Ingredients
For the salmon:
- 4 salmon fillets (about 150 to 180 grams each, skin on)
- 1 tablespoon of olive oil
- Salt and black pepper to taste
- Half a teaspoon of garlic powder
- Half a teaspoon of smoked paprika
- Lemon slices for cooking and serving
For the lemon dill sauce:
- 1 cup of full-fat Greek yoghurt
- 2 tablespoons of fresh dill (finely chopped)
- 1 tablespoon of fresh chives (finely chopped)
- Juice and zest of 1 lemon
- 1 clove of garlic (finely grated)
- 1 tablespoon of olive oil
- Salt and black pepper to taste
- A pinch of sugar (optional, to balance the tang)
For serving:
- Steamed or roasted asparagus
- Roasted baby potatoes
- A simple green salad
- Extra fresh dill for garnish
Cooking Method
Make the lemon dill sauce first so the flavours have time to come together. Combine the Greek yoghurt, fresh dill, fresh chives, lemon juice, lemon zest, grated garlic, olive oil, salt, pepper, and a pinch of sugar if using. Mix well and taste — it should be bright, tangy, fresh, and deeply herby. Refrigerate until serving.
Pat the salmon fillets completely dry using paper towels. Season both sides generously with salt, black pepper, garlic powder, and smoked paprika.
Heat the olive oil in a large non-stick or stainless steel pan over medium-high heat until hot and shimmering. Place the salmon fillets in the pan skin-side down. Press down gently with a spatula for the first 30 seconds to prevent the skin from curling up. Cook without moving for about 4 to 5 minutes until the skin is crispy and golden and the pink colour has travelled about two thirds of the way up the side of the fillet.
Flip the salmon carefully and cook for another 1 to 2 minutes on the flesh side. The salmon is done when it flakes easily with a fork but still has a very slight translucency in the very centre — this is the perfectly cooked point. Remove from the pan and rest for 2 minutes.
Serve the salmon over or alongside your choice of vegetables, with a generous spoonful of the lemon dill sauce on top or on the side. Garnish with extra fresh dill and lemon slices.
Helpful Tips
Cooking salmon skin-side down first and pressing it flat for the first 30 seconds is what gives you that perfectly crispy skin. Do not move the salmon while it is cooking skin-side down — let it sit undisturbed until it is ready to flip. The lemon dill sauce can be made up to 2 days ahead and stored in the fridge — it gets even more flavourful as it sits. Cold salmon straight from the fridge will cook unevenly — let it sit at room temperature for 15 minutes before cooking.
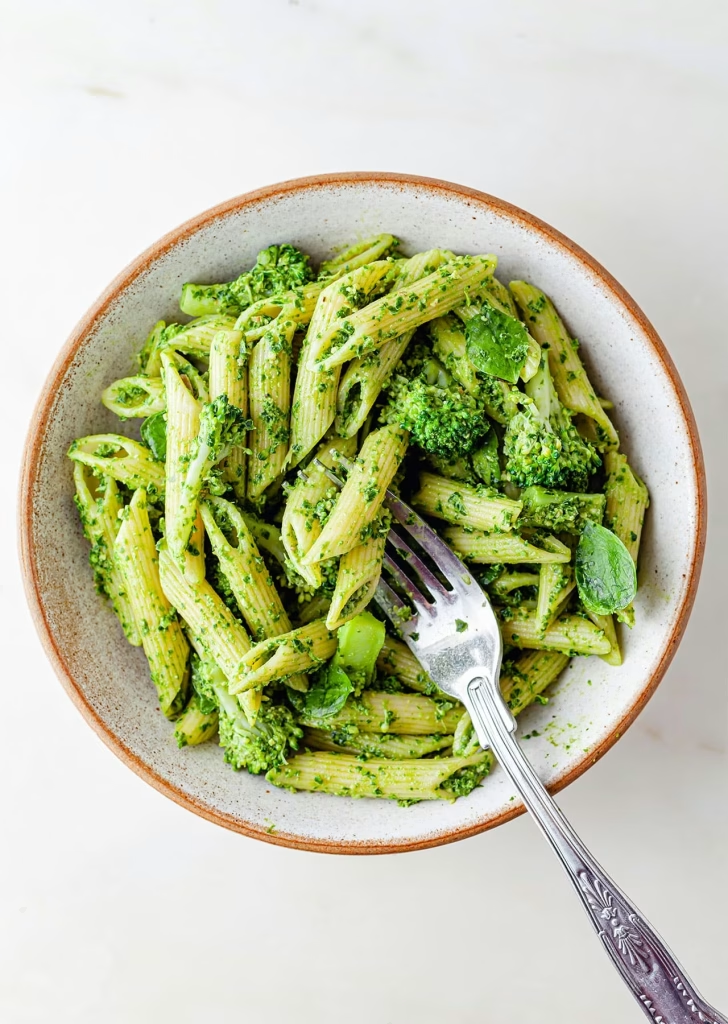
Spring Green Pasta With Pesto
What Is It?
This pasta is an absolute celebration of spring green vegetables and it is one of the freshest, most vibrant dinners you can make at this time of year. A homemade or good quality store-bought pesto is tossed through pasta along with blanched asparagus, fresh peas, baby spinach, and roasted cherry tomatoes, finished with lemon zest, toasted pine nuts, and plenty of Parmesan. It is vegetarian, endlessly adaptable, packed with nutrition, and completely delicious. The best part is that the whole thing comes together in about 20 minutes, making it perfect for any night of the week.
Ingredients
For the pasta:
- 350 grams of pasta (linguine, spaghetti, or rigatoni all work well)
- 1 bunch of asparagus (woody ends removed, cut into 3 centimetre pieces)
- 1 cup of fresh or frozen peas
- 2 large handfuls of baby spinach
- 1 cup of cherry tomatoes (halved and roasted or left fresh)
- Zest of 1 lemon
- A squeeze of fresh lemon juice
- Salt for the pasta water
For the fresh pesto:
- 2 cups of fresh basil leaves (packed)
- Half a cup of freshly grated Parmesan cheese
- Quarter of a cup of pine nuts (toasted)
- 2 cloves of garlic
- Half a cup of good quality extra virgin olive oil
- Salt and black pepper to taste
- A squeeze of lemon juice
For serving:
- Extra Parmesan for grating at the table
- Extra toasted pine nuts
- Fresh basil leaves
- A drizzle of good olive oil
- Extra lemon zest
Cooking Method
Make the pesto first. Toast the pine nuts in a dry pan over medium heat for 2 to 3 minutes, stirring frequently, until golden and fragrant. Watch them carefully as they burn quickly. Place the basil, toasted pine nuts, Parmesan, garlic, lemon juice, salt, and pepper in a food processor. Pulse several times to break everything down. With the processor running, slowly drizzle in the olive oil until the pesto comes together into a smooth, vibrant green sauce. Taste and adjust seasoning. The pesto should be bold, fresh, and very flavourful. Set aside.
If you are roasting the cherry tomatoes, toss them with a little olive oil and salt and roast at 200 degrees Celsius for 15 minutes until soft and slightly jammy. This is optional but adds a wonderful sweetness and depth.
Bring a large pot of well-salted water to a boil. Add the pasta and cook according to packet instructions until al dente. In the last 3 minutes of cooking, add the asparagus pieces to the boiling pasta water. In the last 1 minute, add the peas. Before draining, reserve about 1 cup of the starchy pasta cooking water — this is important for bringing the sauce together.
Drain the pasta, asparagus, and peas together. Return to the pot over very low heat. Add the baby spinach and toss it through — the heat from the pasta will wilt it. Add the pesto and toss everything together, adding the reserved pasta water a splash at a time to loosen the pesto into a glossy, coating sauce that clings to every strand of pasta. Add the lemon zest and a squeeze of lemon juice. Add the roasted or fresh cherry tomatoes and toss gently.
Serve immediately in wide bowls topped with extra Parmesan, toasted pine nuts, fresh basil, and a drizzle of good olive oil.
Helpful Tips
The reserved pasta water is not optional — the starchy water is what makes pesto cling to the pasta in a creamy, emulsified way rather than sitting in a pool at the bottom of the bowl. Never heat pesto over direct high heat as it turns from vibrant green to a dull, dark colour and loses its fresh flavour. Always toss it through the pasta off or over very low heat. Store-bought good quality pesto works perfectly well in this recipe on days when you do not have time to make your own.
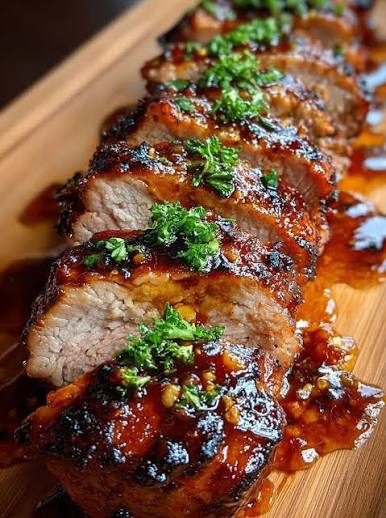
Honey Garlic Glazed Pork Tenderloin With Roasted Spring Vegetables
What Is It?
Pork tenderloin is one of the most underrated dinner proteins available. It is lean, tender, cooks incredibly quickly, and takes on flavours beautifully. In this recipe it is coated in a sticky, sweet, and savoury honey garlic glaze and roasted in the oven alongside a colourful selection of spring vegetables — radishes, baby carrots, snap peas, and spring onions — until everything is beautifully caramelised and deeply flavourful. This is an elegant, impressive dinner that looks like a lot more effort than it actually is and comes together in about 35 to 40 minutes from start to finish.
Ingredients
For the pork tenderloin:
- 2 pork tenderloins (about 400 to 500 grams each)
- Salt and black pepper to taste
- 1 teaspoon of garlic powder
- 1 teaspoon of onion powder
- 1 tablespoon of olive oil (for searing)
For the honey garlic glaze:
- 3 tablespoons of honey
- 3 tablespoons of soy sauce
- 4 cloves of garlic (minced)
- 1 tablespoon of Dijon mustard
- 1 tablespoon of apple cider vinegar
- Half a teaspoon of red pepper flakes
- 1 tablespoon of butter
For the spring vegetables:
- 200 grams of baby carrots (halved lengthwise)
- 1 bunch of radishes (halved)
- 200 grams of snap peas or sugar snap peas
- 4 spring onions (cut into 4 centimetre lengths)
- 2 tablespoons of olive oil
- Salt and black pepper to taste
- 1 teaspoon of dried thyme
Cooking Method
Preheat your oven to 210 degrees Celsius.
Make the honey garlic glaze by combining honey, soy sauce, minced garlic, Dijon mustard, apple cider vinegar, and red pepper flakes in a small saucepan over medium heat. Stir and bring to a gentle simmer. Cook for 2 to 3 minutes until slightly thickened. Remove from heat and stir in the butter. Set aside and divide into two portions — one for glazing before roasting and one for glazing at the end.
Pat the pork tenderloins completely dry and season all over with salt, pepper, garlic powder, and onion powder. Heat the olive oil in a large oven-safe skillet or roasting pan over high heat. Sear the tenderloins for about 2 minutes on each side, turning to brown all sides. This creates a flavourful crust that seals in juices and adds tremendous flavour.
Toss the baby carrots, radishes, and spring onions with olive oil, salt, pepper, and dried thyme. Arrange them around the seared pork in the pan. Brush half the honey garlic glaze generously over the pork tenderloins.
Roast in the oven for 18 to 22 minutes until the internal temperature of the pork reaches 63 degrees Celsius. In the last 5 minutes, add the snap peas to the pan as they cook very quickly. In the last 2 minutes, brush the remaining glaze over the pork.
Remove from the oven and let the pork rest for 5 minutes before slicing. The resting time is essential for juicy pork — cutting into it immediately lets all the juices run out.
Slice the tenderloin into medallions and arrange on a platter with the roasted spring vegetables. Drizzle any remaining glaze or pan juices over everything and serve.
Helpful Tips
Pork tenderloin cooks very quickly and it is very easy to overcook — use a meat thermometer and pull it at exactly 63 degrees Celsius for perfectly juicy, slightly pink in the centre pork that is safe to eat and at its most delicious. Adding snap peas only in the last 5 minutes prevents them from becoming overcooked and mushy. Radishes transform completely when roasted — they lose their sharp, peppery bite and become sweet, tender, and mild, which surprises most people in the most wonderful way.
Creamy Tuscan White Bean and Spinach Soup

What Is It?
This soup is one of the most deeply satisfying, most nourishing, and most effortlessly easy spring dinners on this entire list. A creamy, hearty Italian-inspired soup made from white cannellini beans simmered in a rich, garlicky tomato broth with fresh spinach, rosemary, and a finishing drizzle of good olive oil. It is thick, warming, packed with plant-based protein and fibre, and comes together in about 30 minutes from a pantry full of everyday ingredients. Served with thick slices of warm crusty bread for dipping, this is the kind of dinner that makes you feel completely cared for and nourished from the inside out.
Ingredients
- 2 cans of cannellini beans (800 grams total, drained and rinsed)
- 1 large onion (finely diced)
- 5 cloves of garlic (minced)
- 1 can of diced tomatoes (400 grams)
- 2 tablespoons of tomato paste
- 4 cups of vegetable broth
- 3 large handfuls of fresh baby spinach or chopped kale
- 3 tablespoons of extra virgin olive oil (plus extra for serving)
- 1 sprig of fresh rosemary (or half a teaspoon dried)
- 1 teaspoon of dried thyme
- Half a teaspoon of red pepper flakes
- Half a cup of heavy cream (optional, for a creamier version)
- Juice of half a lemon
- Salt and black pepper to taste
- Freshly grated Parmesan for serving
- Crusty bread for serving
Cooking Method
Heat the olive oil in a large pot over medium heat. Add the diced onion and cook for 5 to 6 minutes until soft and golden. Add the minced garlic, rosemary sprig, and red pepper flakes and cook for 1 to 2 minutes until the garlic is fragrant.
Add the tomato paste and stir through. Cook for 1 to 2 minutes until it darkens slightly. Add the diced tomatoes and stir everything together. Cook for 3 minutes.
Add the cannellini beans and vegetable broth. Stir well. Bring to a gentle boil then reduce to a simmer. Now here is the step that makes this soup wonderfully creamy without any cream — use a potato masher or the back of a spoon to mash about a quarter of the beans directly in the pot. This releases their starch into the broth and thickens the soup naturally into something thick, velvety, and satisfying. If you want a chunkier soup, mash less. If you want it very thick and creamy, mash more.
Add the dried thyme and let the soup simmer for 15 minutes so all the flavours meld together beautifully. If you are using cream, add it now and stir through. Add the baby spinach or kale and stir until completely wilted — about 2 to 3 minutes. Remove the rosemary sprig. Add the lemon juice, taste, and adjust the seasoning generously.
Serve in deep bowls with a very generous drizzle of your best extra virgin olive oil on top, a shower of freshly grated Parmesan, and thick slices of warm crusty bread for dipping.
Helpful Tips
Mashing some of the beans into the broth is the secret to a thick, creamy texture without needing a blender or adding a lot of cream. This soup tastes even better the next day as the flavours continue to develop. It freezes very well for up to 3 months. If using kale instead of spinach, add it 5 minutes earlier than spinach as kale takes slightly longer to become tender.
Lemon Butter Pasta With Spring Herbs
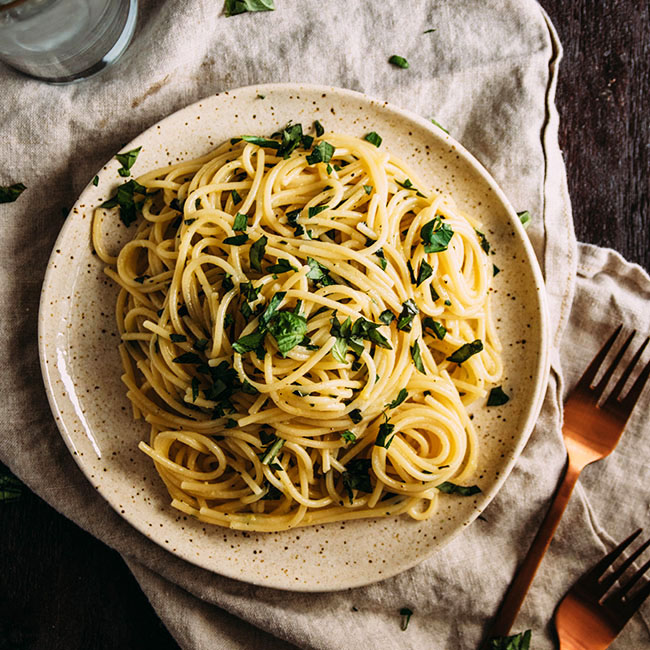
What Is It?
Sometimes the simplest things are the most beautiful and this pasta is the perfect example of that. Lemon butter pasta with spring herbs is a dish where perfectly cooked pasta is tossed in a simple sauce of butter, lemon juice, lemon zest, garlic, and a generous handful of fresh spring herbs — parsley, chives, mint, dill, and tarragon — until every strand is coated in a glossy, fragrant, bright sauce that tastes like spring in every single bite. There are no heavy ingredients, no long cooking times, and no complicated techniques. Just beautiful, fresh, simple food that is ready in 20 minutes and tastes absolutely extraordinary.
Ingredients
- 350 grams of spaghetti, linguine, or tagliatelle
- 5 tablespoons of good quality butter (cold, cut into cubes)
- 4 cloves of garlic (thinly sliced)
- Juice and zest of 2 large lemons
- Half a cup of freshly grated Parmesan cheese (plus extra for serving)
- A generous handful of fresh flat-leaf parsley (roughly chopped)
- A generous handful of fresh chives (thinly sliced)
- A small handful of fresh mint leaves (torn)
- A small handful of fresh dill (roughly chopped)
- Half a teaspoon of red pepper flakes
- Salt and black pepper to taste
- A drizzle of good extra virgin olive oil for finishing
Cooking Method
Bring a large pot of generously salted water to a rolling boil. Add the pasta and cook according to packet instructions until al dente. Before draining, reserve at least 1 and a half cups of the pasta cooking water — this starchy water is essential for making the sauce silky and emulsified.
While the pasta cooks, melt 2 tablespoons of the butter in a large, wide pan over medium-low heat. Add the thinly sliced garlic and red pepper flakes and cook very gently for about 2 to 3 minutes, stirring frequently, until the garlic is just barely golden and very fragrant. Do not let it brown. Add the lemon juice and let it sizzle and reduce for about 30 seconds. Remove from heat.
Drain the pasta and add it directly to the pan with the garlic butter. Return to very low heat. Add the remaining cubes of cold butter one at a time, tossing the pasta continuously and adding a splash of pasta water with each addition. This process of tossing the pasta with cold butter and starchy pasta water creates an emulsified, creamy sauce that clings to every strand. Add the lemon zest and toss through.
Add the Parmesan and toss again, adding more pasta water as needed to keep the sauce flowing and coating. Remove from heat and add all the fresh herbs — parsley, chives, mint, and dill. Toss everything together gently. Taste and season with salt and plenty of black pepper. The pasta should taste bright, buttery, lemony, and very fresh.
Serve immediately in warmed bowls with extra Parmesan grated over the top, a crack of black pepper, and a small drizzle of good olive oil.
Helpful Tips
The pasta water is not optional here — it is what emulsifies the butter and lemon into a proper sauce rather than having pools of melted butter sitting separately at the bottom of the bowl. Add the herbs completely off the heat or over the very lowest heat — heat wilts and darkens fresh herbs very quickly and you want them to stay bright green and fresh. Tasting and adjusting the seasoning generously is essential in a dish this simple — every element needs to be perfectly balanced.
Thai Inspired Spring Chicken Noodle Salad

What Is It?
This is the spring dinner for when you want something that is fresh, exciting, bold, and full of vibrant flavour without anything feeling heavy or overly rich. A warm or room-temperature salad of rice noodles, shredded poached or rotisserie chicken, fresh cucumber, shredded carrots, spring onions, fresh mint, cilantro, and crunchy peanuts, all dressed in a zingy Thai-inspired dressing made from lime juice, fish sauce, chilli, garlic, and a touch of honey. Every bite delivers freshness, crunch, brightness, and that wonderful combination of sweet, sour, salty, and spicy that Thai-inspired food does so beautifully. It is also wonderfully easy to make and can be prepared mostly ahead of time.
Ingredients
For the salad:
- 200 grams of rice noodles (vermicelli or flat rice noodles)
- 2 cups of cooked shredded chicken (rotisserie chicken works perfectly)
- 1 large cucumber (julienned or thinly sliced into matchsticks)
- 2 medium carrots (grated or julienned)
- 4 spring onions (thinly sliced)
- A large handful of fresh mint leaves
- A large handful of fresh cilantro
- A handful of fresh Thai basil (optional but wonderful)
- Half a cup of roasted peanuts (roughly chopped)
- 1 red chilli (thinly sliced, for garnish)
- Lime wedges for serving
- 1 cup of shredded red cabbage (optional, for extra colour and crunch)
For the Thai dressing:
- Juice of 3 limes (about 5 tablespoons)
- 3 tablespoons of fish sauce (or soy sauce for a vegetarian version)
- 2 tablespoons of honey or palm sugar
- 2 cloves of garlic (finely grated)
- 1 red chilli (finely diced — remove seeds for less heat)
- 1 tablespoon of sesame oil
- 1 tablespoon of rice vinegar
Cooking Method
Cook the rice noodles according to the packet instructions. Most rice noodles just need to be soaked in boiling water for 3 to 5 minutes — drain and rinse with cold water immediately. Toss with a drizzle of sesame oil to prevent them sticking together. Set aside.
Make the dressing by combining the lime juice, fish sauce, honey, grated garlic, diced chilli, sesame oil, and rice vinegar in a bowl or jar. Whisk or shake until the honey is dissolved and everything is well combined. Taste — it should be a perfect balance of sour, salty, sweet, and spicy. Adjust any element to suit your taste.
In a large wide bowl, combine the cooked rice noodles, shredded chicken, julienned cucumber, grated or julienned carrots, sliced spring onions, and shredded red cabbage if using. Toss everything together gently.
Pour the dressing over the salad and toss very well so everything is evenly coated. Add the fresh mint, cilantro, and Thai basil and toss again gently.
Pile onto a large serving platter or into individual bowls. Scatter the chopped roasted peanuts generously over the top along with the sliced red chilli. Serve with lime wedges on the side for anyone who wants an extra squeeze of freshness.
Helpful Tips
This salad is best dressed right before serving — if you are making it ahead, keep the dressing separate and add it just before eating. The noodles absorb the dressing quickly and can become a little dry if they sit for a long time — if making ahead, toss the noodles with a tiny bit of sesame oil rather than the full dressing to keep them from sticking. Rotisserie chicken makes this dish almost effortless — shred it while still warm for the easiest shredding. The dressing can be made up to 3 days ahead and stored in a jar in the fridge.
Frequently Asked Questions
What are the best spring vegetables to use for spring dinners?
Spring is one of the most exciting times of year for fresh produce and there are some wonderful vegetables that are at their absolute peak right now. Asparagus is the most iconic spring vegetable and works beautifully in roasted dishes, pastas, risottos, and salads. Fresh peas — both garden peas and snap peas — are wonderfully sweet and tender in spring and can be used in almost anything. Radishes, which most people only think of as a raw salad ingredient, become something completely different and wonderful when roasted. Baby spinach and arugula are at their most tender and mild in spring. Spring onions are sweeter and more delicate than regular onions and add a wonderful freshness to any dish. Artichokes, baby carrots, and tender leeks are also at their best in spring and are worth seeking out at your local market.
How do I make these spring dinners work for meal prepping?
Several of the recipes in this article meal prep particularly well. The white bean and spinach soup can be made in a large batch and keeps in the fridge for 4 to 5 days or freezes for up to 3 months. The frittata stores in the fridge for up to 4 days and is wonderful eaten cold or at room temperature the next day. The pesto pasta can be prepped by making the pesto ahead and storing it in the fridge for up to a week — cook the pasta and vegetables fresh when you are ready to eat. The Thai chicken noodle salad can have all its components prepared separately and assembled fresh each day. The lemon herb chicken thighs reheat beautifully in the oven at 180 degrees Celsius for about 10 minutes.
Can I substitute the proteins in these recipes to make them vegetarian?
Yes, most of the protein-based recipes in this article can be adapted very easily for vegetarian eating. In the lemon herb roasted chicken recipe, use thick slices of halloumi cheese or large portobello mushrooms instead of chicken — roast them with the same marinade and reduce the cooking time accordingly. In the garlic butter shrimp recipe, replace the shrimp with crispy pan-fried tofu or large butter beans tossed in the garlic butter. In the pork tenderloin recipe, a large cauliflower steak coated in the honey garlic glaze and roasted makes a wonderful vegetarian alternative. The honey garlic glaze works beautifully on vegetables and tofu.
How do I keep spring herb pastas and salads from becoming dry when I have leftovers?
Herb-based sauces like pesto and lemon butter pasta dry out and become clumped when stored because the pasta continues to absorb the sauce as it sits. When storing leftover pasta, always add a drizzle of olive oil and toss before refrigerating to coat the strands and prevent them from sticking. When reheating, add a splash of water or broth and warm gently over low heat, stirring until the sauce loosens and coats the pasta again. For herb salads like the Thai noodle salad, store the dressing separately and toss fresh portions right before eating. Fresh herbs should always be added right before serving — never store a dressed herb salad for more than a few hours.
What are the best wines or drinks to serve with spring dinners?
Spring dinners call for drinks that are light, fresh, and vibrant rather than heavy and full-bodied. For the lighter dishes like the lemon butter pasta, the spring pea risotto, and the salmon, a crisp white wine like Sauvignon Blanc, Pinot Grigio, or a dry Riesling pairs beautifully. For the pork tenderloin with honey garlic glaze, a light Pinot Noir or a slightly chilled rosé works wonderfully. For non-alcoholic options, a sparkling elderflower drink is a wonderful spring choice. Fresh lemonade or limeade with mint is refreshing alongside almost any spring dinner. Sparkling water infused with cucumber and fresh mint is wonderfully light and pairs well with the fresher, herb-forward dishes on this list.
Conclusion
Spring is one of the most wonderful times of year to be in the kitchen, and these 10 easy spring dinner recipes are a genuine celebration of everything that makes this season so special in the world of food. From the elegant simplicity of a lemon butter herb pasta to the impressive one-pan roasted chicken with asparagus, from the vibrant freshness of a spring green pesto pasta to the deeply comforting warmth of a Tuscan white bean soup, from the bright, bold flavours of a Thai chicken noodle salad to the creamy, luxurious spring pea risotto — every recipe on this list captures a different beautiful facet of spring cooking.
What connects all of these recipes is their respect for fresh, seasonal ingredients and their commitment to flavour that is vibrant and alive rather than heavy and muted. Spring food should feel like the season — new, fresh, full of energy and colour and life. And the best spring dinners do exactly that while still providing the warmth, satisfaction, and comfort that a proper home-cooked evening meal always delivers.
Whether you work your way through the entire list over the coming weeks or pick out two or three favourites to make again and again throughout the season, these recipes are going to make your spring evenings in the kitchen genuinely enjoyable. Use the freshest ingredients you can find, follow the tips, make each dish your own, and most importantly enjoy every single meal with the people you love. Spring is here and the food is beautiful. Happy cooking!