Hey dear, welcome to kiekie’s place! Oh, I am so excited about today’s post because we are talking about one of my absolute favourite things — summer food. There is something so special about eating during the summer months. The produce is at its very best, the days are long and bright, and everything just tastes better when the sun is shining and there is a warm breeze in the air. Summer is the season of fresh, vibrant, colourful food and today I am bringing you 10 of the best summer lunch ideas that are going to make your midday meals something you genuinely look forward to every single day.
Whether you are packing a lunch to take to work, putting together a quick meal at home, feeding the kids during the school holidays, hosting a casual outdoor gathering, or just looking for something light and satisfying that does not require you to stand over a hot stove for hours, this list has something for absolutely everyone. These ideas are fresh, flavourful, easy to make, and perfect for the warm weather months when you want food that feels as good as the season itself.
Every recipe on this list comes with a full breakdown of ingredients, a clear cooking method, helpful tips, and everything you need to make it successfully. So grab a cold drink, get comfortable, and let us talk summer lunch.
What Makes a Great Summer Lunch?

Before we get into the recipes, let us just quickly talk about what makes a lunch idea work particularly well in summer, because summer eating has its own set of considerations that are worth keeping in mind.
Summer lunches work best when they are light enough not to weigh you down during the hottest part of the day but satisfying enough to keep you energised and full until dinner. They should use fresh, seasonal ingredients that are at their flavour peak during the summer months — things like ripe tomatoes, sweet corn, fresh herbs, cucumbers, berries, avocados, and stone fruits. They should ideally be quick to prepare since nobody wants to spend the best hours of a summer day stuck in a hot kitchen. And they should be versatile enough to work whether you are eating at home, taking them to work, or packing them for a picnic or a day at the beach.
With all of that in mind, here are 10 summer lunch ideas that tick every single box.
Caprese Sandwich

What Is It?
A Caprese sandwich is an Italian-inspired lunch that takes the classic combination of fresh mozzarella, ripe tomatoes, and fresh basil — the holy trinity of Italian summer food — and tucks it between two slices of good crusty bread with a drizzle of extra virgin olive oil and balsamic glaze. It is simple, fresh, beautiful to look at, and the flavours are so perfectly balanced that it never gets old no matter how many times you eat it. This is the definition of summer food — minimal effort, maximum flavour, and ingredients that genuinely shine on their own.
Ingredients
- 1 large ciabatta roll or 2 thick slices of sourdough bread per sandwich
- 150 grams of fresh mozzarella (sliced into rounds — buffalo mozzarella is the best choice)
- 2 large ripe tomatoes (sliced into rounds — use the ripest, most flavourful tomatoes you can find)
- A generous handful of fresh basil leaves
- 2 tablespoons of good quality extra virgin olive oil
- 1 tablespoon of balsamic glaze (the thick, sweet kind — not regular balsamic vinegar)
- Salt and flaky sea salt to taste
- Black pepper to taste
- Optional — a thin spread of pesto on the bread for extra flavour
Cooking Method

This sandwich requires almost no cooking at all, which is exactly why it is perfect for summer. If you want to add a little extra flavour and texture, you can toast the bread lightly in a pan or under the grill until golden — but this is completely optional.
Slice the ciabatta roll in half or lay out your sourdough slices. If you are using pesto, spread a thin layer on the inside of both slices of bread. Drizzle a little olive oil on the bread as well.
Layer the sliced mozzarella on the bottom half of the bread. Season it with a small pinch of flaky salt and black pepper. Lay the sliced tomatoes on top of the mozzarella. Season the tomatoes generously with flaky salt and black pepper — do not skip the seasoning on the tomatoes, it draws out their juices and makes them taste dramatically more flavourful. Tuck the fresh basil leaves on top of the tomatoes, scattering them generously.
Drizzle the balsamic glaze over everything in a thin zigzag pattern. Add another drizzle of olive oil. Place the top half of the bread on and press down very gently. Slice in half and serve immediately.
Helpful Tips
The quality of your ingredients is everything in this sandwich because there is nowhere to hide with such a simple recipe. Use the ripest tomatoes you can find — in summer the farmers market will have tomatoes that are worlds apart from supermarket ones. Use real fresh mozzarella, not the shredded kind. Use good olive oil and real balsamic glaze. Season generously. That is all it takes to make this sandwich extraordinary.
Never refrigerate tomatoes — it kills their flavour and texture. Always store them at room temperature and use them on the same day you buy them for the best results. The sandwich is best eaten immediately after assembly as the bread can become soggy if it sits too long.
Greek Chicken Wraps With Tzatziki

What Is It?
Greek chicken wraps are one of the most satisfying, most flavourful, and most complete summer lunches you can make. Marinated, grilled or pan-cooked chicken strips seasoned with classic Greek herbs and lemon, wrapped in a warm flatbread with crisp salad vegetables, crumbled feta cheese, and a generous dollop of cool, creamy homemade tzatziki. This wrap has everything — protein, freshness, crunch, creaminess, and bold Mediterranean flavour that makes every single bite exciting. It is also very easy to pack and take with you, making it perfect for work lunches and picnics.
Ingredients
For the chicken:
- 400 grams of boneless skinless chicken breasts or thighs (sliced into strips)
- 3 tablespoons of olive oil
- Juice and zest of 1 lemon
- 3 cloves of garlic (minced)
- 1 teaspoon of dried oregano
- 1 teaspoon of smoked paprika
- Half a teaspoon of cumin
- Salt and black pepper to taste
For the tzatziki:
- 1 cup of full-fat Greek yoghurt
- 1 medium cucumber (grated and squeezed completely dry)
- 2 cloves of garlic (finely grated)
- 2 tablespoons of fresh dill (chopped)
- 1 tablespoon of fresh lemon juice
- 1 tablespoon of olive oil
- Salt to taste
For assembling the wraps:
- 4 large flatbreads or flour tortillas
- 1 cup of cherry tomatoes (halved)
- 1 small cucumber (sliced)
- Half a red onion (thinly sliced)
- 100 grams of crumbled feta cheese
- A handful of fresh lettuce or baby spinach
- Kalamata olives (optional)
- Fresh parsley for garnish
Cooking Method
Start by marinating the chicken. Combine the olive oil, lemon juice, lemon zest, minced garlic, dried oregano, smoked paprika, cumin, salt, and black pepper in a bowl. Add the chicken strips and toss to coat thoroughly. Cover and marinate in the fridge for at least 30 minutes, or up to overnight for the most flavourful result.
Make the tzatziki while the chicken marinates. Grate the cucumber on a box grater and place it in a clean kitchen towel. Squeeze out as much liquid as you possibly can — this step is essential for thick, creamy tzatziki. Wet cucumber makes watery tzatziki that slides out of the wrap and soaks the bread. Once dry, combine the cucumber with the Greek yoghurt, grated garlic, fresh dill, lemon juice, olive oil, and salt. Mix well, taste, and adjust the seasoning. Refrigerate until needed.
Cook the chicken by heating a pan or grill pan over medium-high heat with a drizzle of oil. Cook the marinated chicken strips for about 3 to 4 minutes per side until cooked through, slightly golden, and slightly charred at the edges. Remove from the heat and let rest for 2 to 3 minutes.
Warm the flatbreads in a dry pan or directly over a gas flame for a few seconds. Lay the flatbread out flat and spread a generous layer of tzatziki down the centre. Add the lettuce, cherry tomatoes, cucumber, red onion, and olives if using. Lay the cooked chicken strips on top. Sprinkle crumbled feta generously over everything. Fold the sides of the flatbread in and roll it up tightly. Slice in half and serve immediately.
Helpful Tips
Squeezing the cucumber completely dry before mixing the tzatziki is the most important step — never skip it. The tzatziki can be made the night before and stored in the fridge, which makes assembly the next day incredibly quick and easy. For meal prepping, store the components separately and assemble right before eating to prevent the bread from going soggy.
Watermelon Feta Mint Salad
What Is It?
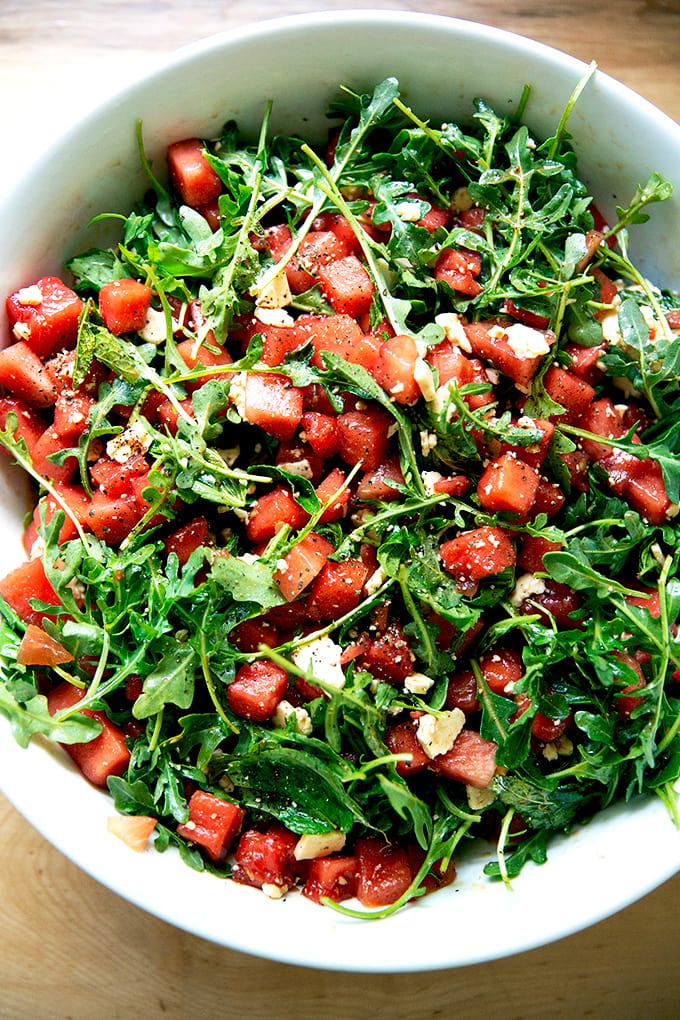
This salad is summer in a bowl. Sweet, juicy watermelon combined with salty crumbled feta cheese, fresh cool mint leaves, thinly sliced red onion, and a simple lime dressing — it sounds like a bold combination but the flavours work together in the most magical way. The sweetness of the watermelon against the saltiness of the feta, the freshness of the mint, the sharpness of the onion, and the bright acidity of the lime creates a salad that is incredibly refreshing, light, and addictive. This is the kind of thing you make for the first time slightly skeptically and end up making every single week for the rest of summer.
Ingredients
- Half a large watermelon (about 1.5 kilograms of watermelon flesh, cut into 3 centimetre cubes or triangles)
- 200 grams of good quality feta cheese (crumbled or cut into small cubes)
- A large handful of fresh mint leaves (torn or left whole)
- Half a small red onion (very thinly sliced)
- Half a cup of cucumber (sliced into thin half-moons — optional but adds extra freshness)
- A handful of arugula or baby spinach (optional — adds a peppery depth)
- Juice of 2 limes
- 2 tablespoons of good quality extra virgin olive oil
- A pinch of flaky sea salt
- A crack of black pepper
- A drizzle of honey (optional, for a touch of extra sweetness)
- Toasted pumpkin seeds or chopped pistachios for crunch (optional)
Cooking Method
This recipe requires absolutely no cooking at all, which makes it one of the most perfect hot weather lunch options imaginable.
Start by chilling your watermelon in the fridge for at least an hour before making this salad — a cold watermelon makes everything taste more refreshing. Cut the watermelon flesh into cubes or triangles, removing any seeds, and place them in a large, wide, shallow bowl or on a large serving platter. A platter works particularly well for this salad because you can spread everything out and it looks absolutely beautiful.
Scatter the thinly sliced red onion over the watermelon. If you find raw red onion very sharp, soak the slices in cold water for 10 minutes before using — this removes most of the harsh, sharp bite while keeping the colour and a mild onion flavour. Add the cucumber slices and arugula or baby spinach if you are using them.
Crumble the feta generously over everything. Scatter the fresh mint leaves over the top. In a small bowl, whisk together the lime juice, olive oil, and a tiny drizzle of honey if using. Pour this dressing over the salad. Season with a pinch of flaky sea salt and a crack of black pepper. Scatter the toasted pumpkin seeds or pistachios over the top for crunch if using.
Serve immediately — this salad does not wait well once assembled because the watermelon releases its juices and everything becomes wet very quickly. Dress it and eat it right away.
Helpful Tips
This salad must be eaten immediately after dressing — do not make it ahead and leave it sitting. If you need to prepare it in advance, keep all the components separate and assemble and dress right before serving. Use the ripest, sweetest watermelon you can find — the sweeter the watermelon the better the contrast with the salty feta. Seedless watermelon makes life easier. The lime juice is essential and much better than lemon juice for this salad — do not substitute.
Cold Sesame Noodles

What Is It?
Cold sesame noodles are one of those dishes that are incredibly simple to make but taste so complex and satisfying that they feel like much more than the sum of their parts. They are a popular dish in Chinese-American cooking — noodles tossed in a rich, creamy, slightly spicy sesame sauce made from tahini or peanut butter, soy sauce, sesame oil, garlic, ginger, and a splash of rice vinegar, served cold or at room temperature and topped with sliced cucumber, shredded carrots, and sesame seeds. They are perfect for summer because they are served cold, can be made ahead, and are so deeply satisfying and flavourful.
Ingredients
For the noodles:
- 300 grams of noodles (soba noodles, ramen noodles, rice noodles, or spaghetti all work)
- 1 tablespoon of sesame oil (tossed through the cooked, drained noodles immediately to prevent sticking)
For the sesame sauce:
- 4 tablespoons of tahini or peanut butter (smooth)
- 3 tablespoons of soy sauce
- 2 tablespoons of rice vinegar
- 1 tablespoon of sesame oil
- 1 tablespoon of honey or maple syrup
- 2 cloves of garlic (finely grated)
- 1 teaspoon of fresh ginger (grated)
- 1 to 2 tablespoons of sriracha or chilli sauce (adjust to your heat preference)
- 3 to 4 tablespoons of warm water (to thin the sauce to a coating consistency)
For topping:
- 1 medium cucumber (julienned or thinly sliced into matchsticks)
- 1 large carrot (grated or julienned)
- 3 green onions (thinly sliced)
- A handful of fresh cilantro or parsley
- 2 tablespoons of toasted sesame seeds
- Chopped roasted peanuts (optional)
- Lime wedges for serving
- Extra sriracha for serving
Cooking Method
Cook the noodles according to the packet instructions in well-salted boiling water. Drain them thoroughly and rinse with cold water — unlike pasta dishes where you want to keep the starch, here you want to cool the noodles quickly and prevent them from sticking together. Toss the drained, rinsed noodles immediately with the tablespoon of sesame oil. Set aside.
Make the sesame sauce by combining the tahini or peanut butter, soy sauce, rice vinegar, sesame oil, honey, grated garlic, grated ginger, and sriracha in a bowl. Whisk everything together until smooth. Add the warm water one tablespoon at a time and keep whisking until the sauce is smooth and pourable — not too thick but thick enough to coat the noodles. Taste the sauce and adjust — add more soy sauce for saltiness, more rice vinegar for tanginess, more honey for sweetness, or more sriracha for heat.
Pour the sauce over the noodles and toss very thoroughly so every strand is coated. The noodles should look glossy, slightly brown from the soy sauce, and evenly coated in the creamy sauce. Taste and adjust seasoning if needed.
Transfer to a serving bowl or individual portions. Top with the julienned cucumber, grated carrot, sliced green onions, fresh cilantro, toasted sesame seeds, and chopped peanuts if using. Serve with lime wedges on the side and extra sriracha for anyone who wants more heat.
Helpful Tips
These noodles are fantastic for meal prepping — make a big batch, toss in the sauce, and store in the fridge for up to 3 days. The sauce thickens as it sits in the fridge so add a splash of water and toss again when you are ready to eat. Store the toppings separately and add them fresh each time for the best texture. Soba noodles made from buckwheat are the most nutritious option and have a wonderful nutty flavour that pairs beautifully with the sesame sauce.
Avocado Chicken Salad

What Is It?
This is not your ordinary chicken salad. Instead of the traditional mayonnaise base, this version uses creamy mashed avocado as the binding ingredient, which makes it lighter, more nutritious, and full of the fresh, buttery flavour that avocado brings. It is mixed with shredded chicken, fresh lime juice, red onion, cilantro, jalapeño for a little heat, and cherry tomatoes, and it can be served in so many different ways — in a sandwich, wrapped in a lettuce leaf for a low-carb option, scooped onto crackers, stuffed into a pita, or eaten straight from the bowl with tortilla chips. It is versatile, incredibly delicious, and comes together in minutes.
Ingredients
- 2 cups of cooked, shredded chicken (rotisserie chicken works beautifully here)
- 2 large ripe avocados
- Juice of 2 limes
- Quarter of a red onion (very finely diced)
- 1 cup of cherry tomatoes (quartered)
- Half a jalapeño (finely diced — remove the seeds for less heat)
- A generous handful of fresh cilantro (chopped)
- Half a teaspoon of garlic powder
- Half a teaspoon of cumin
- Salt and black pepper to taste
For serving options:
- Toasted sandwich bread or ciabatta rolls
- Large romaine or butter lettuce leaves
- Pita bread or flatbread
- Crackers
- Tortilla chips
Cooking Method
This recipe requires no cooking whatsoever if you are using rotisserie chicken, which makes it one of the quickest summer lunch options imaginable.
Cut the avocados in half, remove the stones, and scoop the flesh into a large bowl. Add the lime juice immediately to prevent browning. Use a fork to mash the avocado — leave it slightly chunky rather than completely smooth. You want some texture in the final salad rather than a completely pureed consistency.
Add the shredded chicken to the bowl and mix it into the mashed avocado. The avocado should coat the chicken the way mayonnaise would in a traditional chicken salad. Add the finely diced red onion, quartered cherry tomatoes, diced jalapeño, fresh cilantro, garlic powder, cumin, salt, and black pepper. Mix everything together gently until well combined. Taste and adjust the seasoning — add more lime juice if it needs brightness, more salt if it tastes flat, more jalapeño if you want more heat.
Serve immediately in your preferred way — on toasted bread, in lettuce cups, in pita, on crackers, or with tortilla chips for scooping.
Helpful Tips
Avocado browns quickly when exposed to air — the lime juice in this recipe helps slow browning significantly. Press a piece of cling film directly onto the surface of the salad if storing, making sure there is no air between the film and the surface of the avocado. Eat within a few hours of making for the best colour and flavour. Rotisserie chicken is the ultimate shortcut for this recipe — shred it while it is still warm as it is much easier to shred than cold chicken.
Summer Corn and Black Bean Quesadillas

What Is It?
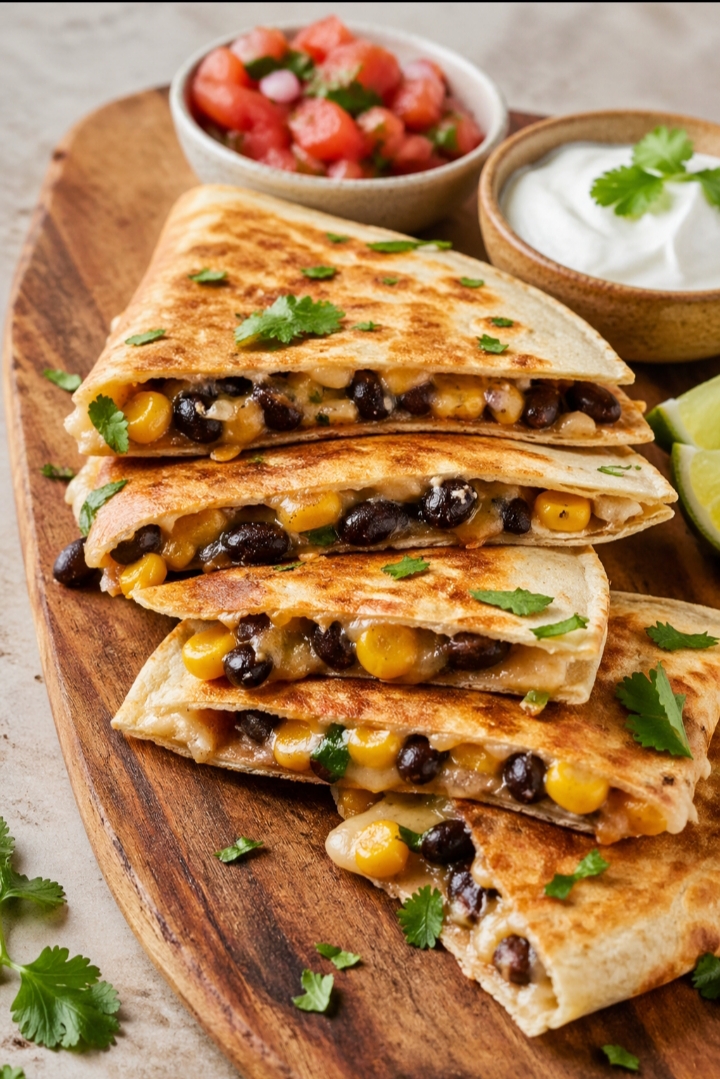
Quesadillas are one of the most crowd-pleasing, most satisfying, and most fun lunch options imaginable, especially in summer when fresh sweet corn is at its absolute best. These quesadillas are filled with a vibrant mixture of fresh or grilled corn kernels, black beans, red bell pepper, red onion, jalapeño, melted cheese, and fresh cilantro, all cooked in a pan until the tortilla is golden and crispy and the cheese inside is completely melted and gooey. They are vegetarian, very nutritious, incredibly delicious, and ready in about 15 minutes. Served with fresh salsa, sour cream, and guacamole, they are a complete and satisfying summer lunch.
Ingredients
For the filling:
- 2 ears of fresh corn (kernels cut from the cob) or 1 and a half cups of thawed frozen corn
- 1 can of black beans (drained and rinsed)
- 1 red bell pepper (finely diced)
- Quarter of a red onion (finely diced)
- Half a jalapeño (finely diced)
- A handful of fresh cilantro (chopped)
- Juice of 1 lime
- Half a teaspoon of cumin
- Half a teaspoon of smoked paprika
- Salt and black pepper to taste
For assembling:
- 4 large flour tortillas
- 2 cups of shredded Monterey Jack or cheddar cheese (or a Mexican blend)
- 1 tablespoon of butter or oil (for cooking)
For serving:
- Fresh salsa or pico de gallo
- Sour cream
- Guacamole or sliced avocado
- Lime wedges
- Hot sauce
Cooking Method
If you are using fresh corn, cut the kernels from the cob by standing the corn upright on a cutting board and slicing downward with a sharp knife. For extra flavour, cook the corn kernels in a dry, very hot pan for about 2 to 3 minutes without stirring until they develop a slight char and become lightly golden. This charring brings out a wonderful sweetness in the corn that takes the filling to another level. Remove from the pan and set aside.
In a bowl, combine the charred or thawed corn kernels, black beans, diced red bell pepper, red onion, jalapeño, fresh cilantro, lime juice, cumin, smoked paprika, salt, and black pepper. Toss everything together and taste for seasoning.
Heat a large pan or griddle over medium heat and add a small amount of butter or oil. Place one tortilla in the pan. Sprinkle a generous layer of cheese over one half of the tortilla. Spoon a generous amount of the corn and bean filling over the cheese. Sprinkle more cheese on top of the filling — the cheese on both sides is what holds the filling in place when you fold and flip. Fold the empty half of the tortilla over the filled half.
Cook for about 2 to 3 minutes until the bottom is golden and crispy. Carefully flip and cook the other side for another 2 minutes until equally golden and crispy and the cheese inside is completely melted.
Remove from the pan and let it rest for 1 minute before cutting into wedges. Serve with fresh salsa, sour cream, guacamole, and lime wedges.
Helpful Tips
The double layer of cheese — under and over the filling — is what holds the quesadilla together and prevents the filling from falling out when you slice it. Charring the corn in a dry hot pan is a wonderful optional step that adds a smoky sweetness to the filling. Do not overfill the quesadillas or they become difficult to flip and the filling spills out. Cook them on medium heat rather than high heat so the cheese has time to melt fully before the tortilla burns.
Nicoise Salad
What Is It?
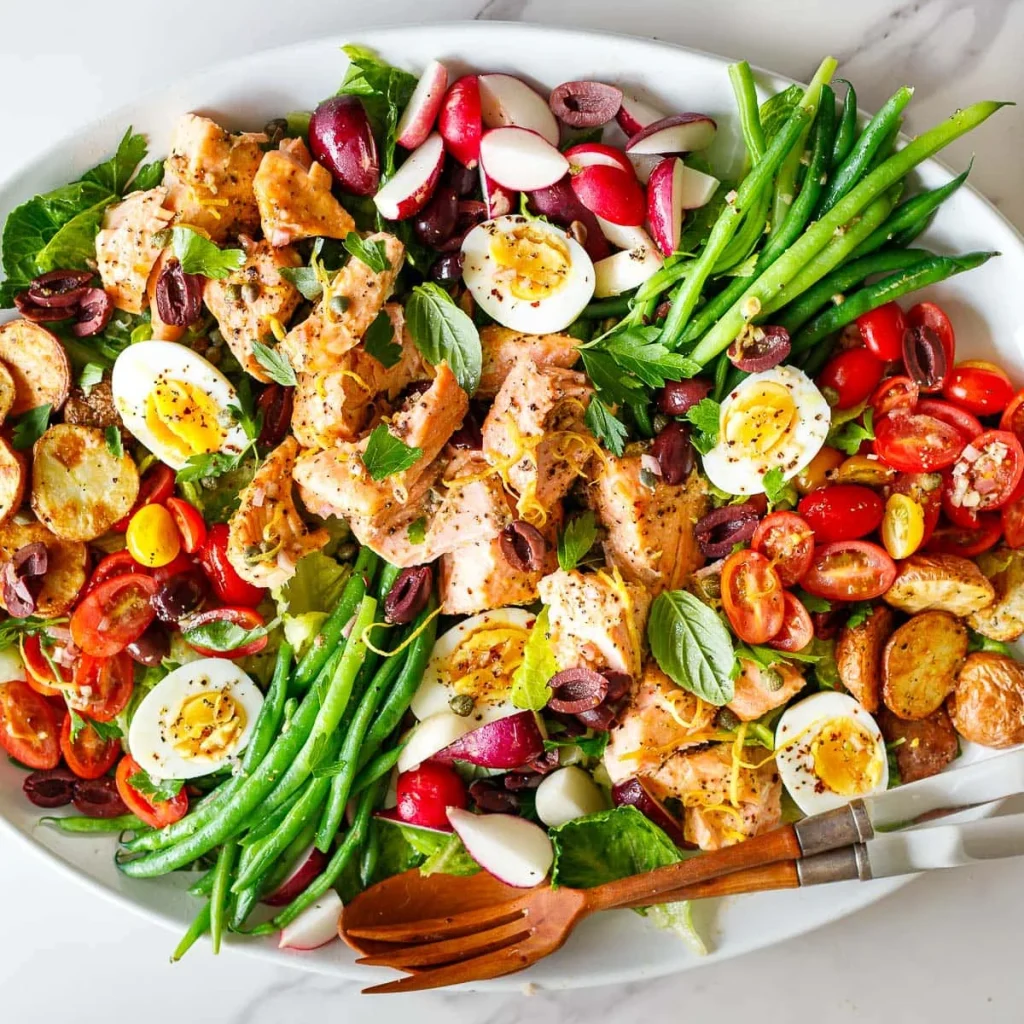
Nicoise salad is a classic French salad from the city of Nice on the French Riviera and it is one of the most complete, most nutritious, and most elegant salads in the entire world. It is a composed salad — meaning the components are arranged beautifully on a platter rather than tossed together — and it contains tuna, hard-boiled eggs, green beans, cherry tomatoes, Nicoise olives, boiled potatoes, and anchovy fillets, all dressed with a simple Dijon vinaigrette. It is hearty enough to be a full and satisfying meal, beautiful enough to serve to guests, and deeply flavourful in a way that feels very sophisticated and special.
Ingredients
For the salad:
- 2 cans of good quality tuna in olive oil (drained)
- 4 large eggs (hard-boiled and peeled)
- 200 grams of green beans (trimmed and blanched)
- 250 grams of baby potatoes (boiled until tender and halved)
- 1 cup of cherry tomatoes (halved)
- Half a cup of Nicoise olives or Kalamata olives
- 6 to 8 anchovy fillets (optional but traditional)
- A generous base of butter lettuce or mixed salad leaves
- Half a small red onion (very thinly sliced)
For the Dijon vinaigrette:
- 3 tablespoons of extra virgin olive oil
- 1 tablespoon of red wine vinegar
- 1 teaspoon of Dijon mustard
- Half a teaspoon of honey
- Salt and black pepper to taste
- 1 small clove of garlic (finely grated — optional)
Cooking Method
Start by preparing all the components. Hard-boil the eggs by placing them in a pot of cold water, bringing to a boil, then cooking for exactly 10 minutes. Transfer to a bowl of ice cold water immediately after cooking — this stops the cooking process and prevents that grey ring from forming around the yolk. Peel when cool and slice in half lengthwise.
Boil the baby potatoes in salted water until tender when pierced with a fork — about 12 to 15 minutes. Drain and let cool slightly, then slice in half.
Blanch the green beans by dropping them into boiling salted water for 2 to 3 minutes until bright green and just tender but still with a good snap. Drain immediately and rinse with cold water to stop the cooking and preserve the colour.
Make the vinaigrette by whisking together the olive oil, red wine vinegar, Dijon mustard, honey, grated garlic if using, salt, and black pepper until emulsified and smooth. Taste and adjust.
To assemble, arrange the salad leaves on a large platter. Arrange the halved potatoes in one section, the green beans in another, the cherry tomatoes in another, and the olives in another. Place the halved eggs cut-side up around the platter. Flake the tuna and place it in the centre. Lay the anchovy fillets over the tuna if using. Scatter the red onion slices over the whole platter.
Drizzle the vinaigrette evenly over everything. Serve immediately.
Helpful Tips
A Nicoise salad is all about the arrangement — take a moment to lay everything out beautifully on the platter because this salad is almost as much about how it looks as how it tastes. Do not overdress it — you want the vinaigrette to enhance the flavours rather than drown them. Use good quality tuna in olive oil rather than tuna in water for the best flavour. The anchovies are traditional and add a wonderful salty, umami depth — give them a try even if you are not usually an anchovy fan.
Tomato Basil Soup With Grilled Cheese
What Is It?
Tomato soup and grilled cheese is one of the most iconic and universally beloved lunch combinations in the entire world, and in summer when tomatoes are at their absolute peak of ripeness and flavour, making this soup from scratch with fresh tomatoes takes the whole experience to a completely different level. This is a fresh, vibrant tomato basil soup made by roasting ripe tomatoes in the oven to concentrate their sweetness and flavour, blending them with garlic, onion, basil, and a touch of cream into the silkiest, most flavourful tomato soup you have ever tasted, served alongside a perfectly golden, crispy, buttery grilled cheese sandwich. This is summer comfort food at its finest.
Ingredients
For the roasted tomato basil soup:
- 1 kilogram of ripe tomatoes (halved — use a mix of varieties for the best flavour)
- 1 large onion (quartered)
- 6 cloves of garlic (left whole and unpeeled)
- 3 tablespoons of olive oil
- 1 teaspoon of sugar
- 2 cups of vegetable or chicken broth
- A large handful of fresh basil leaves
- Half a cup of heavy cream
- Salt and black pepper to taste
- A pinch of red pepper flakes (optional)
For the grilled cheese:
- 8 slices of good quality white or sourdough bread
- 200 grams of good melting cheese — cheddar, gruyère, mozzarella, or a combination
- 3 tablespoons of softened butter (for spreading on the outside of the bread)
- Optional additions inside the sandwich — a smear of Dijon mustard, sliced tomato, or a few basil leaves
Cooking Method
Preheat your oven to 200 degrees Celsius. Place the halved tomatoes cut-side up on a large baking sheet. Add the quartered onion and whole unpeeled garlic cloves to the tray. Drizzle everything generously with olive oil, sprinkle with sugar, salt, black pepper, and red pepper flakes if using. Roast for 35 to 40 minutes until the tomatoes are soft, concentrated, slightly caramelised at the edges, and deeply fragrant. The roasting step is what transforms simple tomatoes into something extraordinary — the sugar caramelises, the moisture evaporates, and the flavour becomes much more concentrated and intense.
Once roasted, squeeze the garlic cloves out of their skins and discard the skins. Transfer the roasted tomatoes, garlic, onion, and all the juices from the baking tray into a blender or a large pot if using an immersion blender. Add the fresh basil leaves and the broth. Blend until completely smooth. If using a regular blender, blend in batches and be very careful with the hot liquid — never fill the blender more than halfway and hold the lid firmly.
Pour the blended soup into a pot over medium heat. Stir in the heavy cream and warm through gently. Taste and adjust the seasoning generously. If the soup is too thick, add a little more broth to reach your desired consistency.
Make the grilled cheese while the soup warms. Spread softened butter on the outside of each slice of bread. Layer the cheese generously on the unbuttered inside of the bread — and add any optional extras if using. Place the buttered side down in a pan over medium-low heat. Top with the second slice of bread, buttered side up. Cook for about 3 to 4 minutes until the bottom is deep golden and crispy. Flip and cook the other side for another 2 to 3 minutes until equally golden and the cheese inside is fully melted.
Serve the soup in deep bowls with a drizzle of cream on top and a fresh basil leaf, alongside the grilled cheese cut in half.
Helpful Tips
Roasting the tomatoes is what makes this soup so much better than any you can make by simply simmering fresh tomatoes on the stovetop. Do not skip this step. Use a variety of ripe tomatoes — a mix of regular, cherry, and vine tomatoes gives the best depth of flavour. The sugar sprinkled over the tomatoes before roasting helps them caramelise and brings out their natural sweetness. Butter on the outside of the grilled cheese bread — not inside — is the secret to that perfectly golden, crispy exterior.
Smashed Cucumber Salad

What Is It?
Smashed cucumber salad is a beloved dish in Chinese cuisine that has taken the food world completely by storm, and once you try it you will completely understand why. Instead of slicing cucumbers in the traditional way, you smash them with the flat side of a large knife or a rolling pin — this breaks them open, creates craggy, uneven surfaces that absorb dressing much better than smooth slices would, and gives the salad a wonderful rustic, irregular texture. The smashed cucumbers are dressed in a bold, garlicky, slightly spicy, tangy dressing made from soy sauce, rice vinegar, sesame oil, garlic, and chilli oil, and the result is a salad that is incredibly refreshing, deeply flavourful, and absolutely addictive.
Ingredients
For the salad:
- 4 medium cucumbers (English cucumbers or Persian cucumbers work best)
- 1 teaspoon of salt (for drawing out moisture)
- 3 cloves of garlic (finely minced or grated)
- 2 green onions (thinly sliced)
- A handful of fresh cilantro (optional)
- 2 tablespoons of toasted sesame seeds
For the dressing:
- 2 tablespoons of soy sauce
- 2 tablespoons of rice vinegar
- 1 tablespoon of sesame oil
- 1 tablespoon of chilli oil or chilli crisp (adjust to your heat preference)
- 1 teaspoon of sugar or honey
- Half a teaspoon of grated fresh ginger
- 1 teaspoon of toasted sesame seeds
Cooking Method
Place the whole cucumbers on a cutting board. Use the flat side of a large knife or a rolling pin to smash each cucumber with firm, downward pressure along its length. The cucumber will crack and split open. Cut the smashed cucumbers into roughly 3 to 4 centimetre pieces — they will be irregular in shape and that is exactly what you want.
Place the smashed and cut cucumber pieces in a colander or bowl and toss with the teaspoon of salt. Let them sit for 10 to 15 minutes. The salt draws out excess moisture from the cucumbers so the dressing is not diluted and the salad does not become watery. After 15 minutes, squeeze the cucumbers gently to remove any excess liquid and pat them dry with a paper towel.
Make the dressing by combining the soy sauce, rice vinegar, sesame oil, chilli oil, sugar or honey, and grated ginger in a small bowl. Whisk until the sugar is dissolved and everything is well combined. Taste and adjust — add more chilli oil for heat, more vinegar for tang, more sugar for sweetness.
Place the salted, drained cucumbers in a serving bowl. Add the minced garlic, sliced green onions, and fresh cilantro if using. Pour the dressing over the cucumbers and toss everything together very well. Sprinkle the toasted sesame seeds over the top. Let the salad sit for 5 minutes before serving so the cucumbers can absorb the dressing.
Serve chilled or at room temperature as a standalone summer lunch or alongside other dishes.
Helpful Tips
The salting and draining step is essential — wet cucumbers will dilute the dressing and make the salad watery and bland. Chilli crisp — a Chinese condiment of chilli flakes and aromatics in oil — is the best choice for this dressing and can be found in most Asian grocery stores. The smashing technique is genuinely what makes this salad special — do not slice the cucumbers instead, as you will get a completely different texture and the dressing will not cling the same way.
Strawberry Spinach Salad With Balsamic Dressing

What Is It?
Strawberry spinach salad is one of the most beautiful, most vibrant, and most unexpectedly delightful salads you can make during summer. Sweet, perfectly ripe strawberries combined with fresh baby spinach, crunchy candied pecans, creamy goat cheese or feta, thinly sliced red onion, and a rich, slightly sweet balsamic dressing — this salad is the kind of thing that makes people stop mid-bite and say “this is incredible.” It is light, fresh, and nutritious but so full of flavour and texture that it feels genuinely indulgent. This is the perfect summer lunch when you want something that looks and tastes beautiful without any cooking at all.
Ingredients
For the salad:
- 4 large handfuls of fresh baby spinach
- 300 grams of fresh strawberries (hulled and sliced)
- 100 grams of goat cheese or feta (crumbled)
- Half a cup of candied pecans or toasted walnuts
- Quarter of a small red onion (very thinly sliced)
- Half a cucumber (thinly sliced — optional)
- A handful of fresh basil leaves (optional but adds a wonderful summery aroma)
- 2 tablespoons of toasted pumpkin seeds (optional)
For the balsamic dressing:
- 3 tablespoons of extra virgin olive oil
- 2 tablespoons of balsamic vinegar (or balsamic glaze for a sweeter, thicker dressing)
- 1 teaspoon of Dijon mustard
- 1 teaspoon of honey
- 1 small clove of garlic (finely grated — optional)
- Salt and black pepper to taste
For quick candied pecans (if making from scratch):
- 1 cup of pecan halves
- 2 tablespoons of sugar
- 1 tablespoon of butter
- A pinch of salt
Cooking Method
If you are making the candied pecans from scratch, do this first. Melt the butter in a small pan over medium heat. Add the sugar and stir until it begins to melt. Add the pecans and toss them in the melting sugar, stirring constantly for about 2 to 3 minutes until the sugar has caramelised and coated the pecans in a golden, glossy layer. Tip them out immediately onto a sheet of parchment paper and spread them out. Sprinkle with a pinch of salt. Let them cool completely — they will harden as they cool. Once cool, break them apart into individual pieces.
Make the balsamic dressing by whisking together the olive oil, balsamic vinegar, Dijon mustard, honey, grated garlic if using, salt, and black pepper in a small bowl until emulsified. Taste and adjust — add more honey if it needs sweetness, more vinegar if it needs tang.
Place the baby spinach on a large serving platter or in a wide salad bowl. Arrange the sliced strawberries over the spinach. Add the thinly sliced red onion, cucumber slices, and fresh basil leaves. Crumble the goat cheese or feta generously over everything. Scatter the candied pecans and pumpkin seeds over the top.
Drizzle the balsamic dressing evenly over the whole salad right before serving. Toss gently at the table or leave as a composed salad for people to serve themselves.
Helpful Tips
Always dress this salad right before serving — dressed spinach wilts very quickly and becomes soft and soggy if it sits in dressing for more than a few minutes. If you are meal prepping this salad, store all the components separately and dress right before eating. Use the ripest, sweetest strawberries you can find — summer strawberries are worlds apart from out-of-season ones. The candied pecans can be made in a large batch and stored in an airtight container for up to 2 weeks — they are wonderful on salads, as a snack, or on top of yoghurt.
Frequently Asked Questions
What are the best summer lunch ideas for meal prepping?
Several of the recipes in this article meal prep exceptionally well. The cold sesame noodles are one of the best options — make a big batch, toss in the sauce, and store in the fridge for up to 3 days with the toppings kept separately. The avocado chicken salad is best eaten fresh but the shredded chicken can be prepared and stored ahead of time. The Nicoise salad components can all be prepared separately and assembled fresh each day. The quesadilla filling can be made ahead and stored for 3 to 4 days, with the quesadillas assembled and cooked fresh each time in just a few minutes. The roasted tomato soup freezes beautifully and can be made in a large batch.
How do I keep my salads from getting soggy when packing them for work?
The number one rule is to always pack the dressing separately and add it right before eating. Keep wet ingredients like tomatoes and cucumbers separate from leafy greens until you are ready to eat. If possible, pack heavier, more robust ingredients at the bottom of your container and more delicate leaves on top. Use an insulated lunch bag with an ice pack to keep everything cold, which also helps maintain the crispness of vegetables. Glass containers seal better than plastic and keep food fresher for longer.
What are good protein options to add to summer salads to make them more filling?
Grilled or rotisserie chicken is the most popular and versatile option — it pairs with virtually every summer salad and can be prepared in a large batch at the beginning of the week. Hard-boiled eggs are quick, affordable, and very nutritious. Canned tuna or salmon in good quality olive oil is an excellent no-cook protein that adds great flavour. Chickpeas — either from a can, drained and rinsed, or roasted in the oven until crispy — add plant-based protein and wonderful texture. Grilled shrimp is wonderful on summer salads and cooks in just a few minutes. Edamame, feta cheese, and avocado also add protein and healthy fats that make salads more satisfying and filling.
Can I make any of these lunches completely ahead of time for the next day?
Yes, many of them work very well when prepared the day before. The cold sesame noodles actually taste better the next day as the flavours have more time to develop — just add a splash of water when you are ready to eat to loosen the sauce. The roasted tomato soup stores in the fridge for up to 4 days and reheats perfectly. The Nicoise salad components all keep well separately for several days. The quesadilla filling stores for 3 to 4 days. The Caprese sandwich and the strawberry spinach salad should be assembled fresh since both have components that deteriorate quickly once assembled.
What summer drinks pair well with these lunch ideas?
Summer lunches call for summer drinks. Fresh lemonade or limeade pairs beautifully with almost everything on this list, especially the Mexican-inspired dishes like the quesadillas and the avocado chicken salad. Iced herbal teas — particularly mint, hibiscus, or peach — are wonderfully refreshing alongside salads. Sparkling water with a slice of lemon or cucumber is a light, refreshing option. For the Mediterranean-inspired dishes like the Greek chicken wrap, the Nicoise salad, and the Caprese sandwich, a chilled glass of sparkling water with lemon or a light fruit spritzer works beautifully.
Conclusion

Summer is truly the most wonderful time of year for food lovers, and these 10 summer lunch ideas are a celebration of everything that makes warm weather eating so special. From the simplicity of a perfect Caprese sandwich to the elegance of a composed Nicoise salad, from the bold flavours of cold sesame noodles to the pure refreshment of a smashed cucumber salad, from the comforting combination of roasted tomato soup and grilled cheese to the vibrant beauty of a strawberry spinach salad — every single recipe on this list captures something unique and wonderful about summer cooking.
What all of these recipes share is a commitment to fresh, seasonal ingredients treated with respect and care. Summer produce is so naturally beautiful and so full of flavour at this time of year that the best thing you can do as a cook is let it shine. Use the ripest tomatoes. Find the sweetest strawberries. Choose the most fragrant basil. Buy corn at the farmers market when it is freshly picked. Use the best olive oil you have. These small choices make a huge difference in the final result and turn a simple lunch into something genuinely memorable.
Whether you are meal prepping these lunches for a busy work week, packing them for a picnic in the park, putting them together for a casual backyard gathering, or just making something special for yourself on a beautiful summer afternoon, these recipes are going to serve you incredibly well. Pick your favourites, make them your own, experiment with the ingredients and variations, and most importantly enjoy every single bite of the most delicious season of the year. Happy cooking and happy summer!