Hey gorgeous, welcome to kiekie’s place! Today I am bringing you something that I know so many of you have been waiting for — a mac and cheese recipe that is genuinely, honestly delicious but also made with ingredients that are actually good for you. I know what you might be thinking. Healthy mac and cheese? Is that even possible? Can something that is lighter and better for you actually taste as good as the real thing? Friend, I am here to tell you with complete confidence — yes. Absolutely yes. And this recipe is the proof.
This Healthy Baked Mac and Cheese is creamy, cheesy, deeply satisfying, golden on top, tender on the inside, and everything you love about classic mac and cheese — but made with wholesome ingredients that nourish your body while still completely delivering on flavour and comfort. We are talking about a sauce that gets its creaminess from a combination of cauliflower, Greek yoghurt, and a modest amount of real cheese rather than a bucket of butter and heavy cream. Whole wheat or chickpea pasta that gives you more fibre and protein than regular pasta. A beautiful golden, slightly crispy breadcrumb topping that makes every bite feel indulgent and satisfying.
This is the kind of recipe that proves beyond any doubt that healthy eating does not have to mean bland, sad, joyless food. It means making smart choices about ingredients while still cooking with care, with technique, and with a genuine commitment to making food that tastes incredible and makes you feel genuinely good after eating it. This mac and cheese does all of that and more.
Whether you are making it for your family on a weeknight, cooking for someone who is trying to eat a little healthier, meal prepping for the week, or just looking for a way to enjoy one of your favourite comfort foods without the guilt, this recipe is going to completely deliver. Let us get into every single detail.
What Makes This Mac and Cheese Healthy?
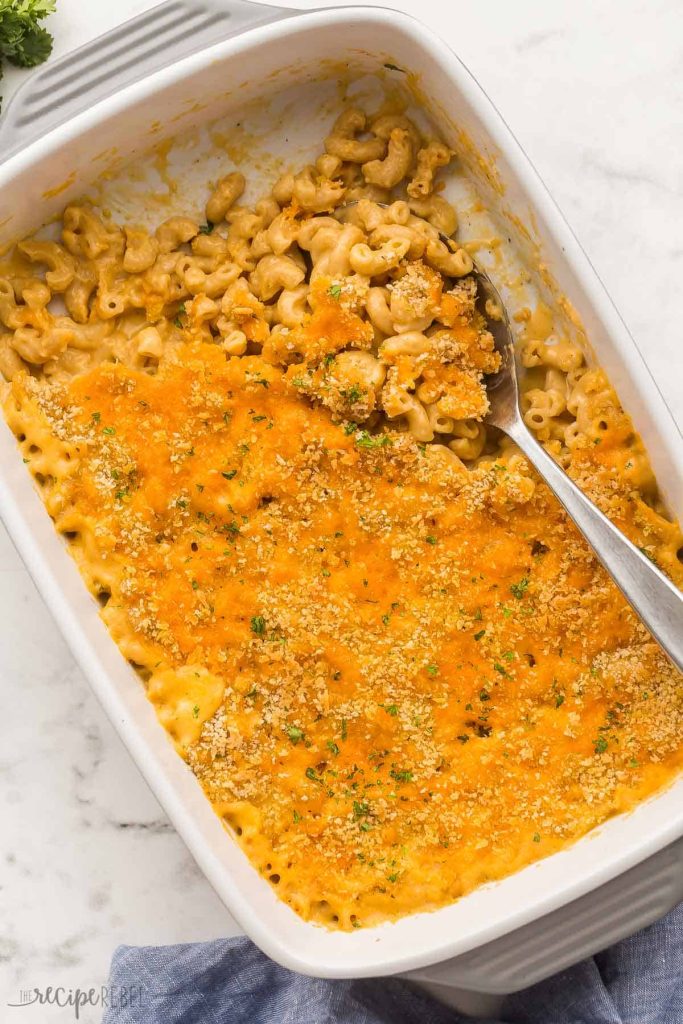
Source: thereciperebel
Before we get into the recipe itself, let us talk about what specifically makes this version healthier than traditional mac and cheese, because understanding the swaps and why they work helps you appreciate and trust the recipe more.
The pasta: Traditional mac and cheese uses regular refined white pasta. This recipe uses whole wheat pasta, chickpea pasta, or lentil pasta — all of which contain significantly more fibre, more protein, and more micronutrients than white pasta. More fibre means you feel fuller for longer. More protein means the meal is more sustaining. And the higher micronutrient content means you are getting more nutritional value from the same portion size. Chickpea pasta in particular has about twice the protein and three times the fibre of regular pasta.
The sauce base: Traditional mac and cheese sauce is made from a roux of butter and flour, whole milk or cream, and a very large amount of cheese. This recipe builds the sauce on a base of pureed cauliflower, which adds a wonderful creaminess and body to the sauce while contributing vitamins, fibre, and volume without a lot of calories. The cauliflower puree is virtually undetectable in the finished dish — it disappears completely into the sauce and all you taste is creamy, cheesy goodness.
The dairy: Instead of heavy cream and full amounts of butter, this recipe uses Greek yoghurt for creaminess and tang, low-fat milk for liquid, and a smaller but still meaningful amount of real, good quality cheese. Using Greek yoghurt rather than cream adds protein and probiotics while reducing fat. Using real cheese — just a smaller amount of better quality, more strongly flavoured varieties — means you still get full, genuine cheese flavour without needing as much.
The topping: Traditional baked mac and cheese is often topped with more cheese or butter-soaked breadcrumbs. This version uses whole wheat breadcrumbs toasted with a small amount of olive oil, which gives you the same satisfying crunch and golden colour with significantly less fat.
The vegetables: This recipe sneaks in a meaningful amount of cauliflower through the sauce and optionally adds other vegetables like spinach, broccoli, or roasted butternut squash that add nutrition, colour, and flavour without making the dish feel virtuous or depressing.
Ingredients You Will Need
For the pasta:
- 400 grams of whole wheat elbow macaroni, chickpea pasta, or lentil pasta
- Generous salt for the pasta cooking water
For the cauliflower cheese sauce:
- 1 medium head of cauliflower (about 600 grams, cut into florets)
- 2 cups of low-fat milk or unsweetened oat milk (warmed)
- Half a cup of plain full-fat Greek yoghurt (at room temperature)
- 1 and a half cups of freshly grated sharp cheddar cheese (use the sharpest cheddar you can find — the stronger the flavour, the less you need)
- Half a cup of freshly grated Parmesan cheese
- Quarter of a cup of freshly grated Gruyère cheese (optional but adds wonderful depth)
- 2 tablespoons of butter (unsalted)
- 2 tablespoons of plain flour or whole wheat flour
- 3 cloves of garlic (minced)
- Half a teaspoon of Dijon mustard
- Half a teaspoon of dried mustard powder
- Half a teaspoon of smoked paprika
- Quarter of a teaspoon of nutmeg
- Salt and white pepper to taste
- A pinch of cayenne pepper (optional)
For the breadcrumb topping:
- Half a cup of whole wheat breadcrumbs or panko breadcrumbs
- 2 tablespoons of olive oil or melted butter
- 2 tablespoons of freshly grated Parmesan cheese
- Half a teaspoon of garlic powder
- Half a teaspoon of smoked paprika
- A pinch of dried thyme
- Salt and black pepper to taste
Optional vegetable additions:
- 2 large handfuls of fresh baby spinach (stirred through the sauce at the end)
- 1 cup of small broccoli florets (blanched and added to the pasta before baking)
- Half a cup of roasted butternut squash (cubed and roasted until golden)
- Half a cup of frozen peas (thawed and stirred through)
Step-by-Step Cooking Method
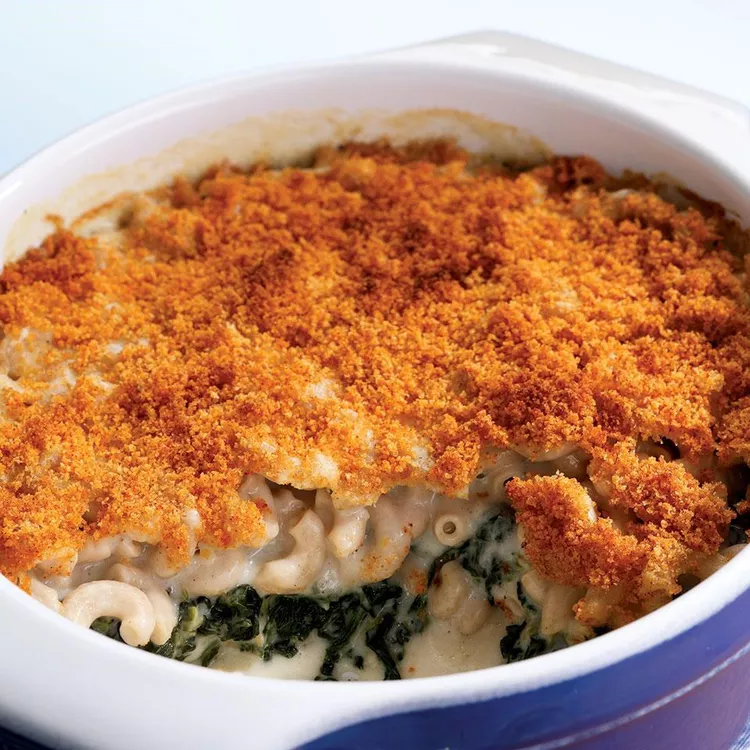
Step 1 — Cook and Puree the Cauliflower
This is the step that makes the magic happen in this recipe and it is worth doing properly. Place the cauliflower florets in a large pot of well-salted boiling water. Cook for about 10 to 12 minutes until the cauliflower is very, very tender — much softer than you would normally cook it. You want it to be so soft that it blends into a completely smooth, silky puree with no lumps or grainy bits remaining.
Drain the cauliflower thoroughly and let it steam dry in the colander for a minute or two. Excess moisture in the cauliflower will make the sauce watery, so giving it time to release steam is important.
Transfer the drained cauliflower to a blender or food processor. Add half a cup of the warm milk. Blend on high until completely smooth and silky — this should take a full 2 to 3 minutes of blending. Stop and scrape down the sides of the blender a couple of times during blending to make sure everything is incorporated. The finished cauliflower puree should be velvety smooth with absolutely no texture or graininess remaining. Set aside.
The cauliflower puree at this stage will look like a smooth, white sauce — it has almost no colour and very little flavour on its own. This is exactly what you want. Its job is to add creaminess, body, and nutrition to the cheese sauce without contributing any noticeable cauliflower flavour to the finished dish.
Step 2 — Cook the Pasta
While the cauliflower cooks, bring a large pot of water to a rolling boil. Add a very generous amount of salt — the water should taste like mild seawater. Add the pasta and cook according to the packet instructions until just barely al dente — about 1 to 2 minutes less than the minimum time suggested. The pasta will continue cooking in the oven during baking, so you want it slightly underdone at this stage so it does not become mushy in the finished dish.
Drain the pasta and toss it immediately with a tiny drizzle of olive oil to prevent sticking. Set aside.
Step 3 — Make the Cheese Sauce
Heat the butter in a large, wide saucepan over medium heat. Once the butter is melted and foaming, add the minced garlic and cook for about 1 minute, stirring constantly, until fragrant. Add the flour and stir it into the butter and garlic. Cook, stirring continuously, for about 1 to 2 minutes until the raw flour smell has cooked off and the mixture looks smooth and slightly golden. This butter-flour mixture is called a roux and it is what will give the sauce body and help it thicken properly.
Gradually add the remaining warm milk to the roux, pouring it in a slow, steady stream while whisking continuously. If you add the milk too quickly or stop whisking, lumps will form. Keep whisking and keep the liquid flowing in slowly and steadily. Once all the milk is added, continue whisking over medium heat for about 3 to 4 minutes until the sauce has thickened enough to coat the back of a spoon. This is your bechamel base.
Add the Dijon mustard, mustard powder, smoked paprika, nutmeg, cayenne if using, and a generous seasoning of salt and white pepper. Stir everything through.
Now add the cauliflower puree to the bechamel base and whisk everything together until completely smooth and well combined. The mixture should look like a very thick, creamy, smooth sauce. It will be much thicker than a traditional cheese sauce at this point — that is correct, because the pasta and cheese addition will thin it slightly.
Reduce the heat to the lowest setting. Add the Greek yoghurt and whisk it in gently. The yoghurt must be at room temperature — cold yoghurt added to a hot sauce can cause it to curdle. Whisk until smooth and fully incorporated. The yoghurt adds a beautiful tang and creaminess that mimics the richness of cream very effectively.
Now add the cheeses — the sharp cheddar, the Parmesan, and the Gruyère if using — in three or four additions, stirring between each addition and letting each addition fully melt before adding the next. Keep the heat very low during this process — high heat causes cheese to become grainy and oily rather than smooth and creamy. Stir gently and patiently between each addition. The finished cheese sauce should be silky, smooth, deeply golden from the cheddar, and very flavourful.
Taste the sauce carefully. It should taste cheesy, slightly tangy, well-seasoned, and deeply satisfying. The salt level is important — it should taste properly seasoned. Adjust the seasoning as needed.
Step 4 — Combine the Pasta and Sauce
Preheat your oven to 190 degrees Celsius. Lightly grease a large baking dish — a 23 by 33 centimetre rectangular dish or any similarly sized oven-safe dish works well.
If you are adding vegetables, do so now. Stir fresh spinach through the hot sauce and let it wilt from the heat. Add blanched broccoli florets, roasted butternut squash cubes, or thawed peas to the pasta before combining with the sauce.
Add the cooked, drained pasta to the sauce and stir everything together very thoroughly so every piece of pasta is completely and evenly coated in the sauce. The pasta should be well coated — not swimming in sauce but generously covered. If the mixture looks too thick and dry, add a splash of warm milk and stir through. If it looks too thin and watery, cook over low heat for another minute while stirring to help it thicken slightly before transferring to the baking dish.
Pour and scrape the pasta and sauce mixture into the prepared baking dish. Spread it out into an even layer.
Step 5 — Make and Add the Breadcrumb Topping
In a small bowl, combine the whole wheat breadcrumbs or panko, olive oil or melted butter, grated Parmesan, garlic powder, smoked paprika, dried thyme, salt, and black pepper. Toss everything together with a fork until the breadcrumbs are evenly coated in the oil and seasoning. The mixture should look slightly clumped and golden from the olive oil.
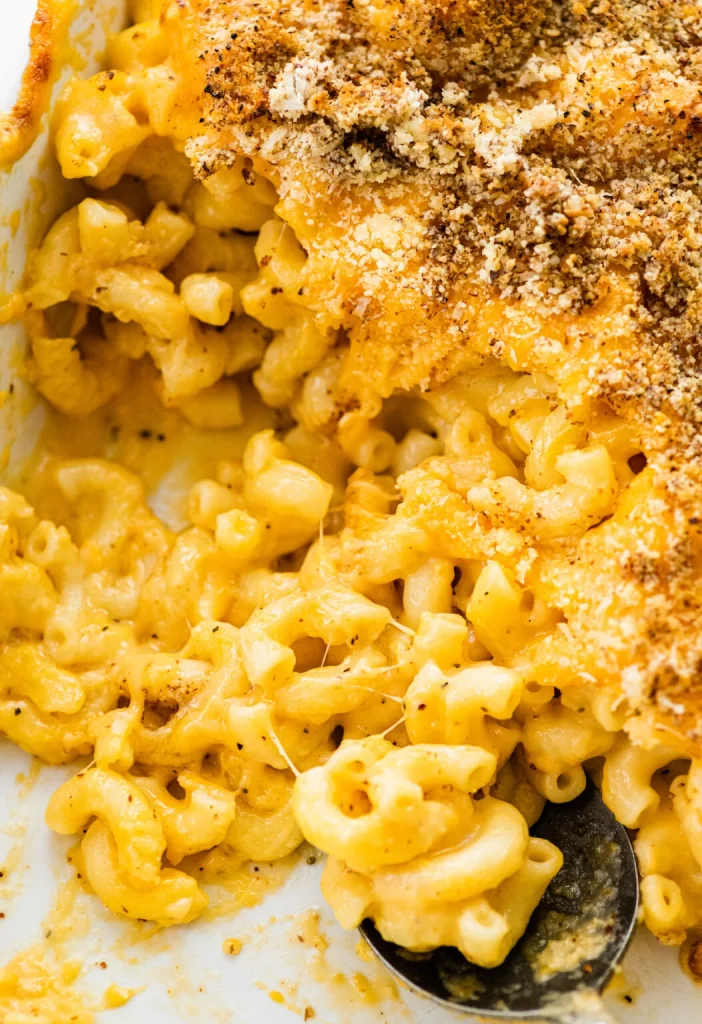
Scatter the seasoned breadcrumbs evenly over the top of the mac and cheese in the baking dish. Spread them in as even a layer as possible so every part of the top has coverage. The breadcrumbs are what create the satisfying golden, slightly crispy topping that makes baked mac and cheese so wonderful. Do not skimp on covering the entire surface.
Step 6 — Bake Until Golden
Place the baking dish in the preheated oven. Bake for 25 to 30 minutes until the breadcrumb topping is deeply golden and crispy, the sauce is bubbling at the edges of the dish, and the whole thing looks irresistibly golden and beautiful.
If after 25 to 30 minutes the top looks good but you want it even more golden and crispy, switch the oven to the broil or grill setting for the final 2 to 3 minutes. Watch it very closely during this time — the breadcrumbs can go from perfectly golden to burnt very quickly under the broiler.
Step 7 — Rest and Serve
Remove the baking dish from the oven and let the mac and cheese rest for 5 to 8 minutes before serving. This resting time allows the sauce to set slightly so it is creamy and scoopable rather than completely liquid when you cut into it. The mac and cheese will be very hot when it comes out of the oven and the resting time also brings it to a temperature that is comfortable to eat.
Scoop generous portions into bowls and serve immediately while the topping is still crispy and the cheese sauce is still beautifully creamy. Add a pinch of extra smoked paprika or fresh herbs over the top if desired.
Helpful Cooking Tips for the Best Results
Cook the cauliflower until it is genuinely very soft. Undercooked cauliflower will not blend into a completely smooth puree — you will have grainy, fibrous bits throughout the sauce that ruin the texture. Cook it for the full 10 to 12 minutes until it is very soft and then blend for the full 2 to 3 minutes until completely silky. There should be absolutely no texture remaining.
Use the sharpest cheddar you can find. The reason you can use a smaller amount of cheese in this healthier version and still get great cheese flavour is by choosing cheese that has a very strong, pronounced flavour. Extra sharp or mature cheddar has a bold, assertive flavour that means a smaller amount goes much further than mild or medium cheddar. Look for aged cheddar — sometimes labelled as extra mature or cave-aged — for the best result.
Bring the Greek yoghurt to room temperature before adding. Cold yoghurt added to a hot sauce can curdle — the proteins seize up and you get an unpleasant, broken texture. Leave the yoghurt out on the counter for 20 to 30 minutes before you start cooking so it is at room temperature when it goes into the sauce.
Add the cheese over the lowest possible heat. Low heat is essential for a smooth, non-grainy cheese sauce. Cheese proteins break down and separate at high temperatures, causing the sauce to become greasy and grainy rather than smooth and silky. Turn the heat to the lowest setting before any cheese goes in and keep it low throughout.
Under-cook the pasta before baking. Pasta cooked to full doneness before going into the oven will be overcooked and mushy by the time the mac and cheese has finished baking. Always cook it 1 to 2 minutes less than suggested on the packet. Al dente pasta going into the oven comes out perfectly cooked.
Taste the sauce before adding the pasta. The sauce should taste properly seasoned and strongly flavourful before the pasta goes in because the pasta will absorb some of the sauce and mute the flavours slightly. A sauce that is perfectly seasoned before combining becomes slightly underseasoned in the finished dish.
Use a large enough baking dish. The mac and cheese needs space in the baking dish to heat through evenly. A dish that is too small will give you a very thick layer that is hot and bubbly on top but cold and undercooked in the centre. A 23 by 33 centimetre dish gives enough surface area for even baking.
Do not press the breadcrumbs down. Scatter them loosely over the surface rather than pressing them in. Pressed breadcrumbs bake into a dense, hard layer rather than a light, crispy, golden topping. Keep them loose and they will toast beautifully in the oven.
Common Mistakes to Avoid
Skipping the cauliflower puree step. The cauliflower is the ingredient that makes this recipe genuinely healthier while still delivering a creamy, satisfying sauce. Skipping it and just making a regular cheese sauce with less cheese will give you a sauce that is thin, less creamy, and less satisfying. The cauliflower is essential.
Using pre-shredded cheese. Pre-shredded cheese contains anti-caking agents that prevent it from melting smoothly and can make the sauce grainy. Always buy blocks of cheese and grate them yourself right before using. This is especially important in a sauce where the amount of cheese is lower than traditional recipes — you need every bit of it to melt beautifully.
Adding cold milk to the roux. Cold milk added to a hot roux is much more likely to form lumps than warm milk. Warm your milk slightly before adding it — either on the stovetop or in the microwave. Warm milk also incorporates more smoothly and the sauce thickens more quickly and evenly.
Baking without the resting time. Cutting into the mac and cheese immediately after it comes out of the oven results in a sauce that is so hot and liquid that it runs all over the plate rather than being creamy and scoopable. Give it the full 5 to 8 minutes to set and you will have a mac and cheese that is perfectly creamy and holds its shape when served.
Using non-fat Greek yoghurt. Full-fat Greek yoghurt is essential in this recipe. Non-fat versions are significantly more likely to curdle when added to a hot sauce and they also lack the richness and creaminess that makes full-fat yoghurt such an effective cream substitute. Use full-fat for the best result.
Under-seasoning. A healthier recipe does not mean a bland one. Season generously at every stage — the pasta water, the bechamel, and the finished sauce all need proper seasoning to produce a dish that is genuinely satisfying. The salt is not the unhealthy component of this dish and should not be reduced to the point where the dish tastes flat.
What to Serve With Healthy Baked Mac and Cheese
A simple green salad with a light lemon vinaigrette is the most natural and most balanced accompaniment. The fresh, slightly acidic salad contrasts beautifully with the rich, creamy mac and cheese and makes the whole meal feel very complete.
Roasted or steamed broccoli is a wonderful side that pairs naturally with mac and cheese. If you have not added broccoli directly into the mac and cheese, serving it alongside gives you the vegetables without affecting the texture of the dish.
A tomato and cucumber salad dressed simply with olive oil and fresh herbs is a refreshing, light side that provides a bright, fresh contrast to the warm, creamy baked pasta.
Grilled chicken or baked chicken alongside the mac and cheese turns it into a more protein-rich, substantial meal that is filling and nutritious.
Roasted cherry tomatoes — simply roasted with olive oil, salt, and thyme until bursting and slightly jammy — are a wonderful side that adds freshness and acidity that cuts through the richness of the mac and cheese.
A simple bean salad — white beans, cherry tomatoes, fresh herbs, and a lemon vinaigrette — adds plant-based protein and makes the meal more nutritionally complete.
How to Store Leftovers
In the fridge: Allow the mac and cheese to cool completely before covering the baking dish with cling film or transferring portions to airtight containers. Store in the refrigerator for up to 4 days. The mac and cheese will thicken significantly overnight as the pasta absorbs more of the sauce. To reheat individual portions, place in a microwave-safe bowl and add a splash of milk — heat in 1-minute intervals stirring between each until piping hot. For reheating the whole dish, cover with foil and bake at 180 degrees Celsius for 20 to 25 minutes until hot throughout. Remove the foil for the last 5 minutes to re-crisp the breadcrumb topping.
In the freezer: Baked mac and cheese can be frozen for up to 2 months. Allow it to cool completely, cover the baking dish tightly with cling film and then foil, or portion into individual freezer-safe containers. Thaw overnight in the fridge before reheating covered with foil in the oven at 180 degrees Celsius for 25 to 30 minutes until piping hot. The texture of the pasta changes slightly after freezing but the dish is still very enjoyable.
Meal prep tip: This recipe makes a generous amount and keeps well, making it excellent for meal prepping. Make the full recipe at the beginning of the week and portion it into individual containers. Each portion reheats quickly and makes a satisfying, nutritious lunch or dinner throughout the week.
Nutritional Benefits of This Recipe
Understanding what is genuinely good for you in this recipe helps you appreciate why these ingredient choices were made.
Cauliflower is one of the most nutritionally impressive vegetables available. It is rich in vitamin C, vitamin K, folate, and fibre. It contains sulforaphane — a powerful antioxidant compound that has been linked to reduced inflammation and improved immune function. It is very low in calories and carbohydrates while being genuinely filling and satisfying.
Greek yoghurt is a wonderful substitute for cream in this recipe. It provides high-quality protein, calcium, and phosphorus. It contains probiotics that support gut health and immune function. And it adds a creamy richness and slight tang that mimics the flavour profile of a more indulgent sauce very effectively.
Whole wheat or chickpea pasta provides significantly more fibre, protein, and micronutrients than regular refined pasta. Chickpea pasta in particular is an excellent source of plant-based protein and has a much lower glycaemic index than regular pasta, meaning it releases energy more slowly and keeps you feeling full for longer.
Real cheese in modest amounts provides calcium, protein, and fat-soluble vitamins A, D, E, and K. Using small amounts of strongly flavoured cheese means you get the nutritional benefits and the incredible flavour without the excess calories of a very cheese-heavy traditional mac and cheese.
Spinach or other added vegetables contribute iron, folate, vitamins A and C, and numerous antioxidants and phytonutrients that support overall health.
Variations You Can Try
Butternut squash version: Replace half the cauliflower with roasted butternut squash. The squash adds a natural sweetness and a beautiful deep orange colour to the sauce that makes it look very vibrant and adds beta-carotene and vitamin A. Roast the squash first until caramelised and then blend it with the cauliflower for an extraordinary sauce.
Spicy jalapeño version: Add finely diced pickled or fresh jalapeños to the pasta mixture before baking. Use pepper jack cheese instead of some of the cheddar and increase the cayenne in the sauce. The heat adds an exciting dimension that makes the mac and cheese feel very grown-up and bold.
Loaded vegetable version: Add blanched broccoli florets, fresh or frozen peas, wilted spinach, roasted cherry tomatoes, and caramelised onions all stirred through the pasta and sauce before baking. This version is extremely nutritious, very colourful, and very satisfying.
Vegan version: Use plant-based butter, oat milk or cashew milk, dairy-free sharp cheddar and Parmesan, and a full cup of raw cashews soaked in water overnight and blended with the cauliflower to replace the Greek yoghurt. The cashews add incredible creaminess and richness. Use nutritional yeast for extra cheesy flavour — add 3 to 4 tablespoons to the sauce along with the dairy-free cheese.
Gluten-free version: Use certified gluten-free pasta — rice-based or chickpea-based both work well. Replace the flour in the roux with a gluten-free plain flour blend or arrowroot powder. Use gluten-free panko breadcrumbs or crushed rice cakes for the topping. Everything else in the recipe is already naturally gluten-free.
Protein-packed version: Stir in shredded rotisserie chicken or canned white beans or lentils with the pasta before baking for a version that is even higher in protein and more filling. Either addition blends naturally with the cheesy, creamy sauce without affecting the fundamental character of the dish.
Frequently Asked Questions
Can I taste the cauliflower in the finished dish?
No — when the cauliflower is properly cooked until very soft and blended into a completely smooth puree, it is genuinely undetectable in the finished mac and cheese. Its flavour is very mild to begin with and it completely disappears into the cheese sauce, contributing only creaminess and body without any noticeable vegetable flavour. Many people have served this to very sceptical family members — including children who claim to hate vegetables — and nobody has ever been able to identify the cauliflower. The key is cooking it until very soft and blending it until completely smooth with absolutely no texture remaining.
Can I make this recipe without the cauliflower?
Yes, you can make a healthier mac and cheese without cauliflower by relying on the Greek yoghurt, reduced cheese amounts, and whole wheat pasta to make the dish healthier. The sauce will be less creamy and less rich-tasting without the cauliflower body, but the dish will still be delicious and healthier than a traditional version. You can also replace the cauliflower with pureed butternut squash, pureed white beans, or pureed sweet potato — all of which add body and nutrition without affecting the flavour significantly.
What is the best pasta shape for this recipe?
Elbow macaroni is the classic choice and works beautifully — the small, ridged tubes hold the sauce well and are the most iconic shape for mac and cheese. Small shell pasta is another excellent option because the cups formed by each piece hold little pools of sauce. Cavatappi — corkscrew-shaped pasta — is wonderful and holds sauce on all its ridged surfaces. Penne rigate — ridged penne — also works well. Whatever shape you choose, make sure it is a short pasta with ridges or curves rather than a smooth, long pasta, as the ridges and curves are what hold the sauce effectively.
Can I make this ahead and bake it later?
Yes, this recipe adapts beautifully to making ahead. Assemble the mac and cheese completely — including the breadcrumb topping — in the baking dish, cover tightly with cling film, and refrigerate for up to 24 hours before baking. When ready to bake, remove from the fridge 30 minutes before baking to take off the chill, then bake as directed, adding 5 to 10 extra minutes to the baking time since the dish is starting cold. This make-ahead approach is very practical for dinner parties and busy weeknights.
My sauce turned out grainy and not smooth. What went wrong?
A grainy cheese sauce is almost always caused by one of two things. Either the cheese was added when the heat was too high — causing the proteins to break and separate — or pre-shredded cheese with anti-caking agents was used. To prevent this in future, always reduce the heat to the absolute lowest setting before adding any cheese and add it in small portions stirring between each addition. Always grate your own cheese from a block. If the sauce does turn grainy, sometimes adding a splash of warm milk and whisking vigorously over very low heat can partially rescue it. The cream cheese trick can also help — stir in a tablespoon of softened cream cheese over very low heat, which can help re-emulsify a slightly broken sauce.
Final Thoughts
Healthy Baked Mac and Cheese is one of those recipes that genuinely changes the way you think about healthier eating. It proves that choosing better ingredients and using smart techniques does not mean sacrificing the pleasure, the comfort, or the deep satisfaction of the food you love. This mac and cheese is creamy, cheesy, golden, bubbling, and completely indulgent in every way that matters — in taste, in texture, in the way it makes you feel when you eat it. And it does all of that while being genuinely good for you.
What makes this recipe so successful is the thoughtfulness behind every single ingredient swap. The cauliflower puree that adds creaminess and nutrition without adding any noticeable flavour. The Greek yoghurt that contributes tang and richness while reducing fat and adding protein. The sharply flavoured cheese that means you need less of it to get full, bold cheese flavour. The whole wheat or chickpea pasta that gives you more fibre and protein in every bite. These are not sacrifices — they are intelligent choices that make the dish better in ways that go beyond just the nutritional profile.
Make this for your family and watch their reactions. Make it for yourself when you want something deeply comforting that you can also feel genuinely good about eating. Make it for a crowd and dare them to guess what makes it healthier. However you serve it and whoever you make it for, this baked mac and cheese is going to be an absolute hit. Happy cooking!