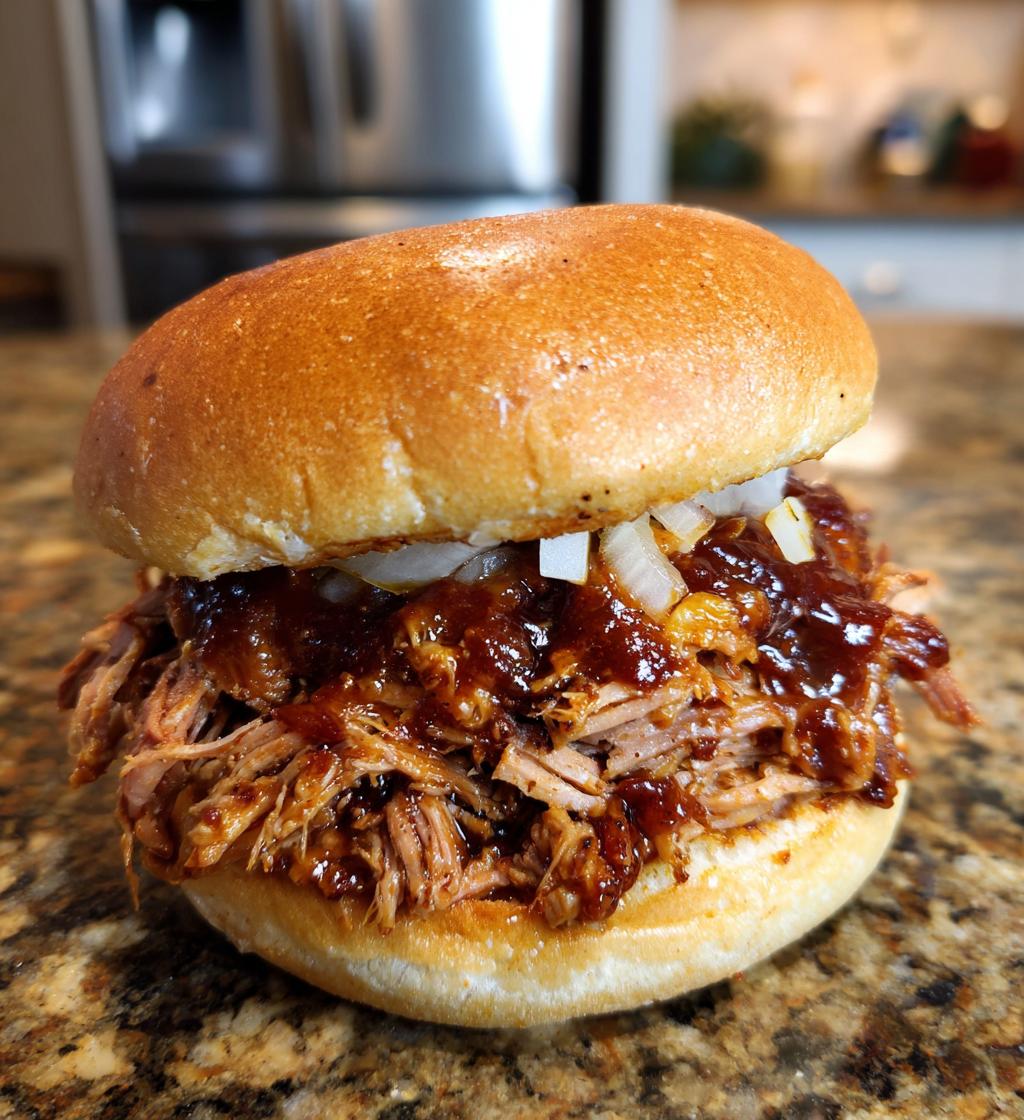
Hello gorgeous, welcome back to kiekie’s place! Today I am bringing you one of those recipes that is going to completely change your weeknight dinner game and make you feel like an absolute kitchen hero with the minimum amount of effort. Because that is exactly what an Instant Pot is for — turning something that would normally take hours and hours of slow cooking into something that is ready in a fraction of the time without sacrificing a single drop of that incredible, deep, tender, fall-apart flavour that makes pulled pork one of the most beloved comfort foods on the entire planet.
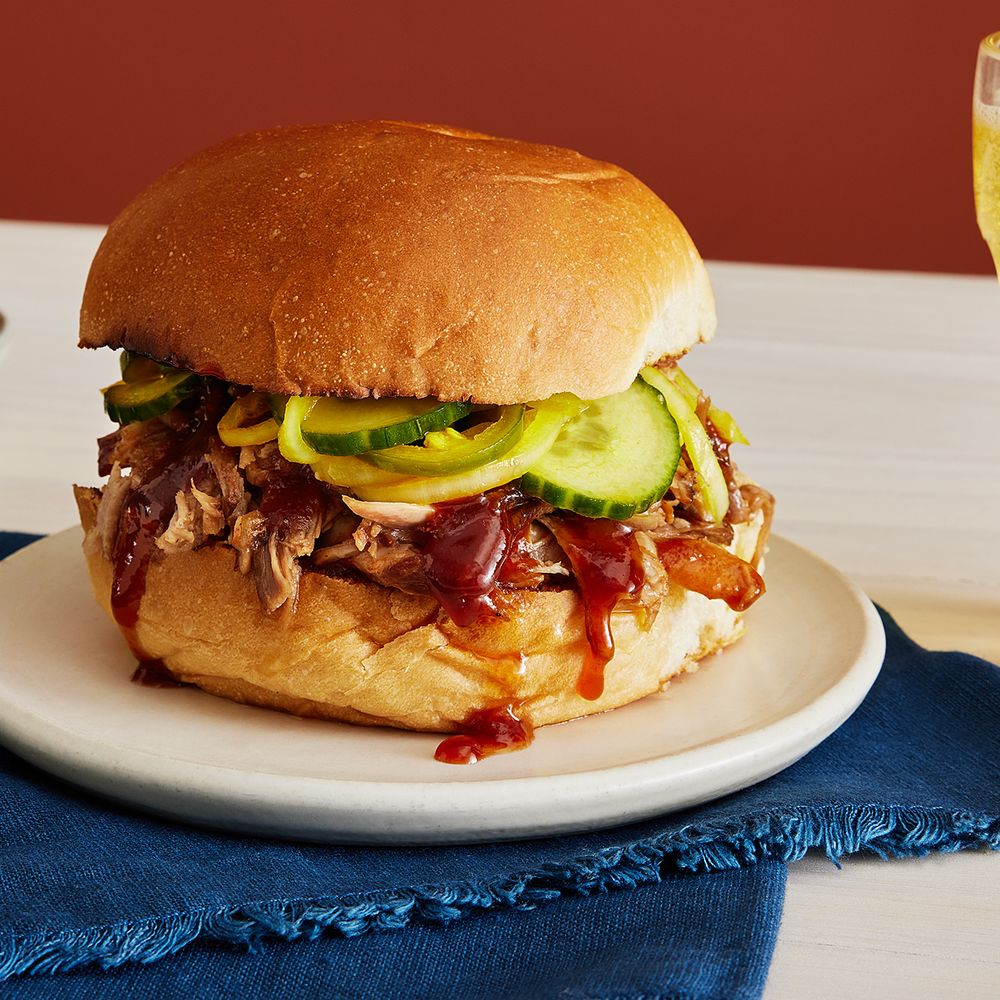
Instant Pot Pulled Pork Sandwiches. Just reading those words is enough to make your mouth water. We are talking about pork that is so incredibly tender it falls apart at the lightest touch of a fork, soaked in a deeply flavoured, slightly smoky, sweet and tangy sauce, piled generously into a soft, toasted bun, and topped with whatever your heart desires — creamy coleslaw, pickles, extra sauce, jalapeños, cheese. The combination is one of those food experiences that is genuinely hard to beat.
What makes this recipe so special is the Instant Pot itself. Traditional pulled pork requires 8 to 12 hours in a slow cooker or several hours in an oven or smoker. The Instant Pot gets you there in about 90 minutes of actual cooking time, delivering pork that is just as tender, just as juicy, and just as deeply flavourful as anything you would make the long way. It is one of those moments where modern cooking technology and traditional comfort food come together in the most perfect way imaginable.
By the end of this article you will have everything you need — the full recipe, a detailed step-by-step method, tips for getting the most tender and flavourful pulled pork possible, ideas for toppings and sides, storage advice, and answers to all the questions you might have along the way. Let us get into it.
What Makes Instant Pot Pulled Pork So Special?
To understand why the Instant Pot is so brilliant for pulled pork, it helps to understand a little about what happens to pork during cooking and why pulled pork requires such a long cooking time in the first place.
Pulled pork is traditionally made from pork shoulder — a cut that is tough, fibrous, and full of connective tissue and fat. This connective tissue is made up of collagen, which is a tough protein that holds the muscle fibres together. When pork shoulder is cooked at low temperatures for a very long time, that collagen slowly breaks down and converts into gelatin — a rich, silky substance that lubricates every fibre of the meat, making it incredibly tender, juicy, and easy to pull apart with forks. This is why pulled pork cooked the traditional way takes so long — you need all that time for the collagen conversion to happen completely.
The Instant Pot achieves the same result in a dramatically shorter time by cooking under pressure. Inside a sealed Instant Pot, the pressure builds up and raises the boiling point of liquid, which means the contents cook at a significantly higher temperature than they would in an open pot or slow cooker. This accelerated heat environment speeds up the collagen breakdown dramatically, getting you to that same tender, fall-apart result in 60 to 75 minutes of pressure cooking instead of 8 to 12 hours of slow cooking.
The result is pulled pork that is genuinely, authentically tender and juicy — not a shortcut approximation of the real thing but the actual real thing, achieved much faster.
Choosing the Right Cut of Pork
The cut of pork you use is the single most important ingredient decision you will make for this recipe, so let us talk about it properly.
Pork shoulder — also sold as pork butt or Boston butt — is the correct and only recommended cut for pulled pork. Despite the confusing name, pork butt is not from the rear of the animal. It is actually from the upper part of the front shoulder and is one of the most heavily worked muscles on the pig, which means it has a lot of connective tissue and fat running through it. As I explained above, this connective tissue and fat is exactly what you need for pulled pork — it breaks down during cooking into gelatin and fat that keeps the meat incredibly moist and flavourful. A lean cut like pork loin will not give you pulled pork — it will give you dry, shredded pork that has none of the richness or tenderness that makes this dish so special.
Bone-in versus boneless pork shoulder: Bone-in pork shoulder has a slight edge in flavour because the bone contributes depth and richness to the cooking liquid. However, boneless is much easier to cut into pieces and fit into the Instant Pot, and the flavour difference is relatively small when the meat is going to be seasoned and sauced anyway. Either works perfectly well.
Size: For a standard 6-quart Instant Pot, a pork shoulder of 1.5 to 2 kilograms is ideal. If you have a larger shoulder, cut it into chunks to ensure even cooking and to help it fit properly in the pot.
Understanding the Rub
A good dry rub applied to the pork before cooking is the foundation of flavour in pulled pork. The rub penetrates the surface of the meat during the cooking process and creates a deeply seasoned, slightly caramelised crust on the outside pieces that adds incredible flavour complexity when everything is pulled and mixed together.
The rub in this recipe is inspired by classic American barbecue flavours — smoky from the paprika, slightly sweet from the brown sugar, savouriness from garlic and onion powder, warmth from cumin, and a gentle heat from cayenne. These flavours build the base of the dish that the sauce then enhances and complements.
For the best results, apply the rub to the pork and let it sit for at least 30 minutes before cooking. If you have the time, rubbing the pork and leaving it uncovered in the fridge overnight gives you an even more deeply seasoned result as the salt in the rub draws moisture to the surface and then reabsorbs it along with all the spice flavours, seasoning the meat all the way through in a process similar to dry brining.
Ingredients You Will Need
For the pork:
- 1.5 to 2 kilograms of boneless pork shoulder (cut into 4 to 6 large chunks)
- 1 tablespoon of olive oil or vegetable oil (for searing)
For the dry rub:
- 2 teaspoons of smoked paprika
- 1 and a half teaspoons of garlic powder
- 1 and a half teaspoons of onion powder
- 1 teaspoon of brown sugar
- 1 teaspoon of cumin
- 1 teaspoon of salt
- Half a teaspoon of black pepper
- Half a teaspoon of cayenne pepper (adjust based on your heat preference)
- Half a teaspoon of dried mustard powder
- Half a teaspoon of dried oregano
For the cooking liquid:
- Half a cup of chicken broth or apple cider (apple cider adds a lovely subtle sweetness that works beautifully with pork)
- Quarter of a cup of apple cider vinegar
- 2 tablespoons of Worcestershire sauce
- 1 tablespoon of soy sauce
- 4 cloves of garlic (smashed)
- 1 small onion (roughly chopped)
- 1 tablespoon of brown sugar
- 1 teaspoon of smoked paprika
- 1 teaspoon of liquid smoke (optional but adds a wonderful smoky depth that mimics outdoor smoking)
For the barbecue sauce:
- 1 and a half cups of good quality store-bought barbecue sauce (use your favourite brand) or homemade barbecue sauce
- 2 tablespoons of apple cider vinegar (to brighten the sauce)
- 1 tablespoon of honey or brown sugar (for extra sweetness if needed)
- Half a teaspoon of smoked paprika
- A few dashes of hot sauce (optional)
For the sandwiches:
- 6 to 8 brioche buns or soft hamburger buns
- Butter for toasting the buns
For toppings — choose your favourites:
- Creamy coleslaw (recipe suggestions below)
- Dill pickle slices
- Sliced jalapeños (fresh or pickled)
- Thinly sliced red onion
- Extra barbecue sauce
- Sliced cheddar or pepper jack cheese
- Fresh cilantro or parsley
- Sriracha or hot sauce
For a quick homemade coleslaw:
- Half a small green cabbage (thinly shredded)
- 1 medium carrot (grated)
- 3 tablespoons of mayonnaise
- 1 tablespoon of apple cider vinegar
- 1 teaspoon of sugar
- Salt and black pepper to taste
Step-by-Step Cooking Method

Step 1 — Make and Apply the Dry Rub
In a small bowl, combine all the dry rub ingredients — smoked paprika, garlic powder, onion powder, brown sugar, cumin, salt, black pepper, cayenne pepper, mustard powder, and dried oregano. Mix them together thoroughly until you have a unified, fragrant spice blend.
Cut your pork shoulder into 4 to 6 large chunks if it is not already pre-cut. Cutting the pork into pieces serves two purposes — it allows the rub to penetrate more surface area of the meat, giving you more deeply seasoned pulled pork, and it helps the pieces fit more easily in the Instant Pot where they will cook more evenly.
Pat all the pork pieces completely dry with paper towels. Dry meat accepts the rub better and will sear more effectively in the next step. Sprinkle the dry rub generously all over every surface of each piece of pork and use your hands to press it in firmly so it adheres. Make sure every piece is well coated on all sides.
If you have time, let the rubbed pork rest at room temperature for 30 minutes before cooking. If you have more time, place the rubbed pork on a plate, cover loosely, and refrigerate overnight for the most deeply seasoned result.
Step 2 — Sear the Pork
This step is technically optional but I strongly encourage you not to skip it because it makes a very significant difference to the flavour of the finished pulled pork. The searing step creates a deeply browned, caramelised crust on the outside of the pork that adds a layer of complex, roasted flavour that pressure cooking alone cannot replicate.
Set your Instant Pot to the SAUTÉ function on HIGH. Add the oil and let it heat up until it is shimmering. Once hot, add the pork pieces in batches — do not crowd the pot. Sear each piece for about 2 to 3 minutes on each side without moving them, until they are deeply golden brown on all sides. Work in batches if necessary — typically 2 to 3 pieces at a time depending on the size of your Instant Pot.
As the pork sears, it will leave behind golden-brown bits on the bottom of the pot. These are flavour and you want them there. Once all the pork is seared, remove it and set aside. If the pot looks very dry, add a small splash of broth to deglaze — use a wooden spoon to scrape up the browned bits from the bottom. Getting these bits into the cooking liquid is important both for flavour and to prevent the BURN warning on your Instant Pot.
Step 3 — Build the Cooking Liquid
With the Instant Pot still on SAUTÉ mode, add the roughly chopped onion to the pot. Cook for about 2 minutes, stirring, just until it starts to soften slightly. Add the smashed garlic cloves and cook for 1 minute more until fragrant.
Pour in the chicken broth or apple cider, apple cider vinegar, Worcestershire sauce, soy sauce, brown sugar, smoked paprika, and liquid smoke if you are using it. Stir everything together well and use your wooden spoon to scrape up any remaining browned bits from the bottom of the pot. Taste the cooking liquid — it should be flavourful, slightly tangy, and boldly seasoned. It does not need to taste perfect because it is going to meld with the pork juices and the dry rub during cooking, but it should have good flavour.
Turn the SAUTÉ function off.
Step 4 — Pressure Cook the Pork
Add all the seared pork pieces back into the Instant Pot, nestling them into the cooking liquid. The liquid should come up to about one third of the way up the pork — it does not need to cover the pork completely because the steam from the pressurised liquid will cook the pork above the liquid line as well.
Secure the Instant Pot lid and make sure the pressure release valve is set to the SEALING position. Select the PRESSURE COOK or MANUAL function and set it to HIGH pressure. Set the cooking time to 60 minutes for a 1.5 kilogram piece of pork shoulder, or 75 minutes for a 2 kilogram piece. Press start and let the Instant Pot do its work.
The pot will take about 10 to 15 minutes to come up to pressure before the timer begins counting down. During this time you may hear hissing and see steam escaping from the valve briefly before it seals — this is completely normal.
Once the cooking time is complete, you have two options for releasing the pressure. Natural pressure release means you simply leave the pot alone and let the pressure release on its own — this takes about 15 to 20 minutes and is the recommended method for pulled pork as it allows the meat to continue gently cooking and relaxing in the steam, resulting in even more tender, juicy pork. Quick release means you carefully turn the pressure release valve to the VENTING position immediately after cooking, which releases the pressure in about 3 to 5 minutes with a rush of steam.
For this recipe, if you have the time, let the pressure release naturally for at least 15 minutes before switching to quick release for any remaining pressure. This natural release time makes a noticeable difference to the tenderness and juiciness of the finished pork.
Step 5 — Remove the Pork and Shred
Once the pressure is fully released and the float valve has dropped, carefully remove the lid. The pork should look very tender and almost falling apart already — this is exactly what you want to see. Use tongs to carefully lift each piece of pork out of the cooking liquid and place them in a large bowl or on a cutting board.
Let the pork rest for 5 minutes. Then use two large forks to pull the meat apart into shreds, working against the grain of the meat. At this level of tenderness, the pork should fall apart with almost no effort at all. Some pieces will shred into long, satisfying strands. Other pieces will crumble into smaller chunks. A combination of different textures is ideal — it makes the pulled pork more interesting and satisfying to eat.
Remove and discard any large pieces of fat, bone if using bone-in pork, and any pieces that are too fatty. A small amount of fat is wonderful and adds moisture and flavour but large chunks of unrendered fat are not pleasant to eat.
Step 6 — Reduce the Cooking Liquid
Do not discard the cooking liquid in the Instant Pot — it is deeply flavourful and is going to be incorporated back into the pulled pork. Set the Instant Pot to SAUTÉ mode on HIGH and let the cooking liquid boil and reduce for about 8 to 10 minutes, stirring occasionally. You want it to reduce by roughly half into a more concentrated, slightly syrupy sauce. Taste it as it reduces and adjust the seasoning.
Once reduced, pour about a quarter of a cup of this concentrated cooking liquid over the shredded pork and toss to coat. This keeps the pork moist and adds a wonderful depth of flavour. You can use more or less depending on your preference.
Step 7 — Make the Barbecue Sauce
While the cooking liquid reduces, prepare the barbecue sauce. In a small saucepan or in a bowl, combine the store-bought barbecue sauce with the apple cider vinegar, honey or brown sugar, smoked paprika, and hot sauce if using. Stir together and taste. Adjust the balance — add more honey if you want it sweeter, more vinegar if you want it tangier, more hot sauce if you want more heat.
Warm the sauce gently in a small saucepan over low heat for a few minutes if you want to serve it warm. Set aside.
Add about half a cup of the barbecue sauce to the shredded pork and toss everything together thoroughly so every strand of pork is coated in that beautiful, sticky, deeply flavoured sauce. Keep the remaining sauce on the side for people to add more at the table based on their preference.
Step 8 — Toast the Buns and Make the Coleslaw
If you are making the quick coleslaw, combine the shredded green cabbage, grated carrot, mayonnaise, apple cider vinegar, sugar, salt, and pepper in a bowl. Toss everything together very well and taste — adjust the seasoning, the sweetness, or the creaminess to your liking. The coleslaw should be tangy, slightly sweet, creamy, and very fresh. Set aside in the fridge while you finish everything else — even 10 to 15 minutes in the fridge makes a difference as the vegetables soften slightly and the flavours come together.
Toast the buns by spreading a thin layer of softened butter on the cut sides of each bun and placing them cut-side down in a hot pan over medium heat. Let them toast for about 1 to 2 minutes until the cut surfaces are golden, slightly crispy, and fragrant with butter. Toasting the buns is not optional — it creates a surface that can hold the saucy pulled pork without immediately becoming soggy, and the toasted, buttery flavour adds a wonderful richness to each bite.
Step 9 — Build the Sandwiches and Serve
Now the most satisfying part — building these incredible sandwiches. Place the toasted bun bottoms on a board or plates. Pile a generous, generous amount of saucy pulled pork onto each bun bottom. Do not be shy — a proper pulled pork sandwich should be loaded and slightly overflowing. Add a drizzle of extra barbecue sauce over the pork.
Top with a generous spoonful of coleslaw — the cool, creamy, tangy coleslaw on top of the hot, rich, saucy pulled pork is one of the most perfect flavour and texture contrasts in all of sandwich eating. Add pickle slices, sliced jalapeños, thinly sliced red onion, or any other toppings you enjoy. Place the top bun on and press down very gently.
Serve immediately with extra barbecue sauce and hot sauce on the side, plenty of napkins — this is a messy sandwich and that is a very good sign — and your choice of sides.
Helpful Cooking Tips for the Best Results
Do not skip the searing step. I know using the Instant Pot is supposed to make things easier and adding a searing step adds time and dishes, but the flavour difference between seared and unseared pork in this recipe is very significant. The caramelised crust adds depth, complexity, and a roasted quality that pressure cooking alone cannot deliver. The extra 10 minutes are absolutely worth it.
Cut the pork into chunks before cooking. A whole large pork shoulder will take significantly longer to become tender in the Instant Pot and may cook unevenly. Cutting it into 4 to 6 large chunks dramatically increases the surface area in contact with the cooking liquid and steam, ensures even cooking, and gives you more surface area for the rub to season.
Use the natural pressure release. Allowing the pressure to release naturally rather than using quick release gives the meat time to relax and reabsorb some of the cooking juices after pressure cooking. Quick release can cause the muscle fibres in the meat to tighten slightly as they are exposed to a sudden change in pressure, which can make the pork slightly less tender. The extra 15 to 20 minutes of natural release makes a meaningful difference.
Reduce the cooking liquid before adding it back to the pork. The cooking liquid straight out of the Instant Pot is thin and watery. Reducing it on the SAUTÉ function concentrates all those incredible flavours into a more intense, slightly syrupy liquid that adds much more flavour when stirred through the shredded pork.
Season the pork boldly with the dry rub. The rub is the foundation of all the flavour in this dish. Apply it generously and press it in firmly. If the pork looks well-coated to the point of almost being dark from the rub, you are doing it right. If it looks pale and you can still see a lot of the natural colour of the pork through the rub, add more.
Toast the buns. Always, always toast the buns. Untoasted buns become immediately soggy under the weight of the saucy pulled pork and the structural integrity of the sandwich falls apart before you can even eat half of it. A toasted bun holds up beautifully and adds flavour and texture of its own.
Do not over-shred the pork. Pulled pork should have a mix of longer shreds and slightly chunkier pieces. Over-shredding turns it into a fine, almost paste-like consistency that loses a lot of the textural appeal. Use a light hand with the forks and stop shredding while there is still some good texture remaining.
Deglaze the pot properly before pressure cooking. If there are browned bits stuck to the bottom of the Instant Pot when you add the cooking liquid, make sure to scrape them all up with a wooden spoon before sealing the lid. Stuck bits on the bottom of the pot can trigger the BURN warning, which will stop the cooking process. A properly deglazed pot is essential for the Instant Pot to function correctly.
Common Mistakes to Avoid
Using a lean cut of pork. Pork loin, pork tenderloin, and other lean cuts do not have the connective tissue and fat content necessary to become properly tender and juicy pulled pork. They will dry out and shred into something that is tough and flavourless. Always use pork shoulder for this recipe without exception.
Not using enough cooking liquid. The Instant Pot requires a minimum amount of liquid to build steam and reach pressure. If you do not have enough liquid, the pot will not reach pressure properly or may trigger the BURN warning. Always use at least the amount specified in the recipe.
Quick releasing the pressure immediately. As mentioned above, quick releasing immediately after cooking gives the meat less time to relax and can result in slightly tougher pork. Let the pressure release naturally for at least 15 minutes for the best result.
Under-seasoning the rub. A pulled pork dry rub should be applied very generously. A light dusting of spices on the surface will not penetrate the meat and will not create a properly seasoned pulled pork. Be bold and generous with the rub.
Not toasting the buns. Soft buns without toasting become soggy within seconds of the pulled pork going on. Toast them every time without exception.
Making the sandwiches too far ahead of serving. Pulled pork sandwiches should be assembled right before serving. If you assemble them too far ahead, even toasted buns will eventually become soggy from the sauce. Keep all the components separate and assemble fresh for each serving.
What to Serve With Pulled Pork Sandwiches

Classic coleslaw is the most traditional and most perfect accompaniment for pulled pork sandwiches. Whether you serve it on top of the sandwich as suggested or on the side, the cool, creamy, tangy coleslaw is an absolutely essential counterpart to the rich, saucy pork.
French fries or sweet potato fries are a crowd-pleasing side that pairs naturally with this kind of sandwich. Sweet potato fries in particular have a natural sweetness that complements the smoky, slightly sweet pulled pork beautifully.
Baked beans are a classic Southern side dish that is deeply satisfying alongside pulled pork. The sweet, slightly smoky beans echo the flavours in the pulled pork and make the meal feel very complete and indulgent.
Corn on the cob — grilled or boiled and buttered — is a wonderful seasonal side that pairs naturally with the bold flavours of pulled pork and adds a fresh sweetness to the plate.
Macaroni and cheese alongside pulled pork is one of those combinations that is pure comfort food perfection. The creamy, cheesy pasta is a wonderful contrast to the bold, saucy meat.
Pickles — both on the sandwich and on the side — are essential with pulled pork. The sharp acidity of the pickles cuts through the richness of the meat and sauce and refreshes the palate beautifully between bites.
Cornbread — warm, slightly sweet, crumbly — is a wonderful bread option alongside the sandwich if you want to lean into the Southern theme of the meal.
A simple green salad with a light vinaigrette is a fresh, nutritious contrast to the richness of the pulled pork and makes the meal feel a little more balanced.
Potato salad — particularly a tangy, vinegar-based one rather than a heavy creamy one — is a wonderful cold side that contrasts nicely with the warm, saucy pulled pork.
How to Store Leftovers
In the fridge: Allow the pulled pork to cool completely before transferring to an airtight container. Store the pulled pork and the barbecue sauce separately if possible, though storing them together works fine. Keep in the refrigerator for up to 4 to 5 days. Reheat gently in a pan over medium-low heat with a splash of broth or water to loosen, or in the microwave covered with a damp paper towel in 1-minute intervals, stirring in between. Always reheat until piping hot throughout.
In the freezer: Pulled pork freezes exceptionally well and is one of the best things to batch cook and freeze for easy future meals. Cool the pork completely, portion it into freezer-safe bags or containers — individual portions are most practical — and freeze for up to 3 months. Label each portion with the date and the amount. Thaw overnight in the fridge before reheating. The pulled pork reheats beautifully and tastes just as good from frozen as it did fresh.
Meal prep strategy: Making a large batch of pulled pork and portioning it into the freezer is one of the most practical meal prep moves you can make. Having pulled pork in the freezer means you are always just a thaw and a reheat away from an incredible sandwich, a rice bowl, a taco, a quesadilla, or any number of other meals that come together in minutes.
Creative Ways to Use Leftover Pulled Pork
One of the most wonderful things about this recipe is how many different ways you can use the leftover pulled pork beyond just sandwiches.
Pulled pork tacos: Warm the pulled pork and pile it into soft corn or flour tortillas. Top with fresh salsa, sliced avocado, pickled red onion, fresh cilantro, and a squeeze of lime. The smoky, saucy pulled pork in a taco is absolutely spectacular.
Pulled pork rice bowls: Place a scoop of steamed white or brown rice in a bowl, add a generous portion of warmed pulled pork, and top with coleslaw, pickled jalapeños, sliced avocado, and a drizzle of extra barbecue sauce. This makes an incredibly satisfying, balanced meal in a bowl.
Pulled pork quesadillas: Layer pulled pork and shredded cheddar or Monterey Jack cheese between two flour tortillas and cook in a dry pan until golden and crispy on both sides and the cheese is melted. Serve with sour cream, salsa, and guacamole.
Pulled pork pizza: Spread barbecue sauce on a pizza base instead of tomato sauce, top with pulled pork, thinly sliced red onion, and mozzarella cheese. Bake until the cheese is melted and golden. This barbecue pulled pork pizza is genuinely extraordinary.
Pulled pork loaded baked potatoes: Split a baked potato open, top with a generous scoop of warm pulled pork, shredded cheddar cheese, sour cream, sliced spring onions, and extra barbecue sauce. This is an incredibly indulgent, deeply satisfying meal that takes barely any effort.
Pulled pork pasta: Toss warm pulled pork through cooked pasta with extra barbecue sauce thinned with a little pasta water and a handful of fresh herbs. It is an unusual but genuinely wonderful combination.
Pulled pork nachos: Spread tortilla chips on a baking sheet, top with pulled pork, shredded cheese, sliced jalapeños, and diced onion. Bake until the cheese is melted. Serve with sour cream, guacamole, and salsa. This is one of the best party foods imaginable.
Variations You Can Try
Honey garlic pulled pork: Replace half the barbecue sauce in the finishing step with a mixture of honey, soy sauce, and minced garlic. The result is a sweeter, more Asian-inspired pulled pork that is absolutely delicious in sandwiches and rice bowls.
Spicy pulled pork: Double the cayenne in the dry rub, add a tablespoon of chipotle in adobo sauce to the cooking liquid, and use a spicy barbecue sauce for finishing. Add sliced fresh jalapeños and pickled chillies on the sandwich for even more heat.
Root beer pulled pork: Replace the chicken broth in the cooking liquid with root beer. The root beer adds a subtle sweetness and complexity to the cooking liquid that is very popular in Southern American cooking and gives the pulled pork a slightly different, wonderful flavour.
Apple cider pulled pork: Use a full cup of apple cider instead of the broth in the cooking liquid and add sliced apples to the pot. The apple cider and apple combination adds a beautiful fruity sweetness that pairs naturally with pork and creates a slightly different, very delicious flavour profile.
Carolina style pulled pork: Use a vinegar-based sauce instead of the sweet tomato barbecue sauce for finishing. Combine apple cider vinegar, a little brown sugar, black pepper, red pepper flakes, and a splash of hot sauce for a tangy, sharp, Carolina-style finishing sauce that is lighter and more acidic than the sweet barbecue version.
Hawaiian pulled pork: Add crushed pineapple and a tablespoon of soy sauce to the cooking liquid. Serve the finished pulled pork on Hawaiian sweet rolls instead of regular buns and top with extra pineapple chunks. The sweet, tropical combination with the smoky pork is absolutely wonderful.
Frequently Asked Questions

Can I make this recipe without an Instant Pot?
Yes, absolutely. If you do not have an Instant Pot, there are two great alternatives. The slow cooker method is the most popular — sear the pork in a pan on the stovetop as directed, add all the cooking liquid ingredients to the slow cooker, nestle the pork in, and cook on LOW for 8 to 10 hours or HIGH for 4 to 5 hours until the pork is completely tender and falls apart. The oven method involves placing everything in a Dutch oven with a tight-fitting lid and cooking at 160 degrees Celsius for 3 to 4 hours until completely tender. Both produce wonderful pulled pork — the Instant Pot is just dramatically faster.
What if my pulled pork is not tender enough after pressure cooking?
If your pork is not as tender as you want it after the pressure cooking time, simply seal the lid again and cook for another 15 to 20 minutes on HIGH pressure followed by another natural pressure release. Pork shoulder is very forgiving and additional cooking time only makes it more tender — it is very difficult to overcook pork shoulder. The most common reasons for pork not being tender enough are the pieces being too large, the cooking time being insufficient for the weight of the meat, or the pot not having reached full pressure properly.
How much pulled pork does this recipe make?
This recipe using 1.5 to 2 kilograms of raw pork shoulder will yield approximately 1 to 1.2 kilograms of finished pulled pork after cooking and shredding. Pork loses a significant amount of weight during cooking as fat and moisture render out. This amount is sufficient for 6 to 8 generous sandwiches, or 8 to 10 smaller servings. If you are cooking for a larger crowd, you can cook two batches sequentially in the Instant Pot or use a larger Instant Pot if available.
Can I use pork loin or pork tenderloin instead of pork shoulder?
I would strongly advise against it. Pork loin and pork tenderloin are very lean cuts with almost no connective tissue or fat. They will not become tender and shreddable in the same way that pork shoulder does — they will dry out and shred into tough, flavourless strands rather than the juicy, tender pulled pork you want. If pork shoulder is not available, pork leg is the next best option as it also has enough fat and connective tissue to become properly tender.
Can I prepare the pulled pork a day ahead for a party?
Absolutely, and in fact pulled pork is one of the best dishes to make ahead for parties and gatherings. Make the pulled pork completely the day before, including the shredding and saucing. Store it in an airtight container in the fridge. When you are ready to serve, reheat gently in a large pan over medium-low heat with a splash of broth added to keep it moist and prevent it from sticking. Stir gently as it heats. The pulled pork actually tastes even better the next day as the flavours have had time to deepen and meld together overnight. Prepare the coleslaw the day before as well and toast the buns fresh just before serving.
Final Thoughts
Instant Pot Pulled Pork Sandwiches is one of those recipes that delivers an experience that is far greater than the sum of its parts. A piece of affordable pork shoulder, a handful of pantry spices, a simple cooking liquid, and a good barbecue sauce — these are humble, everyday ingredients. But put them through the magic of an Instant Pot, give them the time and technique they need to transform, and what comes out is something genuinely extraordinary. Pork that is so tender it barely needs the forks. A sauce that is rich, smoky, sweet, and tangy all at once. A sandwich that is messy and indulgent and absolutely, completely satisfying in every possible way.
What makes this recipe so wonderful for home cooks at every level is how forgiving and how flexible it is. The Instant Pot does the hard work for you. The pork is almost impossible to get wrong once you understand the basic principles. The toppings and sides are endlessly customisable to whatever you enjoy and whatever you have available. And the leftovers — oh, the leftovers — give you the foundation for an entire week of different meals with almost zero additional effort.
Whether you are making this for a family dinner on a weeknight, feeding a crowd at a weekend gathering, or batch cooking for the week ahead, this recipe is going to deliver every single time. Follow the steps, season boldly, let the natural pressure release do its work, pile those buns generously high, and enjoy one of the most satisfying sandwiches you have ever eaten. Happy cooking!