Hey gorgeous, welcome back to my blog! Pull up a seat because today I am sharing a recipe that is going to make you feel like a proper chef even if you have never cooked anything more complicated than toast in your entire life. This recipe right here is one of those magical ones that looks absolutely stunning on the plate, tastes like something you would order at a fancy seafood restaurant, and yet comes together in one single pan in about 30 minutes with ingredients that are simple, affordable, and easy to find anywhere.
Lemon Garlic Shrimp Pasta. Just reading those four words together is enough to make your mouth water. We are talking about tender, juicy shrimp cooked in a buttery, garlicky sauce with a bright hit of fresh lemon that makes everything sing, all tossed through perfectly cooked pasta that soaks up every single drop of that incredible sauce. It is light but satisfying, simple but deeply flavourful, and elegant but completely effortless.
This is the kind of meal that works beautifully on a busy weeknight when you want something special without the stress. It works just as well on a weekend when you want to treat yourself or impress someone you care about. And because everything happens in one pan, the cleanup is minimal and the whole experience from start to finish is as enjoyable as the meal itself.
By the end of this article you will have everything you need — the full recipe, step-by-step cooking method, tips for getting the best results, what to serve alongside, how to store leftovers, fun variations, and answers to the questions you might have along the way. Let us get straight into it.
What Is One Pan Lemon Garlic Shrimp Pasta?

One pan lemon garlic shrimp pasta is a complete pasta dish where everything — from the shrimp to the sauce to the pasta itself — is cooked in a single pan. The shrimp are seared quickly in garlic butter, removed while the sauce is built in the same pan, and then returned at the end so they stay perfectly tender and juicy. The pasta cooks directly in the flavoured liquid, absorbing all that garlicky, lemony, buttery goodness as it cooks, and the result is a dish where every single component is infused with flavour from the very beginning.
The flavour profile of this dish is what makes it so incredibly appealing. The lemon brings brightness and acidity that cuts through the richness of the butter and lifts every other flavour in the dish. The garlic adds depth and warmth. The butter creates a rich, silky, coating sauce that clings to every strand of pasta. And the shrimp bring sweetness, a slight oceanic depth, and a beautiful texture that contrasts wonderfully with the soft, saucy pasta.
This is a dish that manages to feel indulgent and light at the same time, which is a very rare and very wonderful quality in any recipe.
Choosing the Right Shrimp
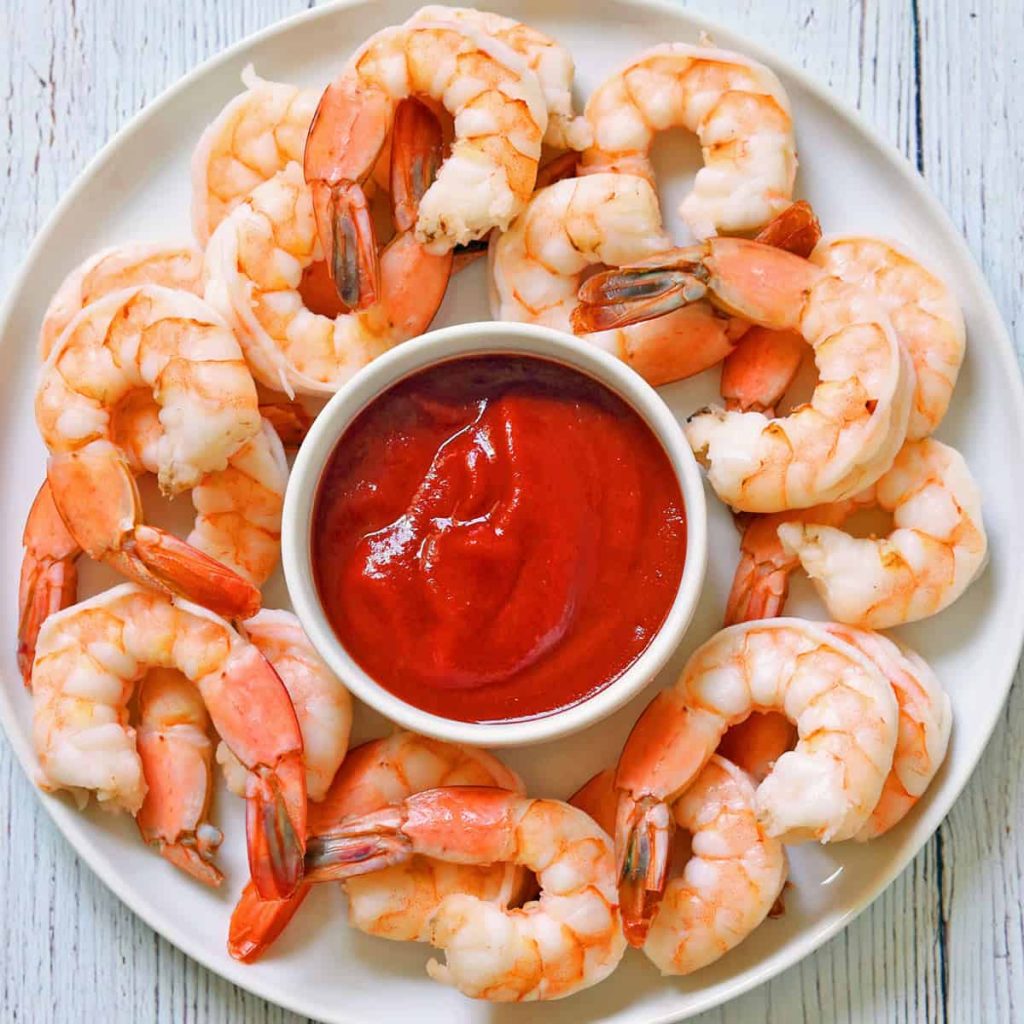
Before we get into the recipe, let us talk about the shrimp because choosing the right ones makes a real difference in the final dish.
Fresh versus frozen shrimp: Fresh shrimp is wonderful if you live near a coast and have access to genuinely fresh seafood. However, for most people, frozen shrimp is actually the better and more reliable option. Shrimp deteriorates very quickly after it is caught and most of the so-called fresh shrimp sold in supermarkets has actually been previously frozen and thawed. Buying frozen shrimp and thawing it yourself at home gives you more control over freshness.
Size: For this recipe, medium to large shrimp work best. Small shrimp cook through almost instantly and can easily become overcooked and rubbery. Large shrimp give you a satisfying bite and are easier to handle and cook correctly. Look for shrimp labelled as 21/25 count or 16/20 count — these numbers refer to how many shrimp are in a pound, which tells you the size.
Peeled and deveined: For ease of cooking and eating, use shrimp that are already peeled and deveined. You can leave the tails on for a more restaurant-style presentation, or remove them for easier eating. Either works perfectly in this recipe.
How to thaw frozen shrimp quickly: Place the frozen shrimp in a colander and run cold water over them for about 5 to 7 minutes, tossing them occasionally. They will thaw quickly and evenly. Never thaw shrimp in warm or hot water as it begins to partially cook the outside while the inside is still frozen.
Ingredients You Will Need
Everything on this list is simple and easy to find.
For the shrimp:
- 500 grams of large shrimp (peeled and deveined, tails on or off)
- Salt and black pepper to taste
- Half a teaspoon of smoked paprika
- Half a teaspoon of garlic powder
- Half a teaspoon of red pepper flakes (optional but wonderful)
- 1 tablespoon of olive oil (for searing the shrimp)
For the pasta and sauce:
- 300 grams of linguine, spaghetti, or fettuccine
- 4 tablespoons of butter (divided — 2 for cooking, 2 for finishing)
- 6 cloves of garlic (minced — do not be shy, garlic is a star here)
- 1 small shallot or half a small onion (finely diced)
- Half a cup of dry white wine (optional but adds wonderful depth — you can substitute with extra broth)
- 3 and a half cups of chicken broth or vegetable broth (low sodium)
- 1 cup of heavy cream
- Zest of 1 large lemon
- Juice of 1 and a half lemons (about 4 tablespoons of fresh lemon juice)
- Half a cup of freshly grated Parmesan cheese
- 1 teaspoon of Italian seasoning
- Salt and black pepper to taste
For garnish:
- Fresh parsley (chopped generously)
- Extra lemon slices or wedges for serving
- Extra Parmesan cheese for the table
- A drizzle of good quality olive oil
- Extra red pepper flakes if desired
Step-by-Step Cooking Method
Step 1 — Season and Prepare the Shrimp
Pat your shrimp completely dry using paper towels. This step is very important — dry shrimp sear beautifully and develop a nice golden exterior, while wet shrimp steam in the pan and stay pale and soft. Press the paper towel firmly against all sides of the shrimp and make sure they are as dry as possible before seasoning.
Once they are dry, place the shrimp in a bowl and season them with salt, black pepper, smoked paprika, garlic powder, and red pepper flakes if you are using them. Toss to coat evenly. The paprika adds a beautiful reddish colour to the shrimp as they cook and a subtle warmth that complements the lemon and garlic in the sauce perfectly.
Step 2 — Sear the Shrimp
Heat the olive oil in a large, wide, deep pan or skillet over medium-high heat. Once the oil is hot and shimmering, add the seasoned shrimp in a single layer. Do not overcrowd the pan — if necessary, cook the shrimp in two batches. Shrimp cook incredibly quickly and you need to give each one enough contact with the hot pan surface to sear properly.
Let the shrimp cook without moving them for exactly 1 minute on the first side. You will see the colour change from grey and translucent at the bottom to pink and opaque as the heat travels up. Flip each shrimp and cook for just 30 seconds to 1 minute on the second side. The shrimp are done when they are pink all the way through and have curled into a loose C shape. A shrimp that has curled into a tight O shape is overcooked — pull them off the heat as soon as they reach that loose C.
This is the single most important thing to understand about cooking shrimp — they go from perfectly cooked to overcooked in a matter of seconds. Watch them closely and remove them from the pan the moment they are done.
Transfer the seared shrimp to a plate and set aside. They will finish cooking when they go back into the warm sauce at the end.
Step 3 — Build the Garlic Base
In the same pan that you cooked the shrimp, reduce the heat to medium and add 2 tablespoons of butter. Let it melt and as soon as it starts to foam, add the finely diced shallot or onion. Cook for about 2 minutes, stirring, until the shallot is softened and translucent.
Add the minced garlic and stir immediately. Cook for about 1 to 2 minutes, stirring constantly, until the garlic is fragrant and just barely golden at the edges. The smell at this point is absolutely extraordinary — garlic cooking in butter is one of the most wonderful aromas a kitchen can produce.
If you are using white wine, add it now. Pour it in carefully as it will sizzle dramatically when it hits the hot pan. Let it cook and bubble for about 2 minutes, stirring and scraping up any golden bits from the bottom of the pan. The wine deglazes the pan, picking up all those flavourful caramelised bits and incorporating them into the sauce. Let it reduce by about half before moving on.
Step 4 — Add the Broth, Cream, and Seasoning
Pour in the chicken or vegetable broth and stir everything together. Add the Italian seasoning, the lemon zest, and half of the lemon juice. Stir to combine. Add a pinch of salt and black pepper. Taste the liquid — it should be bright, garlicky, and flavourful. This is the liquid the pasta is going to cook in so make sure it tastes good at this stage.
Bring the liquid to a gentle boil over medium-high heat, then pour in the heavy cream and stir it in. Let everything come back to a simmer.
Step 5 — Cook the Pasta in the Sauce
Add the dry pasta directly to the simmering liquid in the pan. Use tongs to push it down and submerge it as much as possible. If you are using long pasta like linguine or spaghetti, break it in half before adding so it fits more easily in the pan and cooks more evenly.
Reduce the heat to medium and cook the pasta, stirring every 1 to 2 minutes to prevent it from sticking together or to the bottom of the pan. The pasta will cook in about 10 to 12 minutes depending on the shape you are using. As it cooks it will absorb the liquid and the sauce will thicken naturally from the starch the pasta releases.
If the liquid is absorbing too quickly before the pasta is cooked, add a splash of extra broth or hot water and continue cooking. If the pasta is cooked and there is still too much liquid, raise the heat slightly and let it reduce for a minute while stirring.
You want the pasta to be al dente — cooked through but with just a slight firmness in the centre — and the sauce to be thick and creamy enough to coat every strand.
Step 6 — Add the Parmesan and Butter
Once the pasta is cooked to al dente and the sauce has reached a creamy consistency, reduce the heat to low. Add the remaining 2 tablespoons of cold butter and the freshly grated Parmesan cheese. Stir and fold gently until both are fully melted and incorporated into the sauce. The cold butter added at the end — a technique called mounting — gives the sauce a glossy, silky finish that makes it look and taste incredibly restaurant-quality.
Add the remaining lemon juice and taste the dish. Adjust the seasoning with more salt, pepper, or lemon juice as needed. The lemon flavour should be bright and noticeable but not overwhelming — it should lift the other flavours rather than dominate them.
Step 7 — Return the Shrimp and Serve
Add the seared shrimp back into the pan and gently fold them through the pasta. Let them sit in the warm sauce for about 1 to 2 minutes just to warm through and finish cooking to perfection. Do not put the heat back up high at this point — the residual heat of the pasta and sauce is enough to warm the shrimp without overcooking them.
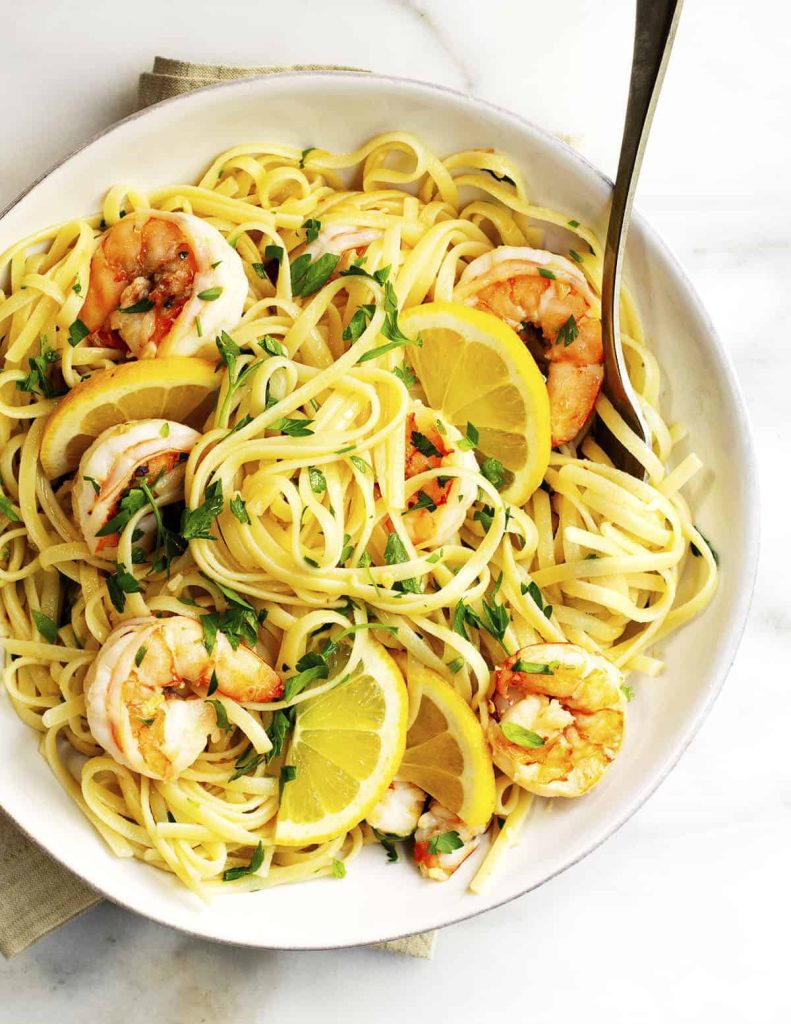
Plate the pasta immediately, twirling it into deep bowls or onto wide plates. Arrange several shrimp on top of each portion so they are visible and appealing. Garnish generously with freshly chopped parsley, a few extra lemon slices or wedges on the side, a dusting of extra Parmesan, and a drizzle of good olive oil. Serve immediately while everything is hot, creamy, and at its absolute best.
Helpful Cooking Tips for the Best Results
Do not overcook the shrimp. I cannot stress this enough. Overcooked shrimp are rubbery, tough, and flavourless, and they are very easy to overcook because the cooking time is so short. Shrimp cook in just 1 to 2 minutes total. The moment they turn pink and curl into a C shape, they are done. Pull them out immediately and they will finish cooking gently when they go back into the warm sauce at the end.
Use fresh lemon juice, not bottled. The brightness and freshness that lemon brings to this dish is one of its most important qualities. Bottled lemon juice is processed and preserved and simply does not have the same vibrant, fresh flavour as juice squeezed from a real lemon. For a dish where lemon is this central to the flavour, fresh is absolutely essential.
Use the lemon zest as well as the juice. The zest of a lemon contains the essential oils from the skin and has an intensely concentrated lemon flavour that is different from the juice. Adding both the zest and the juice gives the dish a deeper, more rounded lemon flavour that is far more interesting than using juice alone.
Grate your own Parmesan. Pre-grated Parmesan from a bag contains anti-caking agents that prevent it from melting smoothly into the sauce. Buy a block of Parmigiano-Reggiano and grate it yourself right before adding it. It melts beautifully and the flavour is far superior.
Use cold butter to finish the sauce. Adding cold butter at the very end of cooking — off or over very low heat — is a classic French technique called mounting the butter. The cold butter emulsifies into the sauce and gives it a glossy, velvety, restaurant-quality finish. Adding warm or room temperature butter does not have the same effect.
Sear the shrimp in batches if needed. Overcrowding the pan when searing shrimp causes them to steam rather than sear. If your pan is not large enough to hold all the shrimp in a single layer with a little space between each one, cook them in two batches. The extra few minutes are absolutely worth it for properly seared, golden shrimp.
Season at every stage. Season the shrimp before cooking. Season the liquid before adding the pasta. Taste and adjust before serving. Layering seasoning at every stage results in a much more deeply flavoured dish than seasoning everything at the end.
Keep extra broth warm nearby. Have an extra cup of warm broth within reach while the pasta cooks. The pasta absorbs liquid as it cooks and sometimes you need to add a splash to keep things moving. Adding cold liquid to a hot pan drops the temperature suddenly, so keeping extra broth warm in a small pot or in the microwave means you can add it without disrupting the cooking.
Common Mistakes to Avoid
Skipping the shrimp searing step and just adding them raw to the sauce. While you technically can cook raw shrimp in the sauce, searing them first in a hot pan gives them a beautifully flavoured golden exterior that adds tremendous flavour to both the shrimp themselves and to the sauce that gets built in the same pan afterwards. The fond — the golden bits left in the pan after searing — is pure flavour that gets incorporated into the sauce when you add the liquid. Never skip the sear.
Adding lemon juice too early. Lemon juice loses a lot of its bright, fresh quality when it is cooked for a long time. Add most of the lemon juice towards the end of cooking — some goes in with the broth and some goes in at the very end after the heat is turned down. This two-stage approach gives you both the cooked, mellowed lemon depth from the juice added early and the bright, fresh punch from the juice added at the end.
Using low-fat cream. The cream in this recipe needs to be heavy cream. Low-fat cream or regular milk can curdle when simmered and does not create the same rich, stable, velvety sauce. Full-fat heavy cream is the only option that works properly here.
Cooking the pasta at too high a heat. A vigorous boil causes the cream to reduce too quickly and evaporate too fast, potentially leaving you without enough sauce before the pasta is cooked. Keep the heat at a steady, gentle simmer throughout the pasta cooking stage.
Letting the pasta sit too long before serving. One pan pasta dishes should be served immediately. As the pasta sits, it continues to absorb the sauce and can go from perfect to too thick and stodgy very quickly. Plate it as soon as it is ready and eat it right away.
What to Serve With One Pan Lemon Garlic Shrimp Pasta
This pasta is elegant and rich enough to be a complete meal on its own, but here are some wonderful sides that complement it beautifully.
Crusty garlic bread or warm sourdough is the most natural pairing for any creamy pasta dish. The bread is perfect for scooping up every last drop of that incredible lemon garlic sauce from the bowl.
A simple arugula salad dressed with lemon juice, olive oil, and shaved Parmesan is a classic Italian-inspired side that pairs perfectly with this pasta. The peppery bitterness of the arugula contrasts the richness of the cream sauce beautifully.
Roasted asparagus drizzled with olive oil and a little lemon juice is a wonderful pairing with lemon garlic shrimp pasta. The slight bitterness and fresh flavour of the asparagus complements the seafood and lemon in the main dish very naturally.
Steamed broccoli or broccolini simply seasoned with olive oil, garlic, and salt is a nutritious, easy side that adds freshness and colour to the meal without competing with the flavours of the pasta.
A Caesar salad — crisp romaine, creamy dressing, and crunchy croutons — is a classic steakhouse and seafood restaurant pairing that works wonderfully alongside this dish.
Sautéed cherry tomatoes cooked quickly in olive oil and garlic until they burst and become slightly jammy are a gorgeous, slightly acidic side that complements the lemon and shrimp in the pasta.
Grilled corn on the cob brushed with herb butter is a fun, summery side that pairs unexpectedly well with lemon garlic shrimp pasta, especially for outdoor meals and casual gatherings.
Roasted garlic bread with melted mozzarella on top is an indulgent, delicious pairing for special occasions when you want everything to feel a little extra.
How to Store Leftovers
In the fridge: Allow the pasta to cool completely before transferring to an airtight container. The shrimp and pasta can be stored together or separately. Stored together, the pasta is best eaten within 1 to 2 days — shrimp deteriorate in quality faster than pasta and the texture can become rubbery when reheated. To reheat, place in a pan over low heat with a generous splash of broth or cream added to loosen the sauce. Stir very gently as it warms and remove from heat as soon as it is hot — do not let it boil or the shrimp will overcook further.
Freezing: This dish is not ideal for freezing. Cream-based sauces can separate when frozen and thawed, and shrimp become rubbery and tough after freezing and reheating. If you want to freeze it, freeze the pasta and sauce separately from the shrimp and add freshly cooked shrimp when you reheat.
Important tip for leftovers: Because shrimp are so delicate and can become rubbery very quickly when reheated, a great option for leftovers is to remove the shrimp before storing, reheat the pasta in a pan with extra liquid, and then add fresh or quickly sautéed shrimp on top. This gives you the best texture and flavour from the leftovers.
Variations You Can Try

Spicy lemon garlic shrimp pasta: Double the red pepper flakes, add a teaspoon of calabrian chilli paste or sriracha to the sauce, and serve with extra chilli flakes on the side. The heat contrasts brilliantly with the bright lemon and rich butter.
Creamy tomato lemon garlic shrimp pasta: Add half a cup of sun-dried tomatoes and half a cup of crushed or blended tomatoes to the sauce along with the cream. The tomato adds a beautiful colour, a slight acidity, and a depth of flavour that pairs wonderfully with the shrimp and lemon.
Lemon garlic shrimp pasta with spinach: Stir in two large handfuls of fresh baby spinach when you add the shrimp back into the pan. The spinach wilts into the sauce within 1 minute and adds colour, nutrition, and a fresh flavour that works beautifully in this dish.
White wine lemon garlic shrimp pasta: Double the amount of white wine and reduce the amount of cream slightly for a lighter, more wine-forward sauce that is less rich but equally delicious and very elegant.
Lemon garlic shrimp pasta with capers: Add a tablespoon of capers to the garlic butter when building the base of the sauce. The salty, briny, slightly tangy capers add a wonderful depth that complements the lemon and shrimp in a very special way.
Dairy-free version: Replace the butter with good quality olive oil, replace the heavy cream with full-fat coconut cream, and replace the Parmesan with nutritional yeast for a cheesy, umami quality. The result is different from the original but still very delicious and completely dairy-free.
Add vegetables: Thinly sliced zucchini, cherry tomatoes halved, roasted red peppers, or peas can all be added to this dish to make it more nutritious and colourful. Add firm vegetables like zucchini with the shallots at the beginning. Add delicate ones like peas and cherry tomatoes at the end when you return the shrimp to the pan.
Frequently Asked Questions
Can I make this recipe without white wine?
Absolutely. The white wine adds a lovely depth and complexity to the sauce but it is completely optional. Replace it with an equal amount of extra chicken or vegetable broth. If you want to add a little of the acidity that wine brings without using alcohol, add an extra splash of lemon juice or a small splash of white wine vinegar when you would normally add the wine. The dish will still be delicious and full of flavour without the wine.
My sauce turned out too thin. How do I fix it?
If the sauce is too thin after the pasta is cooked, raise the heat to medium-high and let the sauce reduce for a couple of minutes while stirring continuously. The liquid will evaporate and the sauce will thicken. You can also mix half a teaspoon of cornstarch with a tablespoon of cold water and stir it into the simmering sauce — it will thicken within 1 to 2 minutes. For future reference, making sure you are cooking on a gentle steady simmer rather than a low heat during the pasta cooking stage helps the sauce reduce to the right consistency alongside the pasta.
Can I use pre-cooked frozen shrimp?
You can, but keep in mind that pre-cooked shrimp only need to be warmed through — they are already cooked and any additional cooking time will make them rubbery and tough. If using pre-cooked shrimp, skip the searing step entirely and just add them to the pan when the pasta is fully cooked, stir them gently through the sauce, and serve immediately. They only need about 1 minute in the warm sauce to heat through.
What type of pasta works best for this recipe?
Long, thin pasta shapes work best for this dish because they twirl beautifully in the sauce and the sauce coats every strand evenly. Linguine is the classic choice and pairs most naturally with seafood. Spaghetti and fettuccine are equally good options. If you prefer short pasta, penne or rigatoni work well because the ridges and hollow centres hold the sauce beautifully. Avoid very tiny pasta shapes as they absorb liquid too quickly and can become mushy before developing the sauce properly.
How do I know when the shrimp are perfectly cooked?
Perfectly cooked shrimp are pink and opaque all the way through and have curled into a loose C shape. The tail end and the head end are close to each other but not touching. Undercooked shrimp are translucent and grey in the centre. Overcooked shrimp have curled into a tight O shape — the two ends are touching or overlapping — and will feel firm and rubbery when you bite into them. The window between perfectly cooked and overcooked is very narrow, especially for large shrimp, so watch them carefully and remove them from the heat the moment they reach that loose C shape.
Final Thoughts
One Pan Lemon Garlic Shrimp Pasta is one of those recipes that earns its place in your permanent collection the very first time you make it. It is elegant without being complicated. It is rich without being heavy. It is packed with flavour without requiring a long list of difficult ingredients or advanced cooking techniques. And it comes together in one pan, in about 30 minutes, with minimal mess and maximum satisfaction.
What makes this dish truly unforgettable is the way all the flavours work together in perfect harmony. The butter and garlic create a rich, aromatic base that carries everything. The lemon — both the zest and the juice — cuts through the richness and gives the dish that bright, fresh, alive quality that makes you want to keep eating. The Parmesan adds depth, saltiness, and a silky creaminess to the sauce. And the shrimp — tender, sweet, lightly seared, and infused with all those incredible flavours — are the star of the show that ties everything together into something genuinely spectacular.
The key to getting this recipe right every single time is in caring about the details. Drying the shrimp before searing so they colour properly. Building the garlic base slowly over medium heat so nothing burns. Cooking the pasta in the flavoured liquid so it absorbs all that goodness. Adding the butter and Parmesan off the heat so the sauce becomes glossy and velvety. Finishing with fresh lemon juice right at the end so the flavour is bright and vibrant. These are the details that separate a good pasta from a truly great one and they are all very simple once you know them.
Make this recipe on a weeknight when you want something special without the stress. Make it on a weekend when you want to treat yourself to something that feels indulgent and restaurant-worthy. Make it for guests and watch their eyes light up when they take that first bite. However and whenever you make it, this one pan lemon garlic shrimp pasta is going to deliver every single time. Happy cooking!